Enable single sign-on (SSO) for the RDS web access on Windows Server 2012 / 2012 R2 / 2016
- Windows Server
- 08 February 2019 at 15:57 UTC
-

- 2/2

4. Configure the Single Sign-On (SSO)
Now that SSO is working for our RDS web access, we will configure the required settings for your user to log in only once on the client.
Then, it will be automatically connected to the web access when it tries to access it.
To enable single sign-on (SSO) from Internet Explorer, the domain corresponding to your RDS web access must be part of the list of sites associated with its intranet zone.
To do this, you can use the "Site to Zone Assignment List" policy located in : Computer Configuration -> Policies -> Administrative Templates -> Windows Components -> Internet Explorer -> Internet Control Panel -> Security Page.
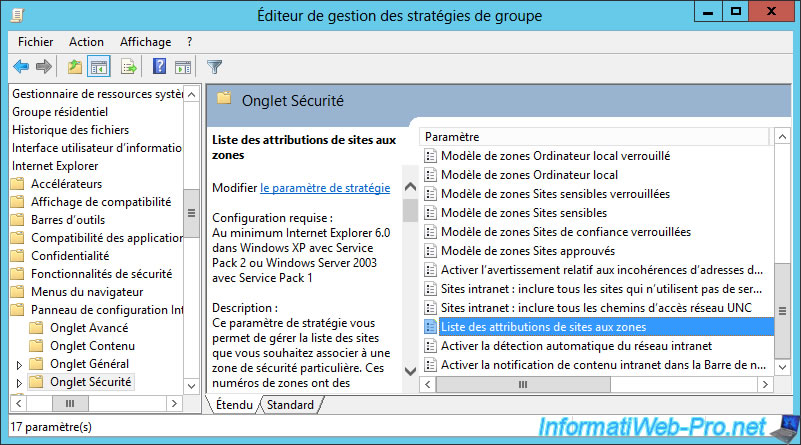
As you can see in the description of this policy, Internet Explorer manages 4 security zones that you can be targeted with the following numbers :
- Intranet zone
- Trusted Sites zone
- Internet zone
- Restricted Sites zone
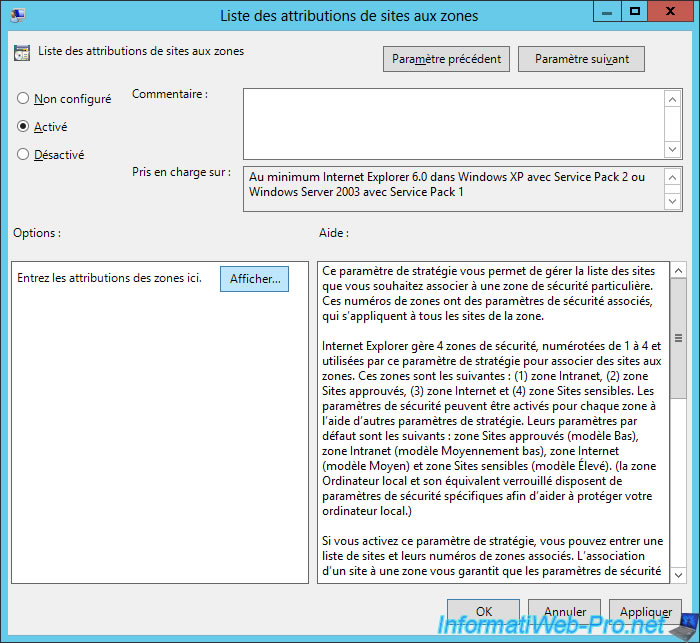
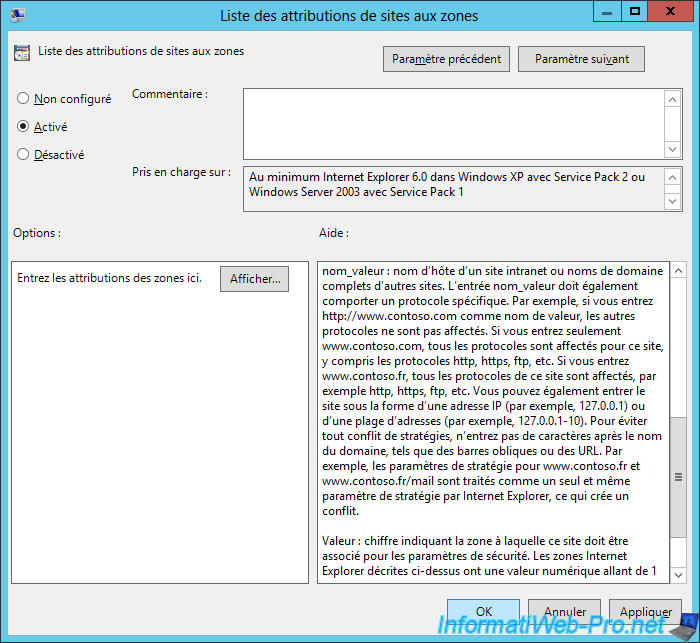
In the rest of this description, you will also find out how to configure the zone assignments (accessible via the "Show" button) :
- value name : the domain of the concerned site (to target all the protocols for a specific domain), a prefix like "https://my.domain.lan" to target only the HTTPS version of a specific domain, ...
- value : the number (from 1 to 4) corresponding to the zone in which you want to add it
Select "Enabled" and click Show.

To enable the Single Sign-On (SSO) for your web access, add :
- its address in HTTPS version (to avoid the theft of identifiers) as name : https://rds.informatiweb.lan/
- the number corresponding to the intranet zone : 1
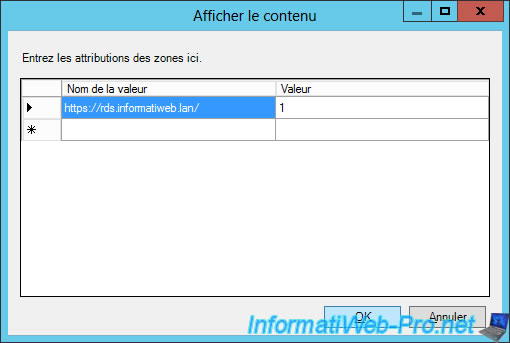
Finally, click OK.
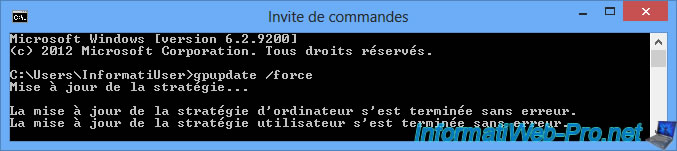
Close Internet Explorer on your clients PCs, and then force the policy update on them.
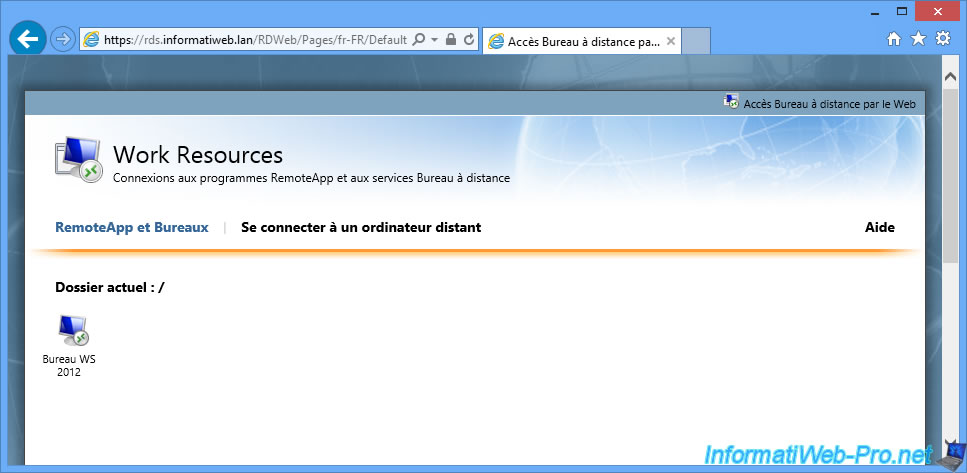
Open again Internet Explorer and try to access your web access via the HTTPS version : https://rds.informatiweb.lan/RDWeb/
If SSO is configured correctly, you will see the RemoteApp programs and/or the desktops to which you have access.
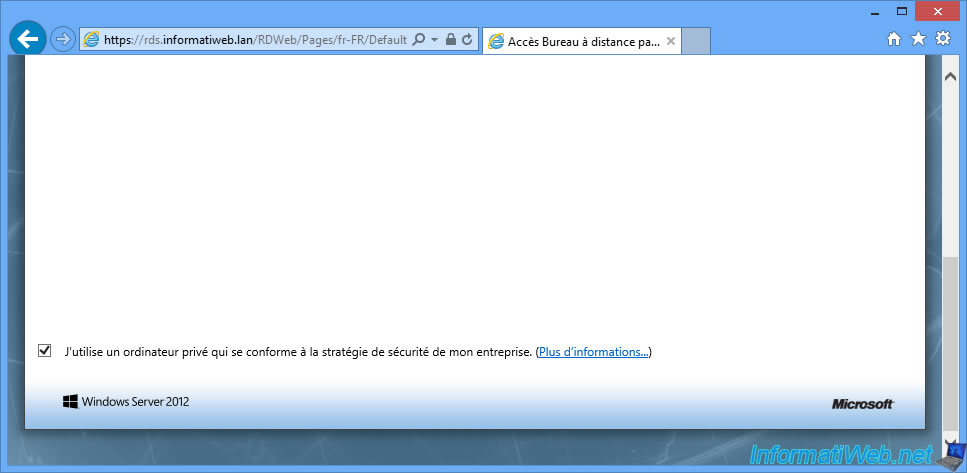
If you look at the bottom of the page (if you use Windows Server 2012 and not the 2012 R2 version), you will find a "I am using a private computer that complies with my organization's security policy" box.
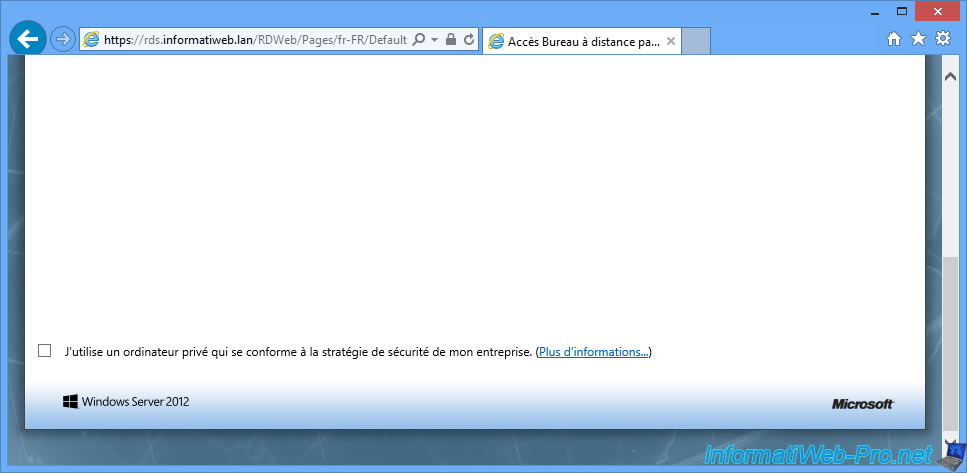
This box corresponds to the choice "This is a computer ..." that was present in the login form before.
But since we have removed it since Windows authentication was enabled, we can't choose it before logging in to this web access.
However, in the next step of this tutorial, you will see how to change this default.

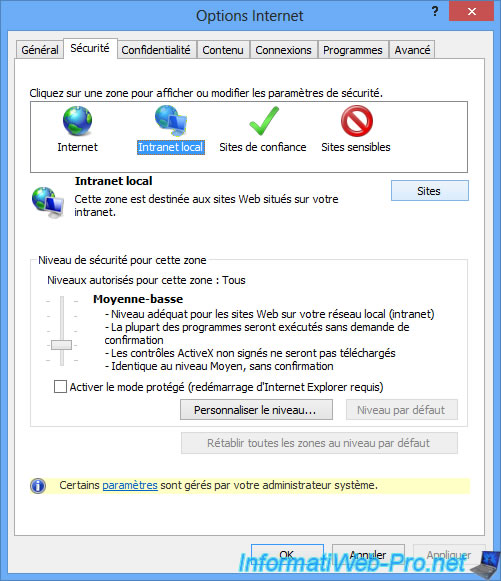
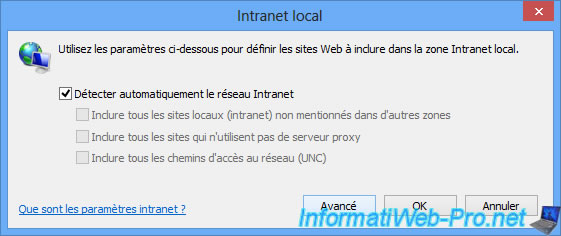
For those who want to know what has been changed through the group policy previously used, open Internet Explorer's Internet Options and go to the Security tab.
In this tab, you will find the 4 zones that we talked about previously.
Select "Local Intranet" and click Sites.
Note : as you can see below, Internet Explorer tells you that some settings are managed by your system administrator. This is due to the application of the group policy mentioned above.
Click Advanced.
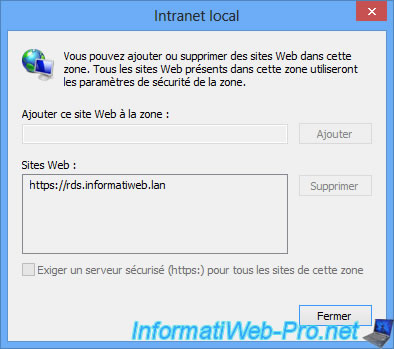
In the list, you will find the website or domain added previously via Group Policy.
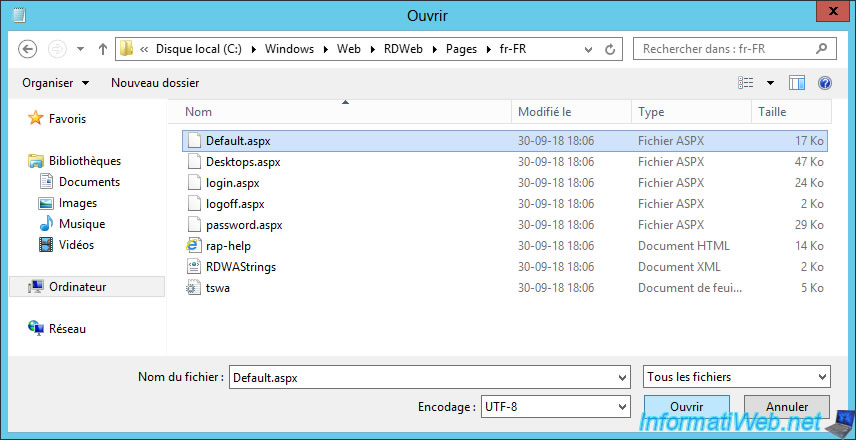
5. Enable the private mode by default
In order for the "Security" choice (previously accessible from the login form) to be "private" by default, you will need to modify a variable in this file : C:\Windows\Web\RDWeb\Pages\en-US\Default.aspx
Note : to edit this file, you will first need to start the notepad as an administrator.
In this file, locate the "Page Variables" section and change the value of the "bPrivateMode" variable to "true" instead of "false".
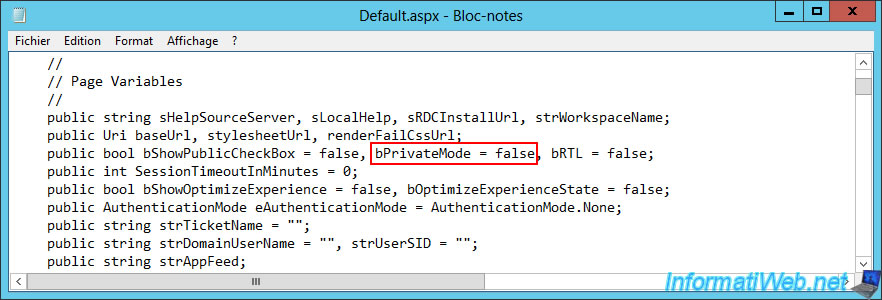
Refresh the RDS web access page and you will see that the box is now checked by default.
Share this tutorial
To see also
-
Windows Server 6/7/2019
WS 2012 / 2012 R2 - RDS - Set up HA on your RDS infrastructure
-
Windows Server 3/8/2019
WS 2012 / 2012 R2 / 2016 - RDS - Access RemoteApp via a modern application
-
Windows Server 4/28/2019
WS 2012 / 2012 R2 / 2016 - RDS - Attempt to unblock the session as a user
-

Windows Server 3/16/2019
WS 2012 / 2012 R2 / 2016 - RDS - Change the properties of RemoteApps
No comment