- Linux
- 28 February 2014 at 19:59 UTC
-

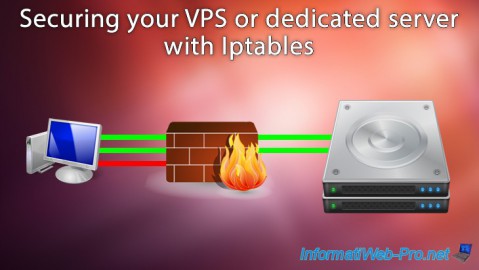
If you purchased a VPS on the Internet, you will soon realize that hackers may seek loopholes on your servers. Especially, if it becomes known.
To secure it, so let's close all the doors that you do not use on your server.
- What about iptables
- The 2 policies for managing a firewall
- Creating a configuration script for the firewall
- Run the script on every boot
To do this, we'll use "iptables" which is a command line interface to configure the firewall "Netfilter".
1. What about iptables
To begin, list the rules of your firewall by typing the following command :
Bash
iptables -L
You will notice that by default, all traffic is allowed. What is the worst configuration because in this configuration, the firewall is completely useless.
Bash
Chain INPUT (policy ACCEPT)
target     prot opt source               destination
Chain FORWARD (policy ACCEPT)
target     prot opt source               destination
Chain OUTPUT (policy ACCEPT)
target     prot opt source               destination
As you can see, there are three categories of traffic :
- The incoming traffic (Chain INPUT) :
That the server receives. For example : An HTTP request on port 80 to request a page to our web server "Apache". - The outgoing traffic (Chain OUTPUT) :
That the server sending to clients (or other servers). For example : The content of the web page that a visitor had asked earlier. - The redirected traffic (Chain FORWARD) :
In summary, this is what makes your router at home. The router is a gateway that redirects data (incoming and outgoing) from a network interface to another (from one network to another).
It is through this system that can connect multiple computers to a single Internet connection (arriving in modem) and distribute the correct network packets to good computers.
You will therefore understand that this category does not interest us unless you want to create a network gateway. We will therefore block it completely.
2. The 2 policies for managing a firewall
To configure a firewall, "Netfilter" in our case, there are 2 ways :
- Either you allow all traffic and you block unwanted traffic
- Either you block all traffic and you allow only traffic you need
In our case, we will choose the second option is the best and easiest to implement.
3. Creating a configuration script for the firewall
So why create a configuration script rather than directly type the "iptables" command ?
The reason is simple, when you type iptables commands, they have immediate effect and would therefore blocked when we begin by banning all traffic.
The second reason is simply that the firewall is reset when you restart your Ubuntu machine. Voluntary or not, restart so expose your server to all the hackers found on the net.
Now that this issue is resolved, begin our script.
To begin, you must indicated the language used in your script by adding this line :
Bash
#!/bin/sh
Then, to avoid future "warning" in the logs, you must add the small header as follows :
Bash
### BEGIN INIT INFO
# Provides:          My Firewall
# Required-Start:    $local_fs $remote_fs $network $syslog
# Required-Stop:     $local_fs $remote_fs $network $syslog
# Default-Start:
# Default-Stop:
# X-Interactive:     false
# Short-Description: My Firewall
### END INIT INFO
echo "Configuring the firewall ..."
Now that the required information is provided, begin our script strictly speaking.
To avoid the preceding rules interfered with ours, we reset our firewall.
Bash
# Reset
iptables -t filter -F
iptables -t filter -X
echo "Firewall reset"
Then, as we chose the second policy for managing a firewall, we'll start blocking incoming and redirected all traffic.
Bash
# Incoming and redirected traffic is blocked
iptables -t filter -P INPUT DROP
iptables -t filter -P FORWARD DROP
echo "Incoming and redirected traffic blocked"
For simplicity, we recommend that you allow all outgoing traffic. Since it is our server. Outbound traffic can only theoretically being dangerous.
Unless anyone can use your server as he wants.
Bash
# Outgoing traffic is allowed
iptables -t filter -P OUTPUT ACCEPT
echo "Outgoing traffic allowed"
Also for simplicity, we will allow the connections. Given that these connections are in state "established" is that they have been authorized by the regulations of traffic entering the firewall.
Otherwise, the connection will be "NEW" type and will be blocked by the firewall.
Bash
# We don't break the established connections
iptables -A INPUT -m state --state RELATED,ESTABLISHED -j ACCEPT
iptables -A OUTPUT -m state --state RELATED,ESTABLISHED -j ACCEPT
echo "Established connections allowed"
We will allow all incoming and outgoing traffic on the loopback network interface
These are the requests made to the server itself. Given that requests information itself, there is no risk to allow this traffic.
Bash
# Authorizes the incoming and outgoing traffic on the loopback network interface (IP : 127.0.0.1)
iptables -t filter -A INPUT -i lo -j ACCEPT
iptables -t filter -A OUTPUT -o lo -j ACCEPT
echo "Loopback traffic allowed"
We will also allow the ping to and from the server.
Info : The ping command is used to test the connection between two network devices and it's therefore interesting to pass up. This helps diagnose network problems you may encounter.
Bash
# ICMP (ping)
iptables -t filter -A INPUT -p icmp -j ACCEPT
iptables -t filter -A OUTPUT -p icmp -j ACCEPT
echo "Ping allowed"
The rest of the rules regarding the various protocols that exist on your server.
Some small information about the commands that follow :
- dport = destination port
- sport = source port
- We know only the destination port for incoming traffic (this is the port on which the server is listening)
- We know only the source port for outgoing traffic (because it's once again the port on which the server works)
Example :
A visitor sends an HTTP request to the web server on port 80.
This request comes from the IP address of the client from xxx.xxx.xxx.xxx port x (randomly allocated by the client operating system) and arrives on port 80 on the server (because the protocol used is HTTP).
When the server sends him the answer (the contents of the requested in this case page), it uses port 80 (which is the source port for outgoing traffic) and sends the response to the client IP address xxx.xxx.xxx.xxx on the port that the client had when sending the request.
Note : Since it is the TCP protocol is a connected mode, the server knows the IP address and port of the client. He knows so answer it this way.
Bash
# SSH incoming / outgoing
iptables -t filter -A INPUT -p tcp --dport 22 -j ACCEPT
iptables -t filter -A OUTPUT -p tcp --sport 22 -j ACCEPT
echo "SSH allowed"

# DNS incoming / outgoing
# DNS queries to the server (TCP and UDP)
iptables -t filter -A OUTPUT -p tcp --sport 53 -j ACCEPT
iptables -t filter -A OUTPUT -p udp --sport 53 -j ACCEPT
iptables -t filter -A OUTPUT -p tcp --dport 53 -j ACCEPT
iptables -t filter -A OUTPUT -p udp --dport 53 -j ACCEPT
# DNS requests sent by clients and therefore received by the server (TCP and UDP)
iptables -t filter -A INPUT -p tcp --dport 53 -j ACCEPT
iptables -t filter -A INPUT -p udp --dport 53 -j ACCEPT
echo "DNS allowed"

# NTP outgoing (time server)
iptables -t filter -A OUTPUT -p udp --sport 123 -j ACCEPT
echo "NTP allowed"

# HTTP + HTTPS incoming / outgoing (Web Server : HTTP (80) and HTTPS secured by SSL (443 or 8443)
iptables -t filter -A OUTPUT -p tcp --sport 80 -j ACCEPT
iptables -t filter -A OUTPUT -p tcp --sport 443 -j ACCEPT
iptables -t filter -A INPUT -p tcp --dport 80 -j ACCEPT
iptables -t filter -A INPUT -p tcp --dport 443 -j ACCEPT
iptables -t filter -A INPUT -p tcp --dport 8443 -j ACCEPT

# Mail SMTP : 25 (Protocol for sending e-mails)
iptables -t filter -A INPUT -p tcp --dport 25 -j ACCEPT
iptables -t filter -A OUTPUT -p tcp --sport 25 -j ACCEPT

# Mail POP3 : 110 (Protocol to access to e-mails)
iptables -t filter -A INPUT -p tcp --dport 110 -j ACCEPT
iptables -t filter -A OUTPUT -p tcp --sport 110 -j ACCEPT

# Mail POP3S : 995 (Protocol to access to e-mails)
# POP3S is a secure POP3 over SSL
iptables -t filter -A INPUT -p tcp --dport 995 -j ACCEPT
iptables -t filter -A OUTPUT -p tcp --sport 995 -j ACCEPT

# Mail IMAP : 143 (Protocol to read emails by a system of remote folders)
iptables -t filter -A INPUT -p tcp --dport 143 -j ACCEPT
iptables -t filter -A OUTPUT -p tcp --sport 143 -j ACCEPT
echo "Emails protocols allowed"
And finally, the FTP protocol is quite complicated if you do not know how it works.
Note that we have activated the passive port range (50000-50100) in the configuration of the FTP server to find out what range of ports to allow.
In fact, using FTP, you don't just use port 21 as one might think.
Because if you install an FTP server on your computer and look at your network connections (using TCP View, for example), you will notice that file transfers are not made by the port 21 but by one of passive ports configured on the server.
Port 21 are used primarily to connect (or authentication) as well as sending commands.
Here is the diagram of a file transfer via FTP :
- Connection to the FTP server on port 21
- Request a file transfer (sending or receiving)
- The FTP server port chosen among its range of passive ports, and it starts the file transfer
- Once the transfer is complete, this additional connection is cut
- If you transfer another file, a new connection will be made time of the transfer, ...
We must therefore allow the following ports :
- Port 20 : Data transfer (direct mode). The client will in this case a warning from its firewall (it is recommended to configure the passive port to avoid this problem in clients)
- Port 21 : Sending commands and receiving responses (connection ok, ...)
- Range 50000:50100 ports (in our case) : Data transfer by the passive server ports.
Bash
# FTP outgoing
iptables -t filter -A OUTPUT -p tcp --sport 21 -j ACCEPT
iptables -t filter -A OUTPUT -p tcp --sport 20 -j ACCEPT
# FTP incoming
iptables -t filter -A INPUT -p tcp --dport 20 -j ACCEPT
iptables -t filter -A INPUT -p tcp --dport 21 -j ACCEPT
echo "FTP allowed"

# FTP Passive
iptables -t filter -A OUTPUT -p tcp --sport 50000:50100 -j ACCEPT
iptables -t filter -A INPUT -p tcp --dport 50000:50100 -j ACCEPT
echo "Passive FTP server ports allowed"
Then enter this line at the end of file
Bash
echo "Firewall configuration completed"
And save the file with the name "firewall" and enable the execution of the script like this :
Bash
chmod +x firewall
If you're wondering why we added lines "echo" for each block of rules is simply to more easily debug the script, the day an error occurs (if such is the case).
When the script runs (and thus start the machine when it will be added), this series of messages will appear.
To run this script, simply type the following command :
Bash
./firewall
4. Run the script on every boot
Before this script programmed to boot your machine, make sure that everything works properly.
Test your SSH connection, your file transfer by FTP, your messaging protocols (SMTP, POP3, IMAP, ...), ...
If you no longer have access to your server, ask to restart your dedicated server or VPS from your account with your provider.
If everything still works then you can put it to boot your machine.
To do this, first copy the "firewall" file in the "/etc/init.d" folder (where there are other services such as apache, postfix, ...)
Bash
cp firewall /etc/init.d
Then add the script to start the machine, use the command "update-rc.d" :
Bash
update-rc.d firewall defaults
Share this tutorial
To see also
-

Linux 12/12/2014
Debian / Ubuntu - Configure a DNS server (BIND)
-

Linux 9/12/2015
Debian / Ubuntu - Network monitoring with HTML statistics
-

Linux 1/11/2014
Ubuntu - Enable root account
-

Linux 1/31/2014
Ubuntu - Update your server


You must be logged in to post a comment