Secure access to VMware vCenter Server (VCSA) over HTTPS (in a multi-site infrastructure) on VMware vSphere 6.7
- VMware
- 06 November 2024 at 14:42 UTC
-

- 2/4

6. Create the certificate request for the VMware vCenter Server machine certificate (VCSA)
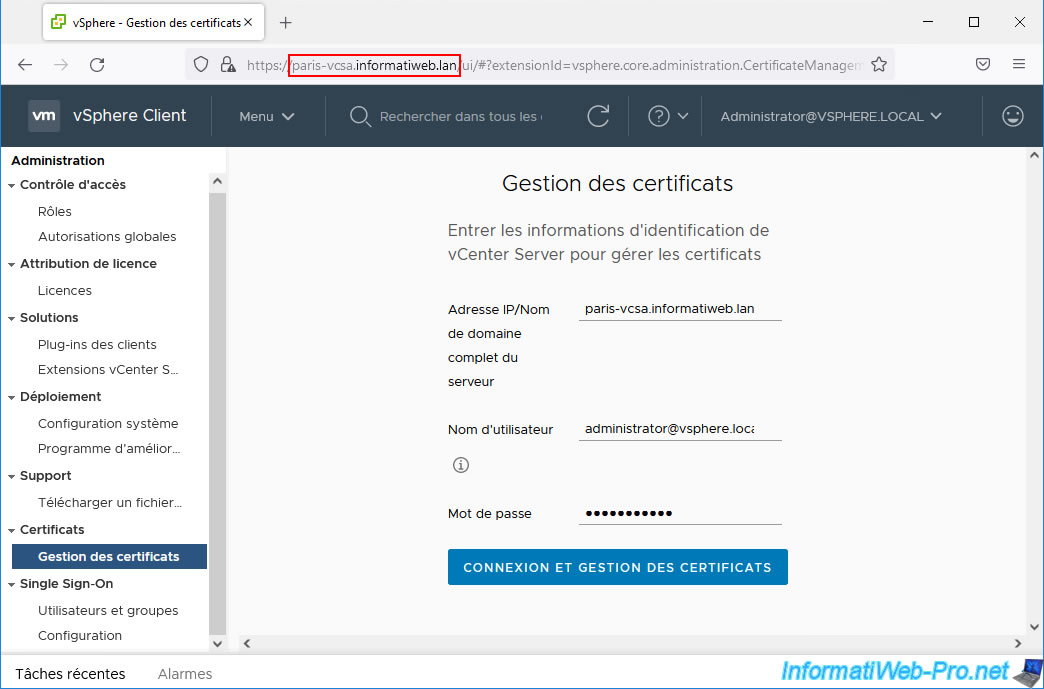
To get started, go to your 1st VMware vCenter Server (VCSA) and log in as "administrator@vsphere.local".
Then go to the menu and click: Administration -> Certificates -> Certificate Management.
On the "Certificate Management" page that appears, provide the domain name of the VMware vCenter Server (VCSA) where you are located and log in again as "administrator@vsphere.local".
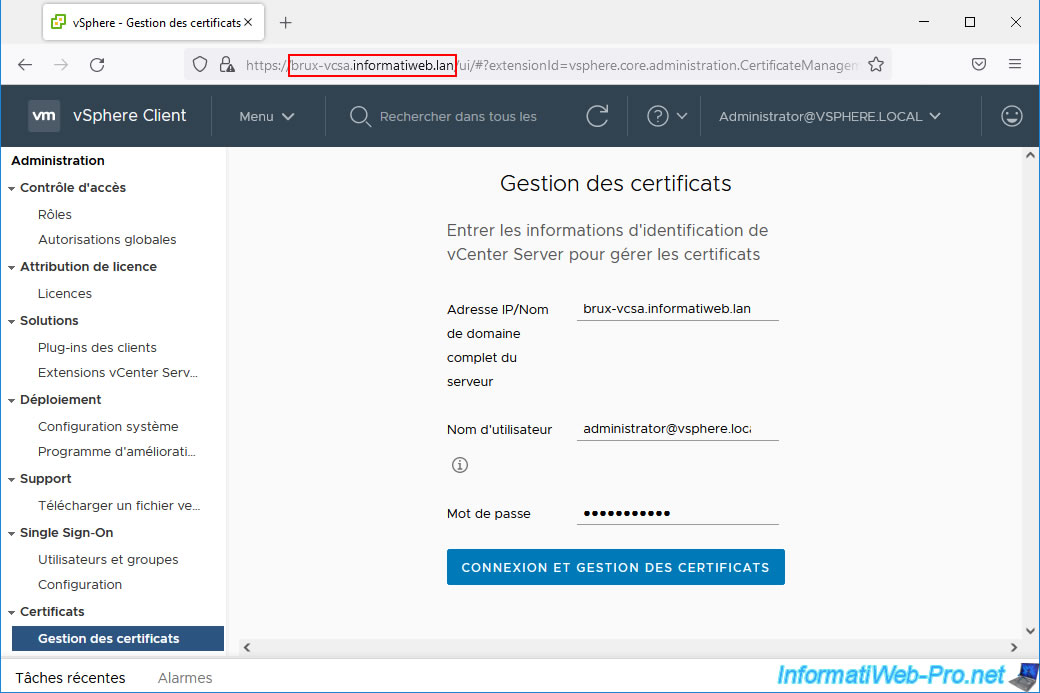
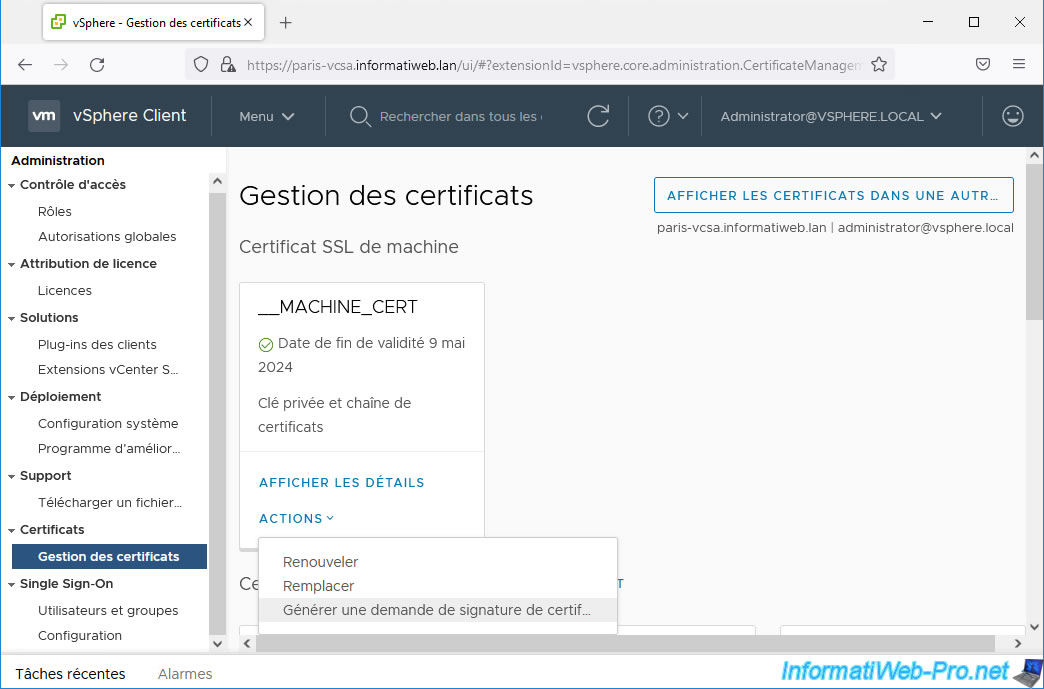
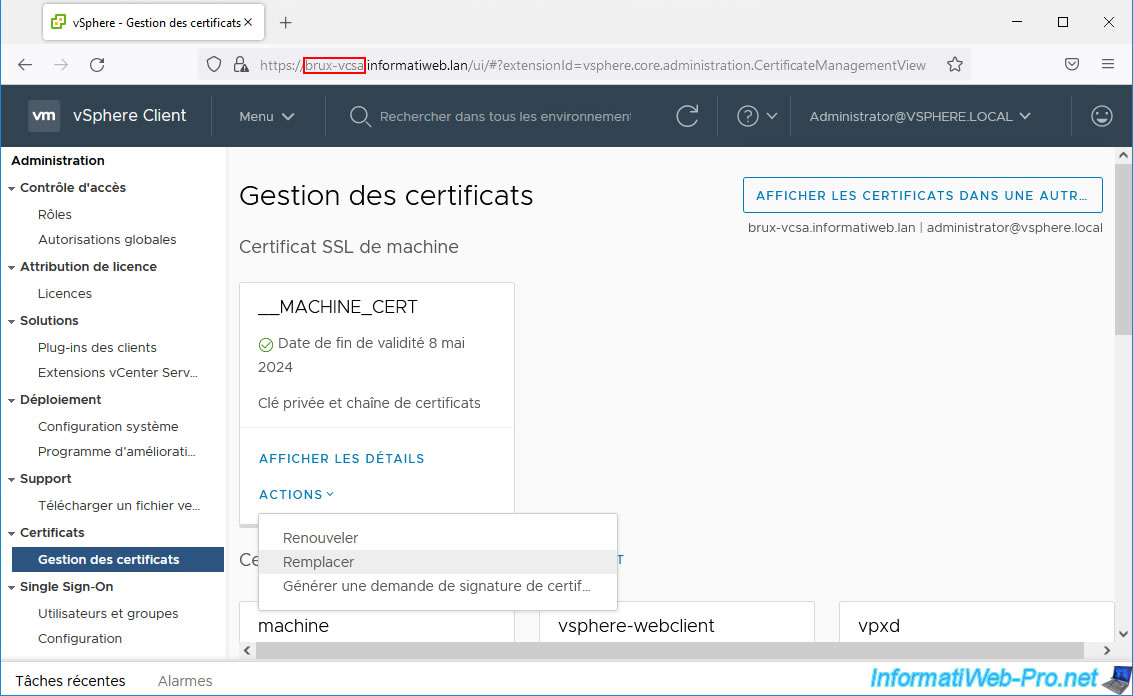
To secure access to your VMware vCenter Server (VCSA), you must replace the "__MACHINE_CERT" certificate (as explained in our tutorial cited previously).
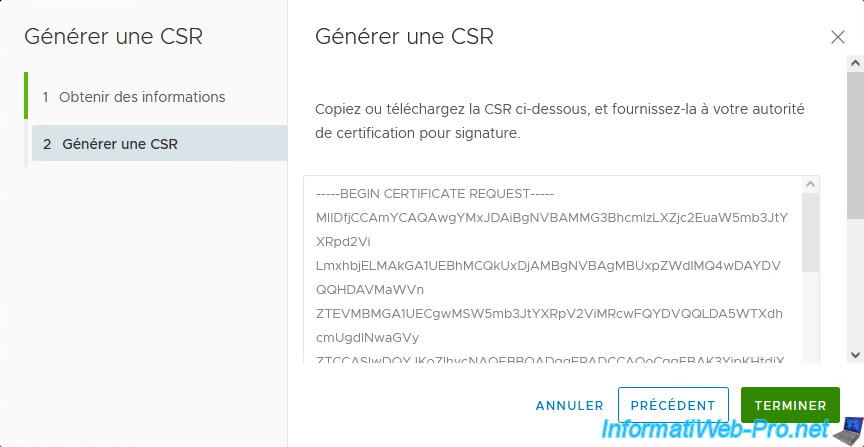
For this certificate, click: Actions -> Generate Certificate Signing Request (CSR).

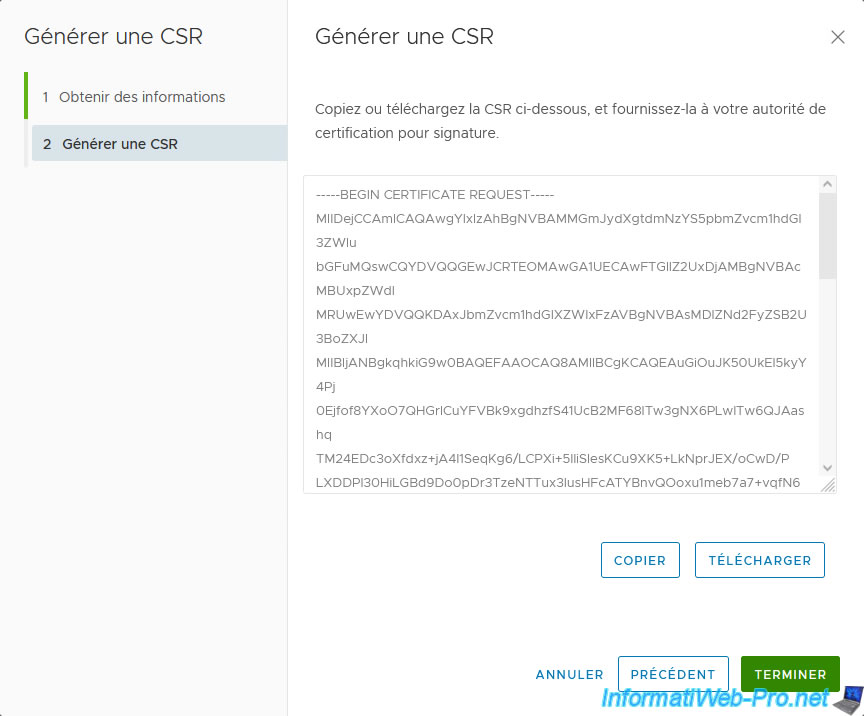
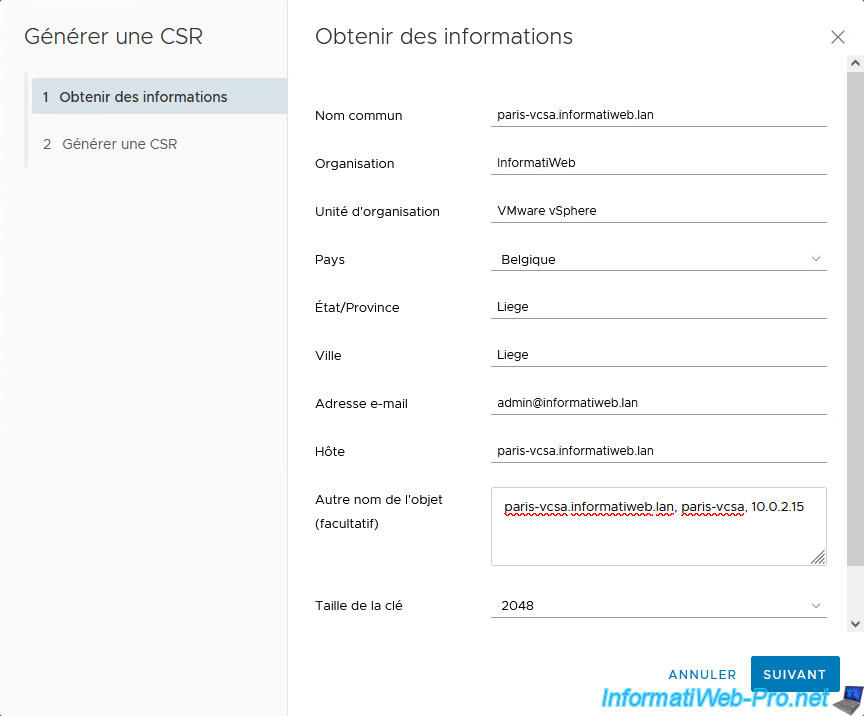
Complete the form provided.
In our case, it is a certificate request (CSR) for our VMware vCenter Server (VCSA) in Brussels.
Note: for information regarding the different fields offered, refer to the tutorial cited above (concerning securing a VMware vCenter Server (VCSA)).

Copy this certificate request.
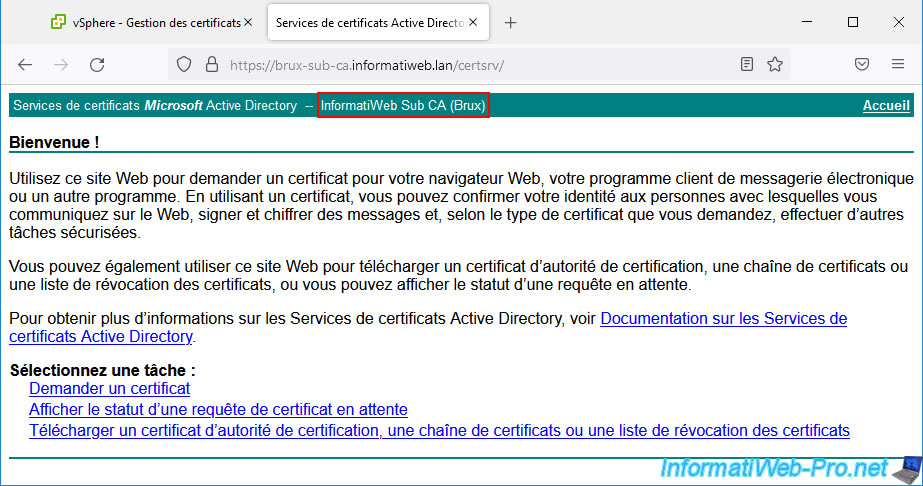
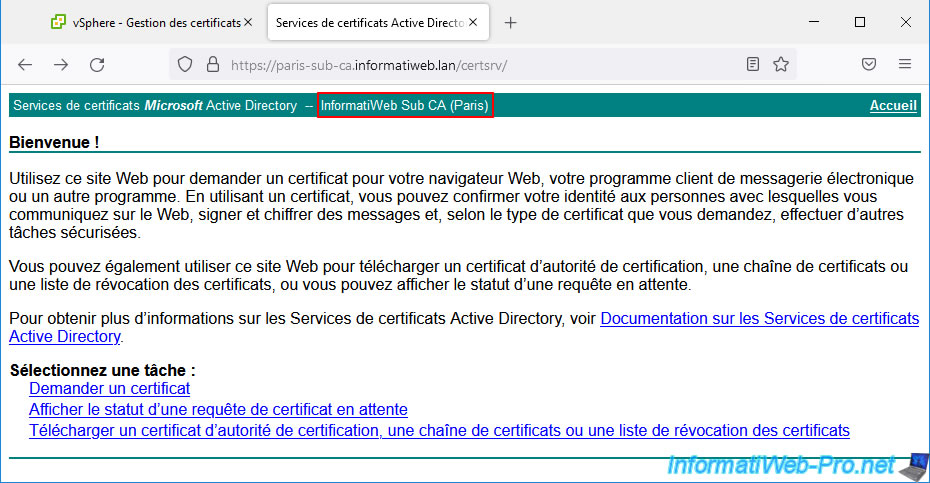
Access the web interface of your certification authority located on the same physical site as your VMware vCenter Server (VCSA).
In our case, we will submit the certificate request from our server "brux-vcsa" to our secondary certificate authority "brux-sub-ca".
This will facilitate the administrative management of certificates by the administrator of your local certificate authority.
In addition, certificate revocation can be verified locally (whether via Active Directory, the HTTP protocol or the OCSP protocol, if applicable).
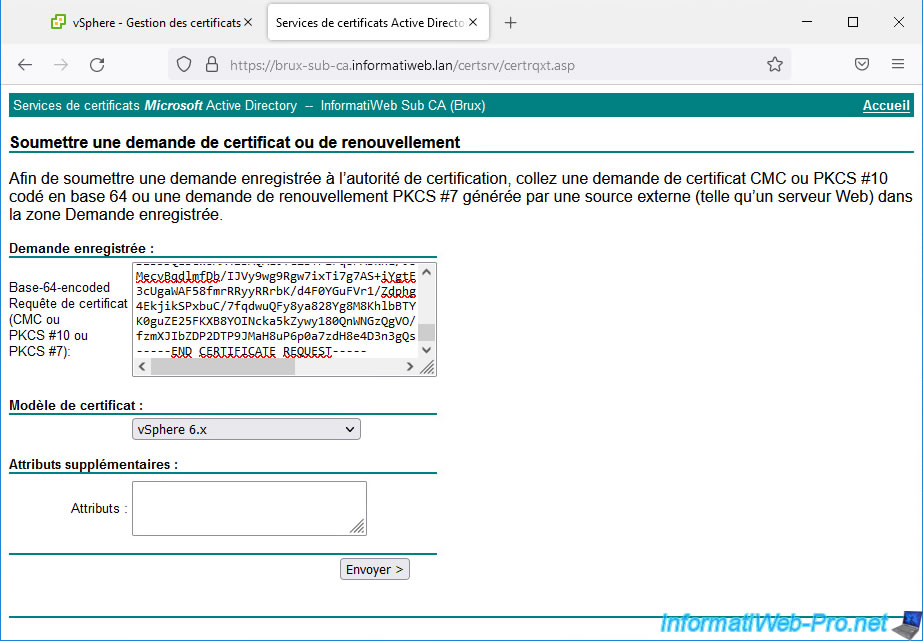
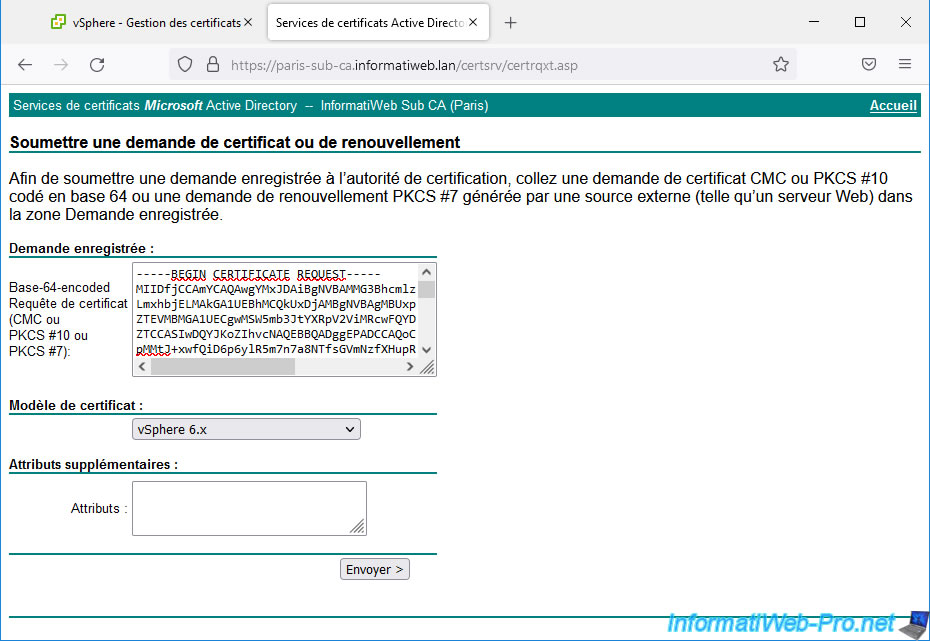
In your certificate authority's web interface, click: Request a certificate -> advanced certificate request -> Submit a certificate request by using a base-64-encoded CMC or PKCS #10 file, or submit a renewal request by using a base-64-encoded PKCS #7 file.
Paste the certificate request (CSR) provided by your VMware vCenter Server (VCSA), select the "vSphere 6.x" certificate template created previously, and click Submit.
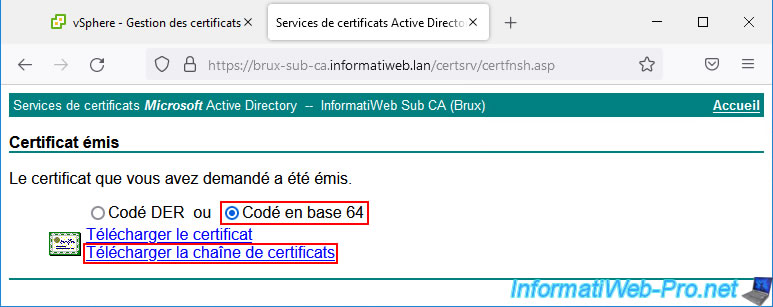
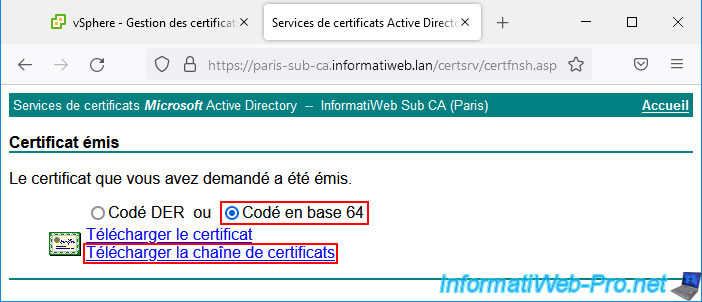
Download the certificate issued in "base 64" format by clicking on "Download certificate chain" to ensure that the certificate can be considered valid (despite the presence of a secondary certification authority in your PKI infrastructure).
Once the certificate is downloaded in ".p7b" format, convert it to ".cer" format (supported by VCSA) using OpenSSL.
If necessary, refer to our previous tutorial to find out how to install OpenSSL correctly on your computer or server under Windows (Server).
Bash
cd C:\OpenSSL
openssl pkcs7 -print_certs -in C:\Users\Administrator\Downloads\brux-vcsa-cert-full-chain.p7b -out C:\Users\Administrator\Downloads\brux-vcsa-cert-full-chain.cer
Now do the same thing on your remote VMware vCenter Server (VCSA), but submit the certificate request to your remote certificate authority.
In our case, we access the “Certificate Management” page of our “paris-vcsa” server.
Click "Actions -> Generate Certificate Signing Request (CSR)" again for its machine certificate (__MACHINE_CERT).
This time, you will need to generate this certificate request for your 2nd VMware vCenter Server (VCSA).
In our case, it is a certificate request (CSR) for that of Paris.
The certificate request appears.
This time, access the web interface of your 2nd secondary certificate authority which is located on the same physical site as the VMware vCenter Server (VCSA) to be secured.
In our case, that of Paris.
Click the links: Request a certificate -> advanced certificate request -> Submit a certificate request ...
Paste the certificate request (CSR) generated by your VMware vCenter Server (VCSA), select the "vSphere 6.x" certificate template, and click Submit.
Choose the "Base 64 encoded" format and click on: Download certificate chain.
Once the certificate is downloaded in ".p7b" format, convert it to ".cer" format.
Bash
cd C:\OpenSSL
openssl pkcs7 -print_certs -in C:\Users\Administrator\Downloads\brux-vcsa-cert-full-chain.p7b -out C:\Users\Administrator\Downloads\brux-vcsa-cert-full-chain.cer
To replace the machine certificate of your VMware vCenter Server (VCSA), you will need the private key generated by it.
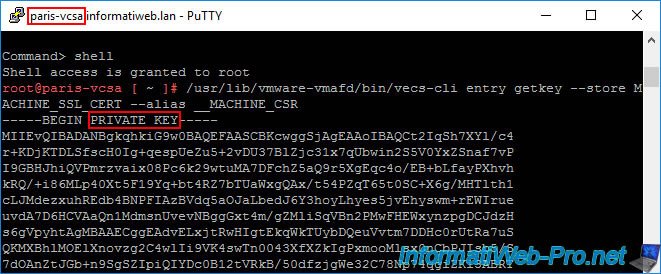
To obtain it, connect by SSH as "root" to your first VMware vCenter Server (VCSA) using PuTTY (for example) and access the Linux Shell by typing:
Plain Text
shell
Then, display the private key generated by VCSA using the command:
Bash
/usr/lib/vmware-vmafd/bin/vecs-cli entry getkey --store MACHINE_SSL_CERT --alias __MACHINE_CSR
Thanks to PuTTY, you can easily copy it by selecting it with the mouse.

Do the same on your 2nd VMware vCenter Server (VCSA).
7. Replace VMware vCenter Server Machine SSL certificate
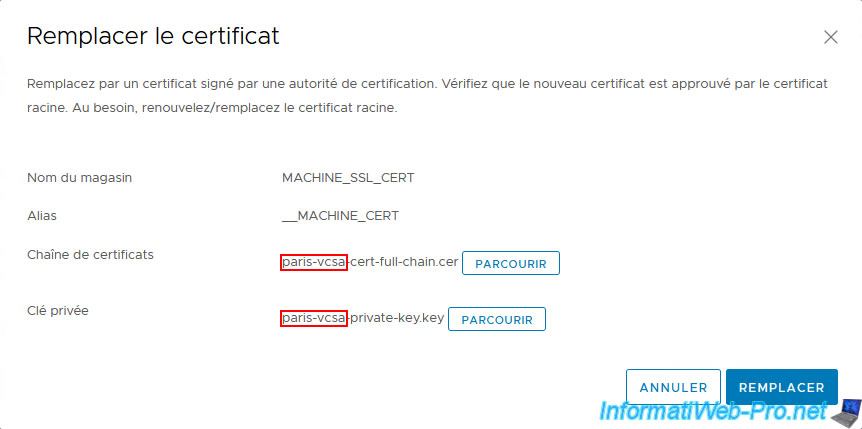
On your 1st VMware vCenter Server (VCSA), go to the "Certificate Management" page and click "Actions -> Replace" for the machine certificate.
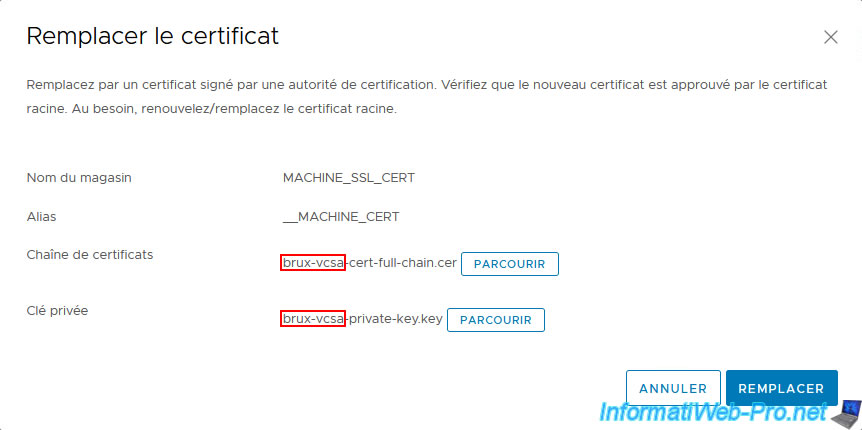
Select the certificate issued by your 1st certificate authority for your 1st VMware vCenter Server (VCSA), as well as the private key retrieved via SSH from that VCSA server, then click Replace.
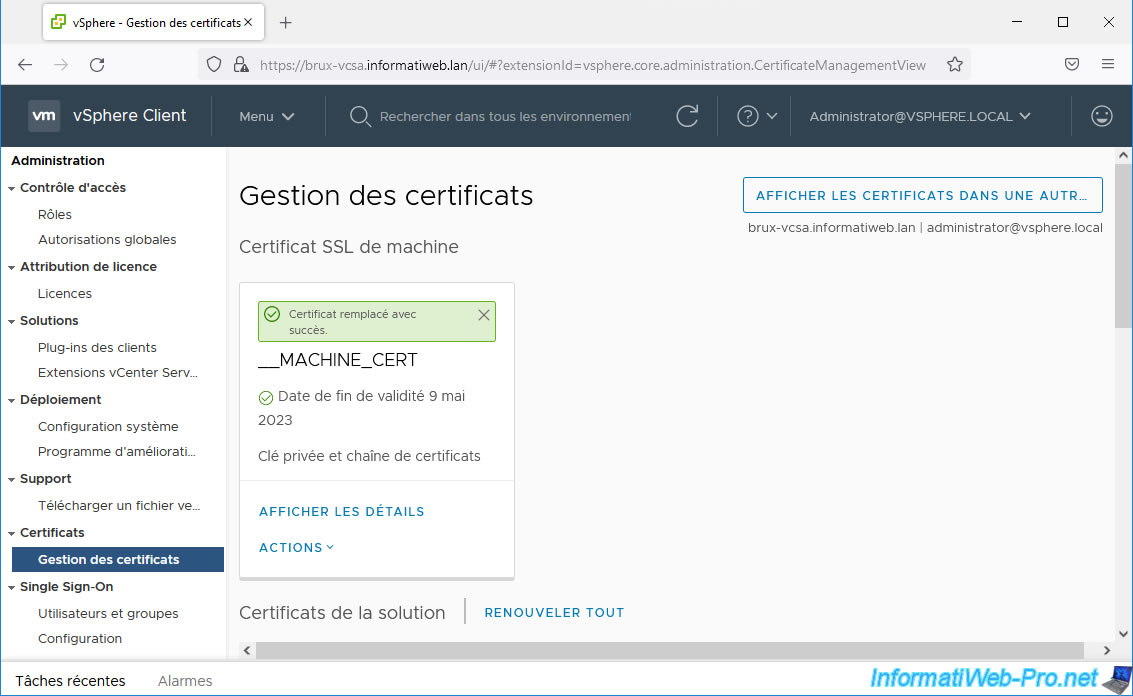
The message “Success, certificate replaced” appears.
Do the same on your 2nd VMware vCenter Server (VCSA).

Select the certificate issued by your 2nd certificate authority for your 2nd VMware vCenter Server (VCSA), as well as the private key retrieved via SSH from that VCSA server, and click Replace.
Share this tutorial
To see also
-
VMware 3/13/2024
VMware ESXi 6.7 - Synchronize the clock of ESXi hosts from a time server (NTP)
-
VMware 3/8/2024
VMware ESXi 6.7 - Synchronize the clock of VCSA from a time server (NTP)
-
VMware 7/31/2024
VMware vSphere 6.7 - Add an Active Directory identity source
-
VMware 5/22/2024
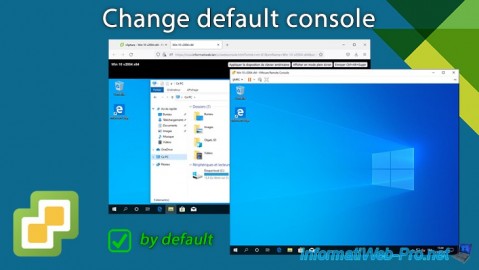
VMware vSphere 6.7 - Change default console
No comment