- Citrix
- Citrix XenApp / XenDesktop
- 02 August 2016 at 11:32 UTC
-

When you install and configure Citrix XenApp or Citrix XenDesktop, you must also install Citrix Receiver on the client computers. However, by default, Citrix Receiver will ask you the address of a StoreFront server + the user credentials for each client computer.
To improve the user experience, we will configure the server to allow the user to directly use its applications or desktops through Citrix Receiver without enter anything.
For this, we will use a feature called Single Sign-On (SSO).
Configuration used :
- servers under Win. Server 2012 + Citrix XenApp 7.6 or Citrix XenDesktop 7.6
- the configuration used is the same as our tutorial : Citrix XenApp - Installation, configuration and applications delivery
- Server configuration
- Configure Windows clients
- Enable automatic connection to Citrix Receiver (web and program)
- Automatic connection to the Citrix Receiver program (if necessary)
1. Server configuration
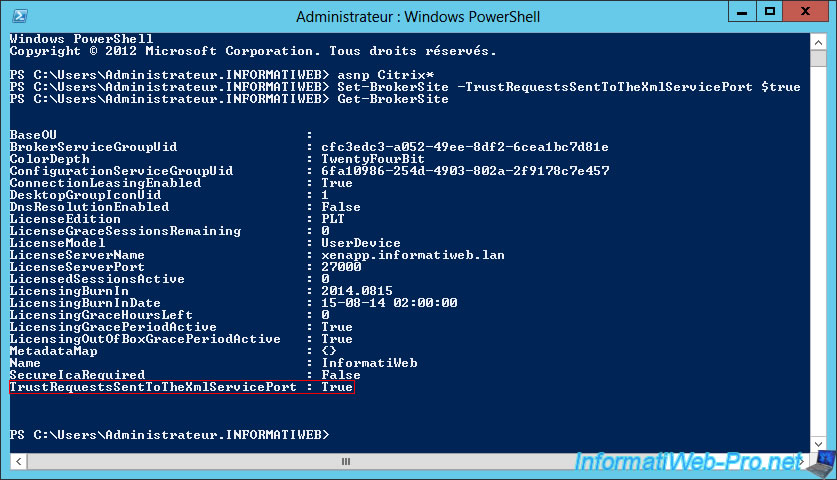
To begin, enable the "Trust requests sent to the XML service" setting on the XenApp/XenDesktop server.
For this :
- Open a powershell window (the icon is in the task bar in Win. Server 2012).
- Type "asnp Citrix*" to load Citrix powershell commands
- Enable trusted XML requests by typing : Set-BrokerSite -TrustRequestsSentToTheXmlServicePort $true
- Ensure that this setting has been enabled by typing "Get-BrokerSite" and make sure the line "TrustRequestsSentToTheXmlServicePort" is "TRUE".
Source : support.citrix.com
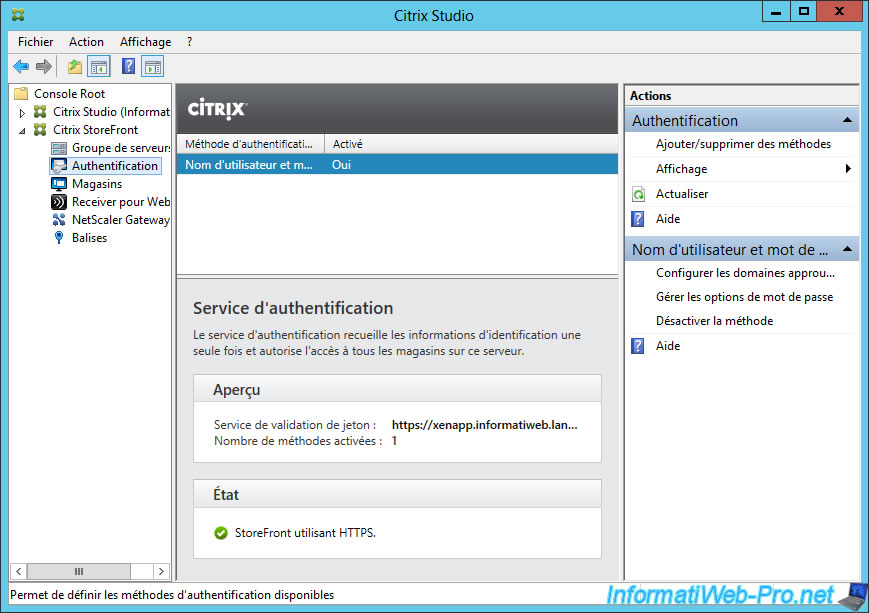
Enable SSO (pass-through authentication) for StoreFront and the web interface.
To do this, launch Citrix Studio or Citrix StoreFront, go to "Citrix StoreFront -> Authentication" and click on "Add/Remove Methods".
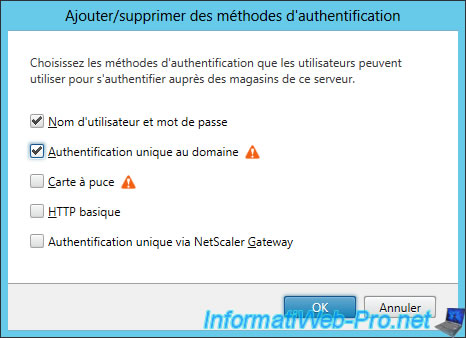
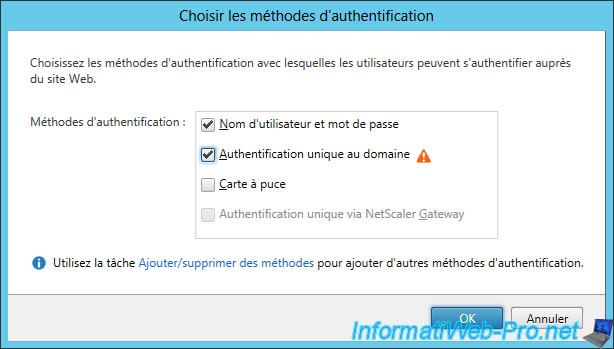
In the list that appears, check the "Domain pass-through" box.
Note that it's best to also leave the "User name and password" box checked to be able to login manually from the web interface or Citrix Receiver if the automatic connection would not work or is not enabled on the client PC.
Note : the orange triangle indicates that this authentication method must be enabled separately for each Receiver Web site.
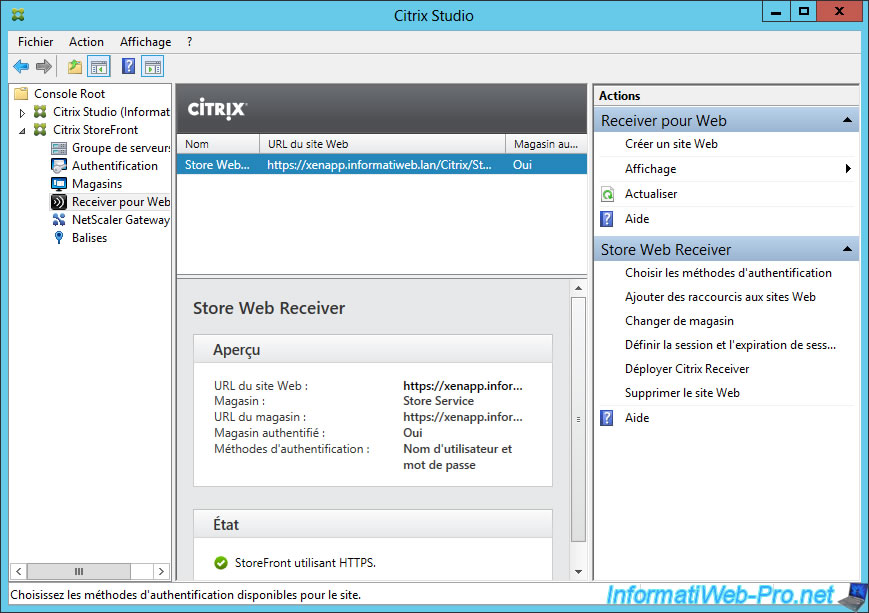
Then, go to "Citrix StoreFront -> Receiver for Web" and click "Choose Athentication Methods".
In the list that appears, check the "Domain pass-through" box.
As before, it's recommended to also leave the box "User name and password" checked.
Note : as indicated by the orange triangle, to ensure an optimal user experience, all Windows client machines must be associated to the domain and SSO must be enabled for Citrix Receiver.
2. Configure Windows clients
In order to the user is able to automatically log on to the Citrix Receiver web interface and to the Citrix Receiver program, you must install Citrix Receiver and enable the "Single Sign-On (SSO)."
To do this, download Citrix Receiver from your Citrix server.
The address looks like this : https://xenapp.informatiweb.lan/Citrix/StoreWeb
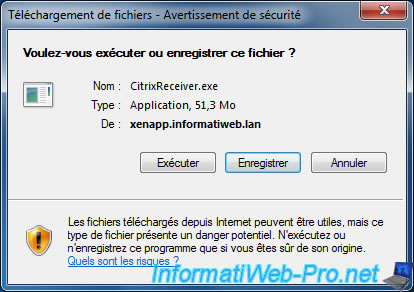
Then, as shown in the Citrix documentation, you will need to log on the client PC with an account that has administrator privileges to install Citrix Receiver.
For this tutorial, we used the Domain Administrator account.
To install Citrix Receiver and enabling the Single Sign-On, open a command prompt and type this : CitrixReceiver.exe /includeSSON
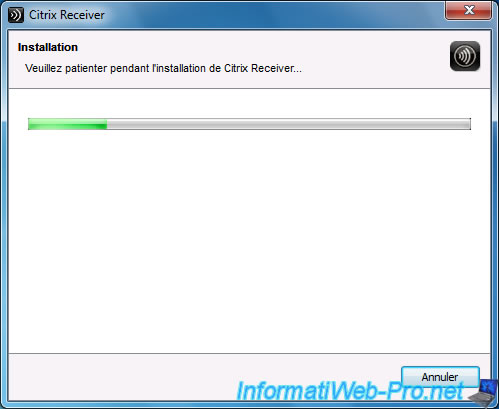
The installation wizard appears.
Just click Install, and then Finish.
3. Enable automatic connection to Citrix Receiver (web and program)
Note that these manipulations are not necessary if you use Citrix Receiver Enterprise for Windows (which is not the case by default).
If you use Citrix Receiver (default version), you have to change two settings of Internet Explorer.
To begin, login on the client PC with a domain user and see if you can access the file : "https://xenapp.informatiweb.lan/Citrix/Authentication/integrated/test.aspx".
If Internet Explorer shows you your username : no change is necessary because the automatic connection works.
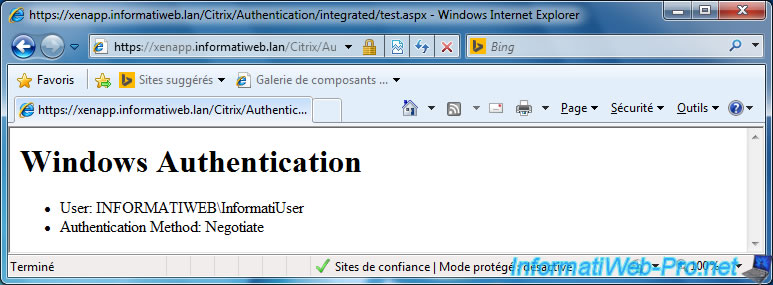
But, if this is not the case (Internet Explorer prompts you for a user name and a password), you will have to make these 2 manipulations in Internet Explorer settings.
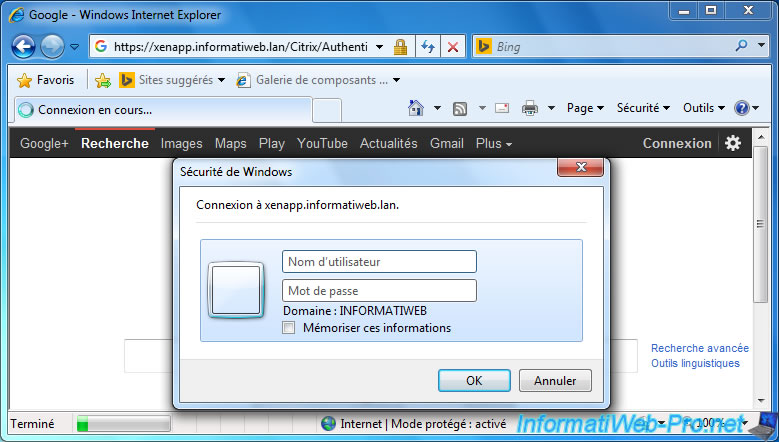
To begin, in Internet Explorer, go to "Tools -> Internet Options -> Tab : Security".
Select "Trusted sites" and click on the "Sites" button to add the address of your StoreFront or the web interface.
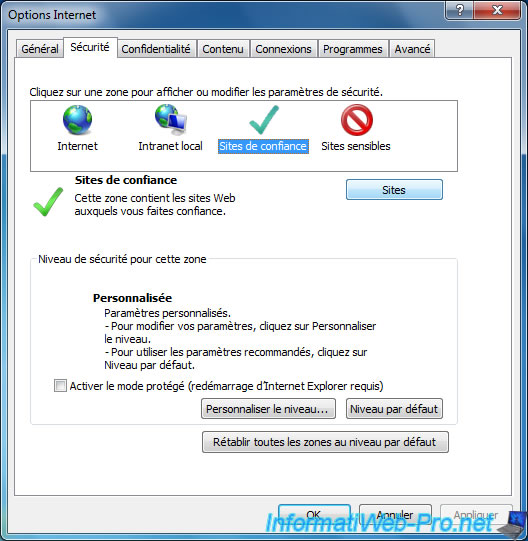
Only the root of the site is required. (for example : https://xenapp.informatiweb.lan)
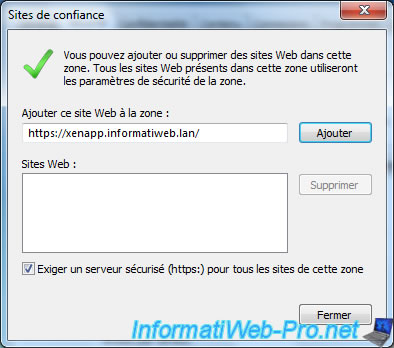
Then, click "Custom Level".
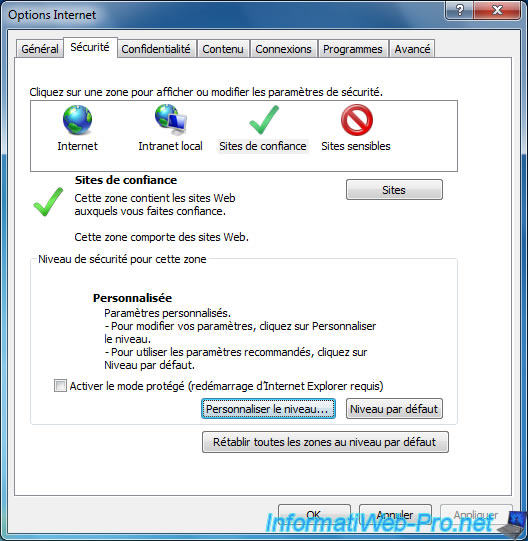
Then, locate the "User Authentication" option.
For this option, select the value "Automatic logon with username and password".
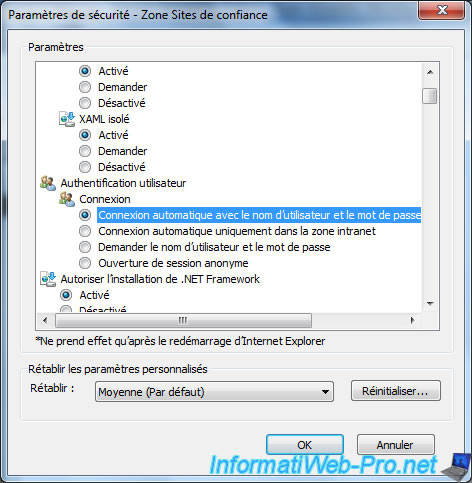
Click Yes.

Now, automatic login will work for the web interface.
Indeed, if you go to address "https://xenapp.informatiweb.lan/Citrix/StoreWeb", this message will be displayed :
To use the account you used to connect to the computer, click "Login".
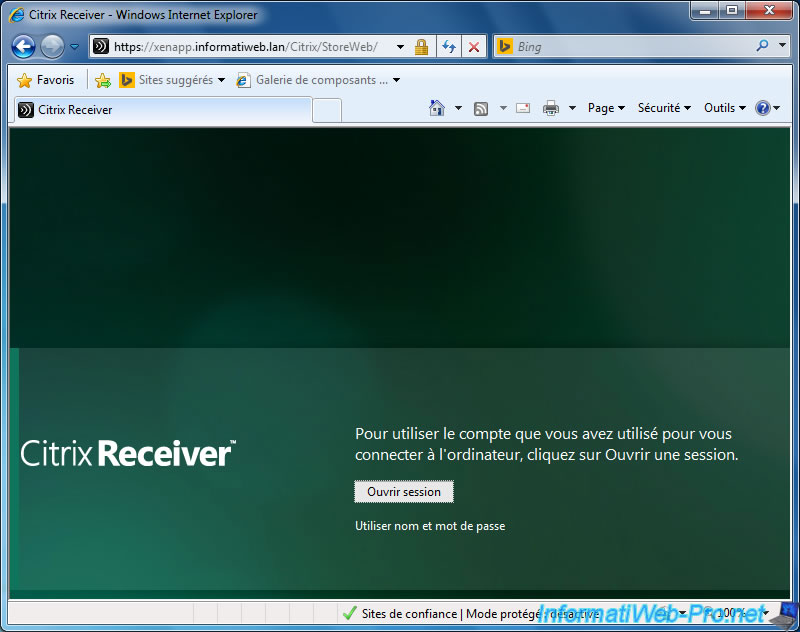
Click "Login" and your applications will be displayed.
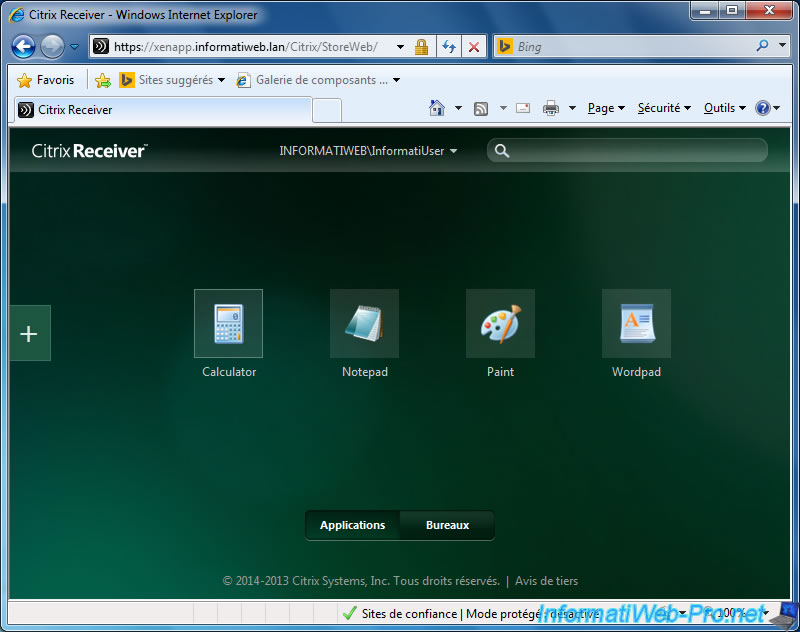
4. Automatic connection to the Citrix Receiver program (if necessary)
For the "Citrix Receiver" program, you must also use Group Policy (GPO).
For security and flexibility, create an organizational unit (OU) in the Active Directory and move the client computers in this OU.
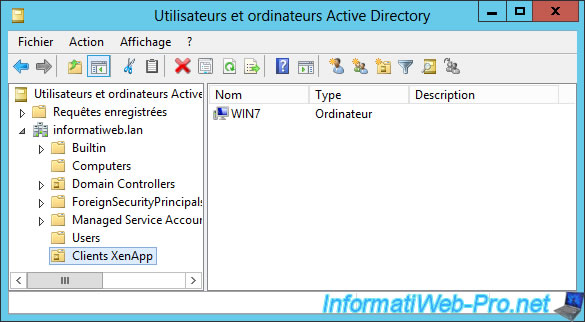
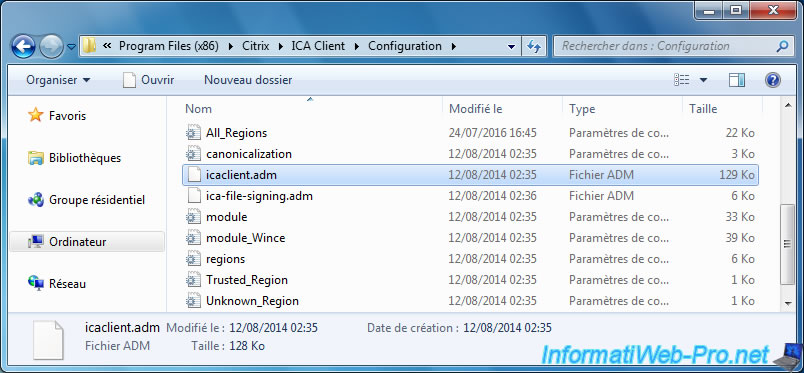
Then, get the "icaclient.adm" file located in the folder "%SystemDrive%\Program Files (x86)\Citrix\ICA Client\Configuration" folder of the client PC and copy it on your Active Directory server.
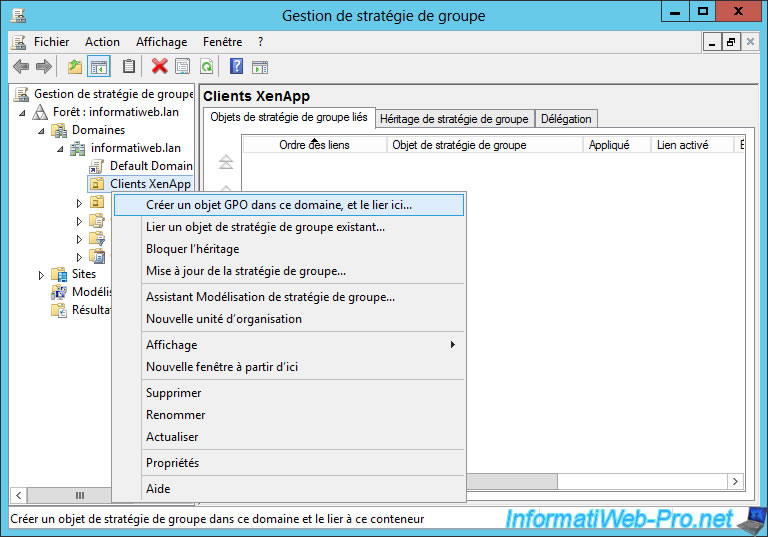
On your Active Directory server, open the "Group Policy Management" program and go to [your domain] -> [name of your OU].
Then, right click on this OU and click "Create a GPO in this area ...".
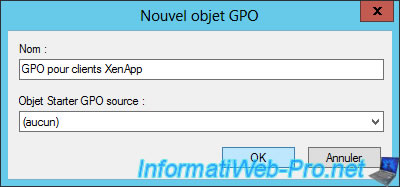
Enter a name for your GPO object.
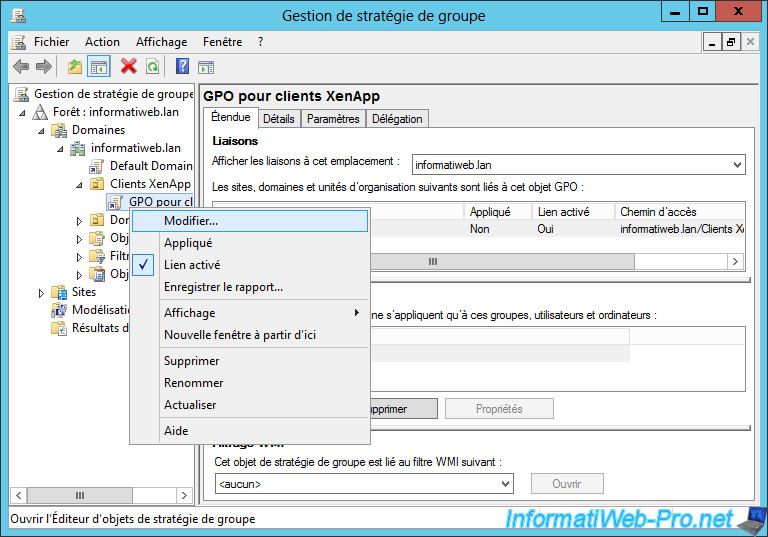
Right click "Edit" on this GPO.
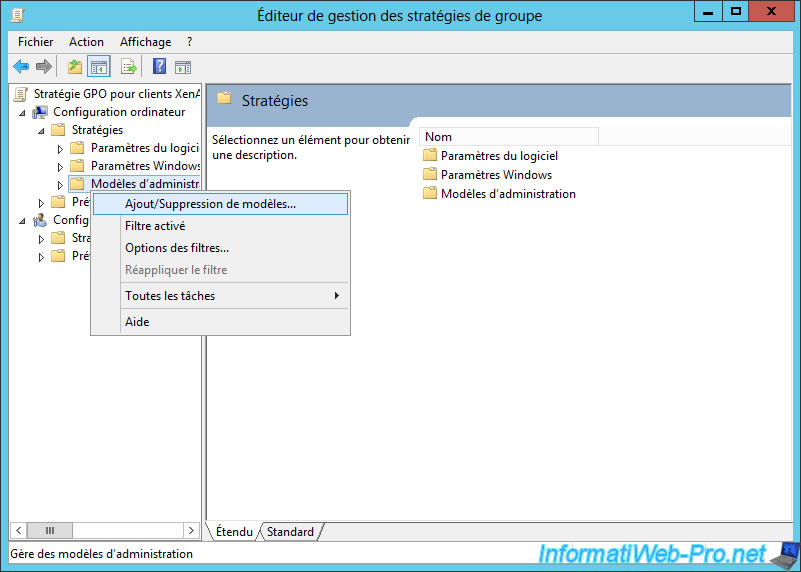
Open the "Policies" item in "Computer Configuration" and right-click "Add/Remove Templates" on the "Administrative Templates" item.
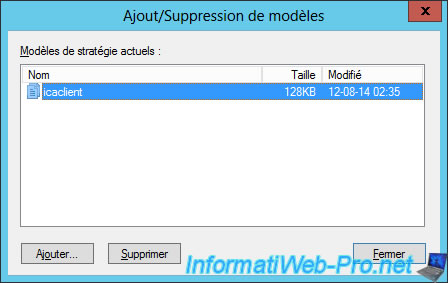
Click Add and select the "icaclient.adm" file.
Now, go to : Computer Configuration -> Policies -> Administrative Templates -> Classic Administrative Templates (ADM)
-> Citrix Components -> Citrix Receiver -> User authentication.
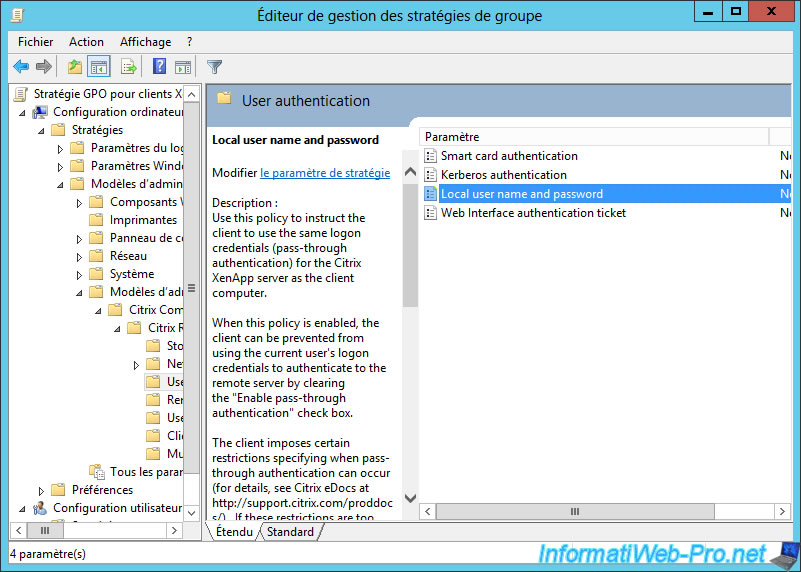
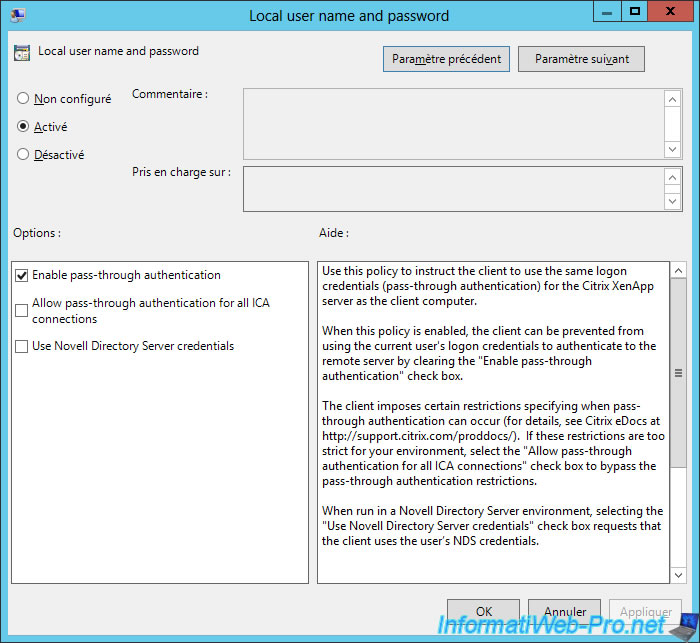
In displayed policies, select the "Local user name password" policy and make sure the "Enable pass-through authentication" is checked and click OK.
Note : If you use an older version of Citrix Receiver or another ICA client, it may be necessary to also check the "Allow pass-through authentication for all ICA connections" box.
Then, if you wish, you can also define the list of storefront server(s) that you want to add in Citrix Receiver.
To do this, go to "Computer Configuration -> Policies -> Administrative Templates -> Classic Administrative Templates (ADM) -> Citrix Components -> Citrix Receiver -> Storefront" and enable the "Storefront Accounts List" policy.
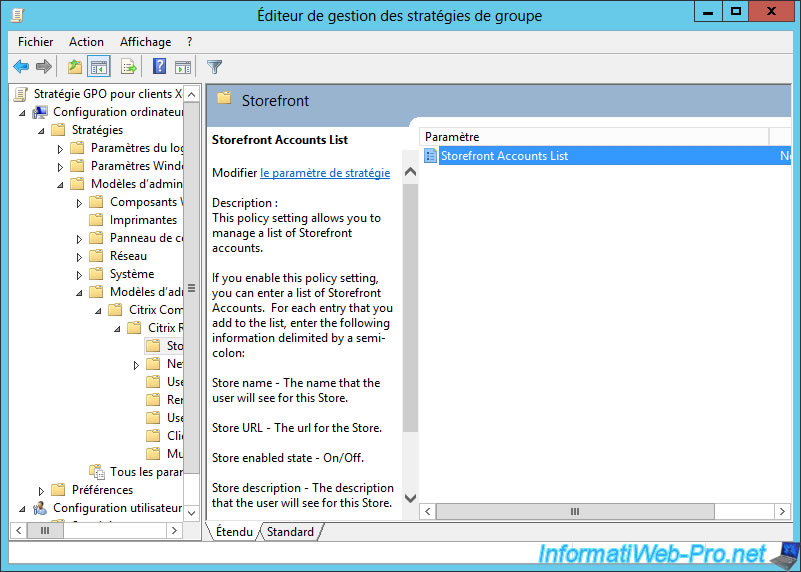
For this strategy, select "Enable", then click the "View" button.
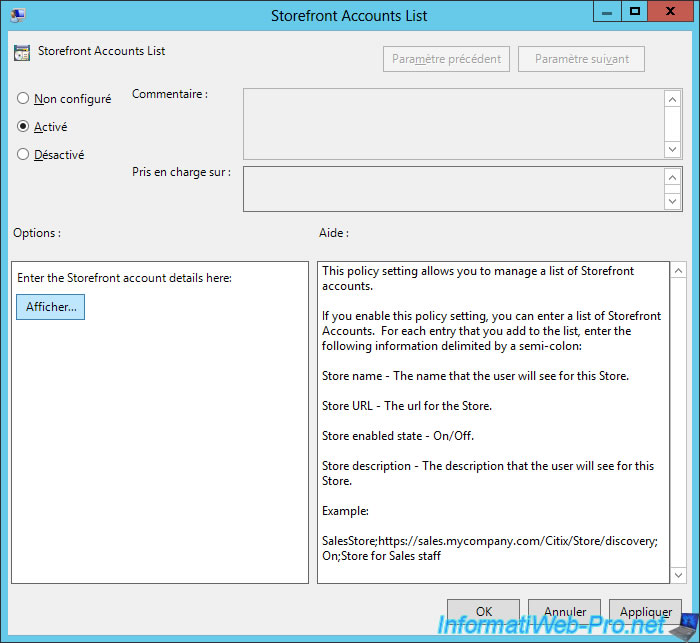
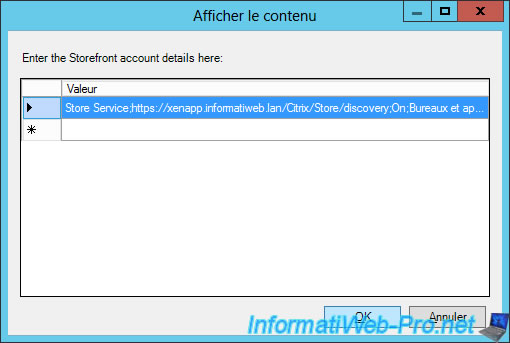
As shown in the description of this policy, you need to create a line by StoreFront server by specifying each time : the name and the address of the StoreFront server, if the store is enabled or not, and a description.
In our case, we will indicate : Store Service;https://xenapp.informatiweb.lan/Citrix/Store/discovery;On;Desktops and Office applications
Restart the PC client to update security policies of that PC, and open Citrix Receiver.
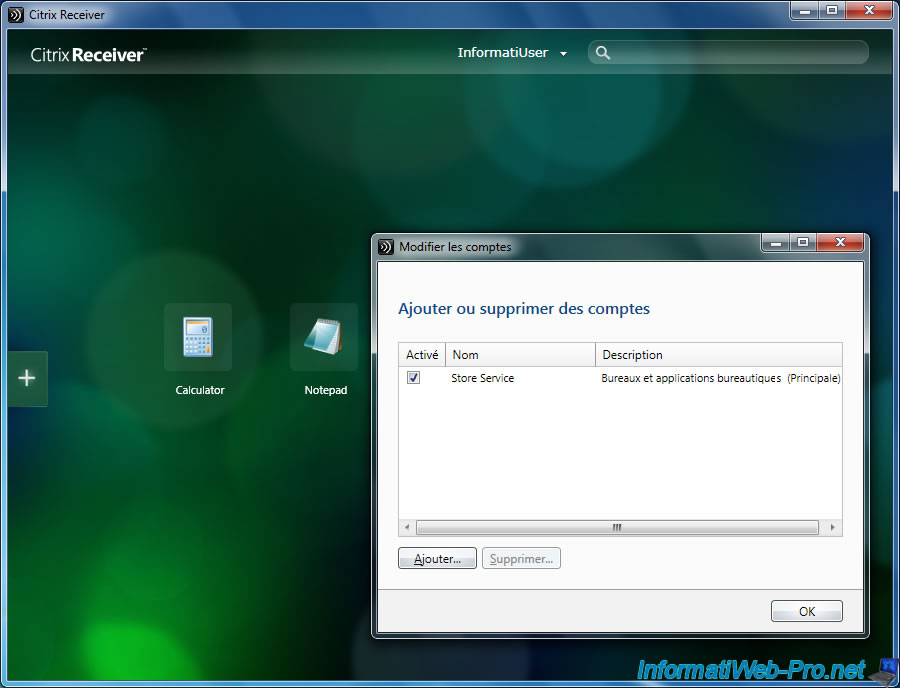
If you have configured the "Storefront Accounts List" policy, Citrix Receiver will directly display your applications and you will be automatically connected with the SSO.
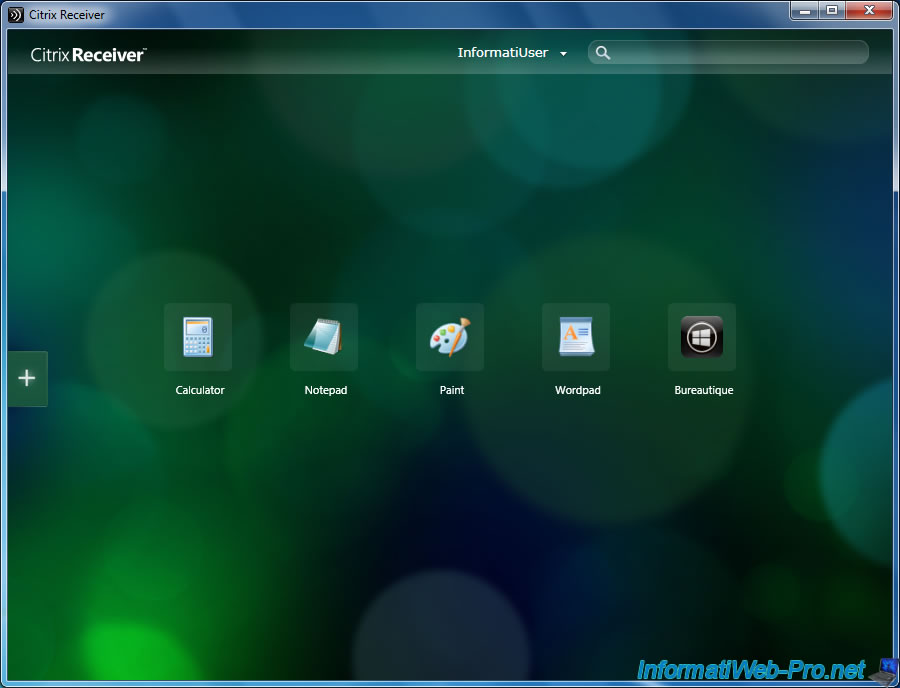
If you click on the small icon next to your user name, and then click Accounts, you will see that the "Store Service" store (which we have defined by GPO) is already in the list.
Procedure based on two articles of the Citrix support :
- How to Manually Install and Configure Citrix Receiver for Pass-Through Authentication
- How to Configure Single Sign-on for Web Interface Using Version 10, 11, and 12x Plug-ins
Share this tutorial
To see also
-
Citrix 5/14/2016
Citrix XenApp / XenDesktop 7.6 - Load balancing
-

Citrix 3/22/2015
Citrix XenApp 7.6 - Applications delivery
-
Citrix 5/31/2015
Citrix XenDesktop 7.6 - Deliver desktops by using PVS
-

Citrix 3/27/2016
Citrix XenDesktop 7.6 - PVS - vDisks updates

You must be logged in to post a comment