Publish RemoteApps (on a single server) on Windows Server 2012 using TSE
- Windows Server
- RDS
- 27 August 2014 at 09:26 UTC
-

- 2/3
4. Create a "RemoteApp" collection
Now that the installation is complete, we will add a collection "RemoteApp".
Collections are used to create some groups of programs that you can assign to users or groups of users.
For example, office programs (such as Microsoft Office (to be installed in volume licensing) or OpenOffice that is the free equivalent) for the secretary and web development programs (such as Adobe Dreameaver or Sublime Text) for the web developer of the society.
To create a new collection, click on the link "Create collections of sessions".
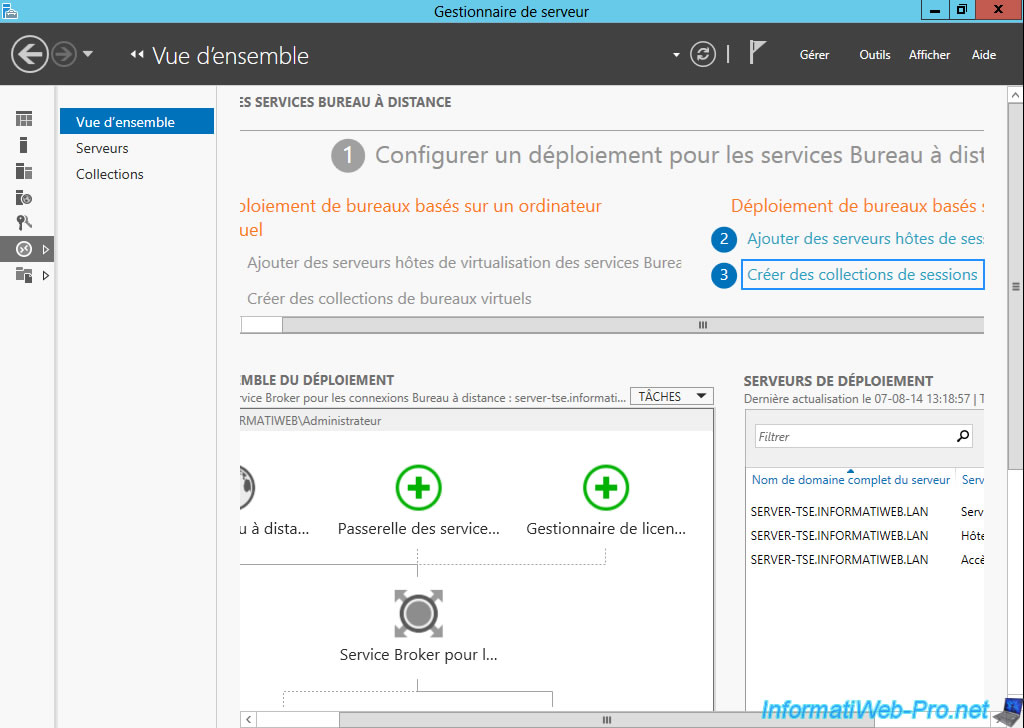
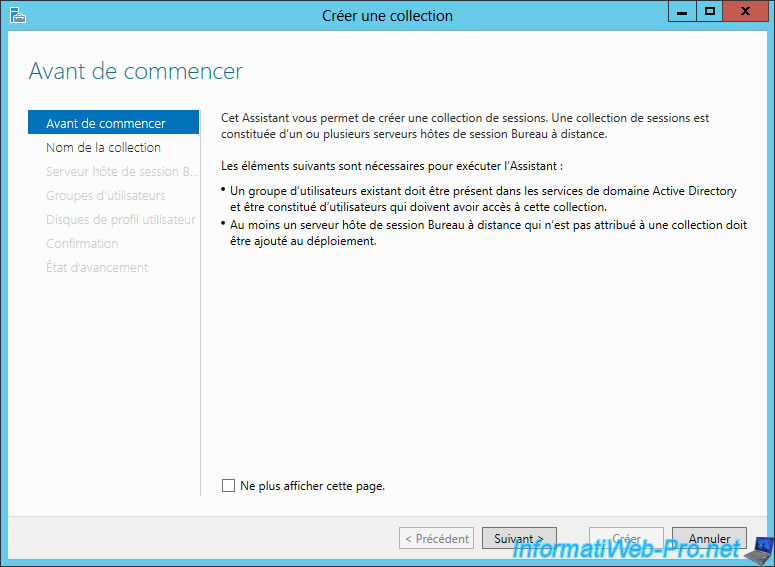
The wizard opens.
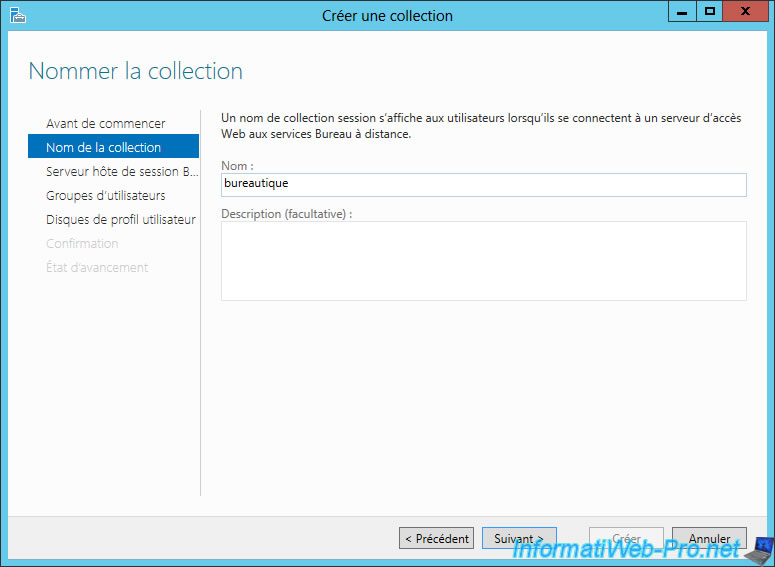
Enter a name for this collection. For example : office programs.
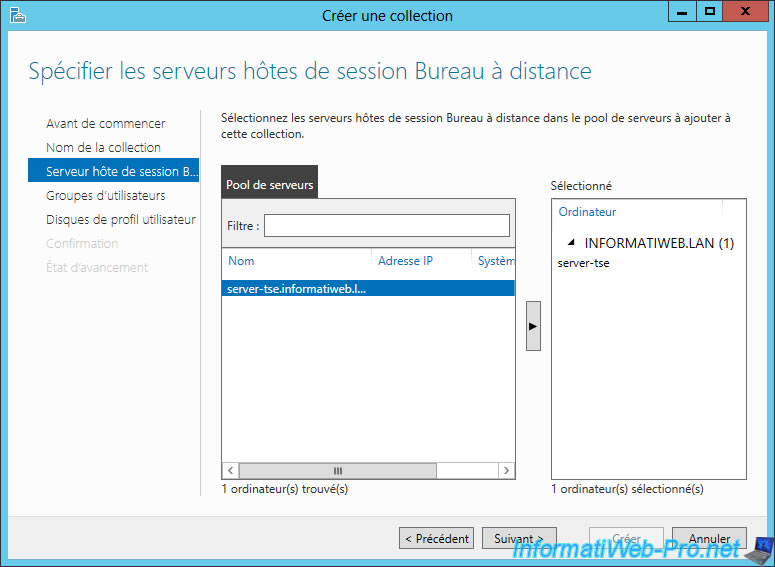
Select the server that will manage the programs that you publish.
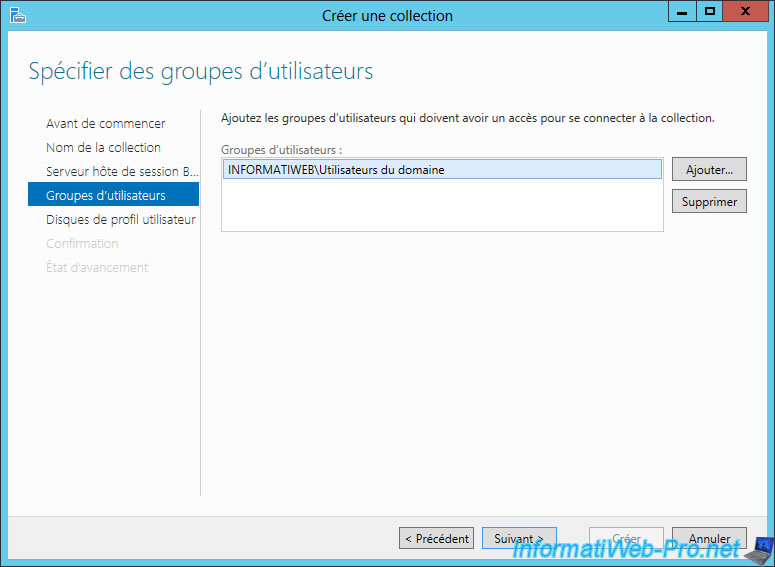
Select the users or groups that will have access to this collection of programs. By default, Active Directory's users.
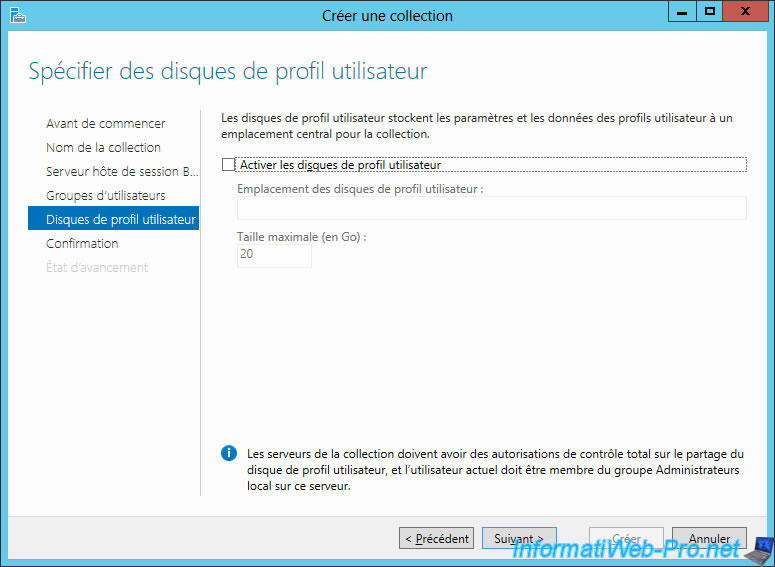
Uncheck "Enable user profile disks" box.
It's useless if you only use one server "Session Host Remote Desktop".
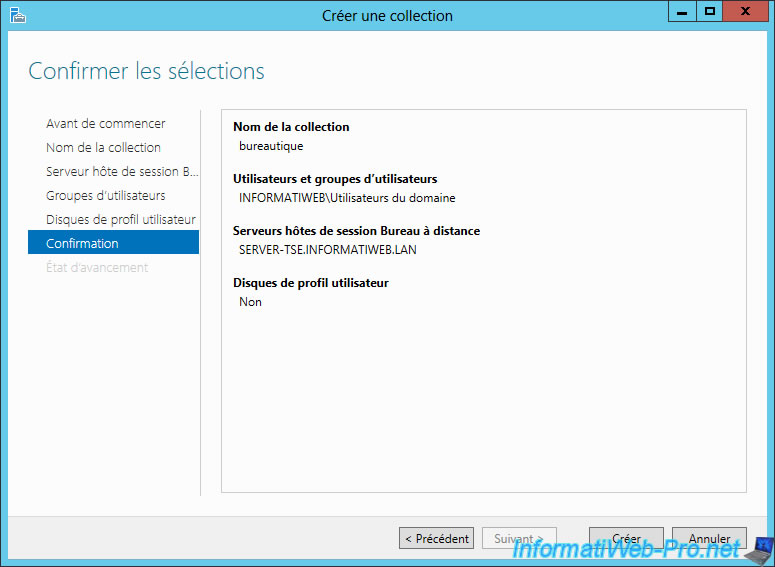
A summary of the configuration is displayed.
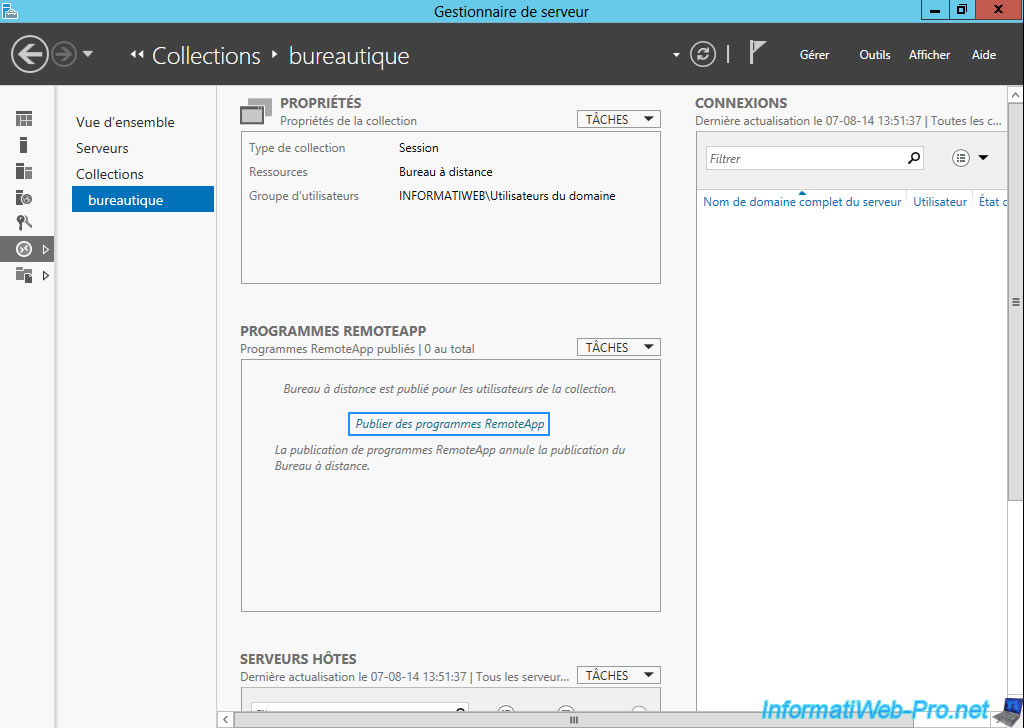
Now that the collection is created. We will publish RemoteApp programs in this collection.
To do this, click on the "Publish RemoteApp programs" link.
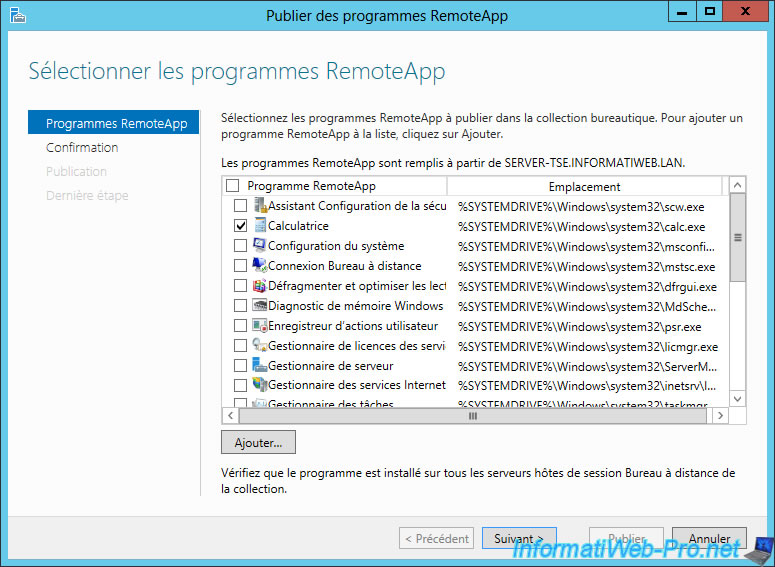
Select the programs you want to publish.
In our case, we will publish the calculator, Paint and WordPad (supplied with Windows).
Note : To publish the NotePad++ program, refer to this solution : "Error when publishing NotePad++ in RemoteApp on Windows Server 2012".
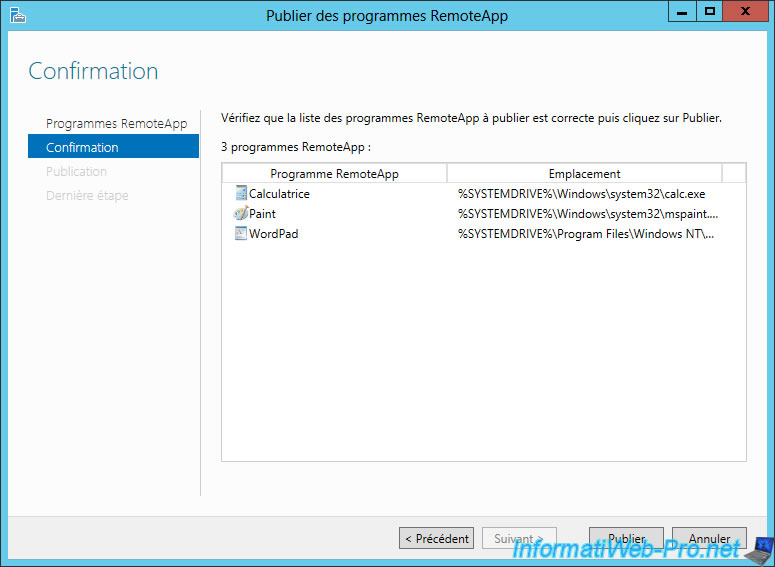
Confirm the publication of selected programs.
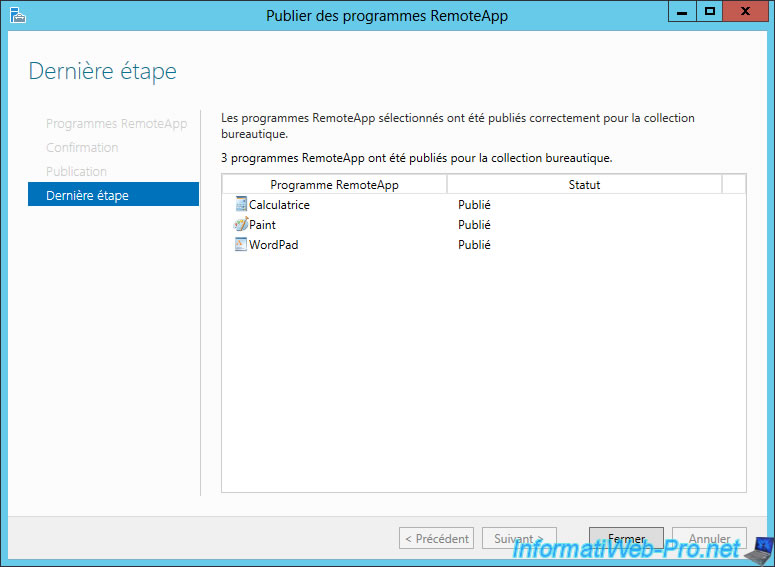
The programs have been published.
5. Testing and functioning
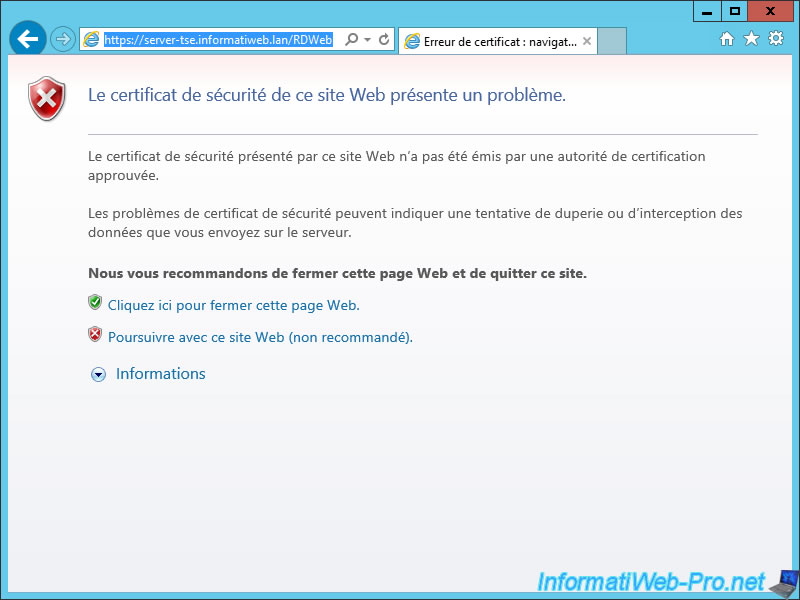
Now that we have configured the minimum necessary, trying to access the address "https://localhost/RDWeb" from the server or "https://[server name].domain.extension/RDWeb".
For now, your web browser will display an error about the certificate used to secure the connection to the server. This error is due to the fact that the certificate is self-signed and therefore has not been signed by a recognized authority. We will resolve that later.
Log in with a user who is authorized to use the collection created
Note : You must specify the domain name in front of the username.
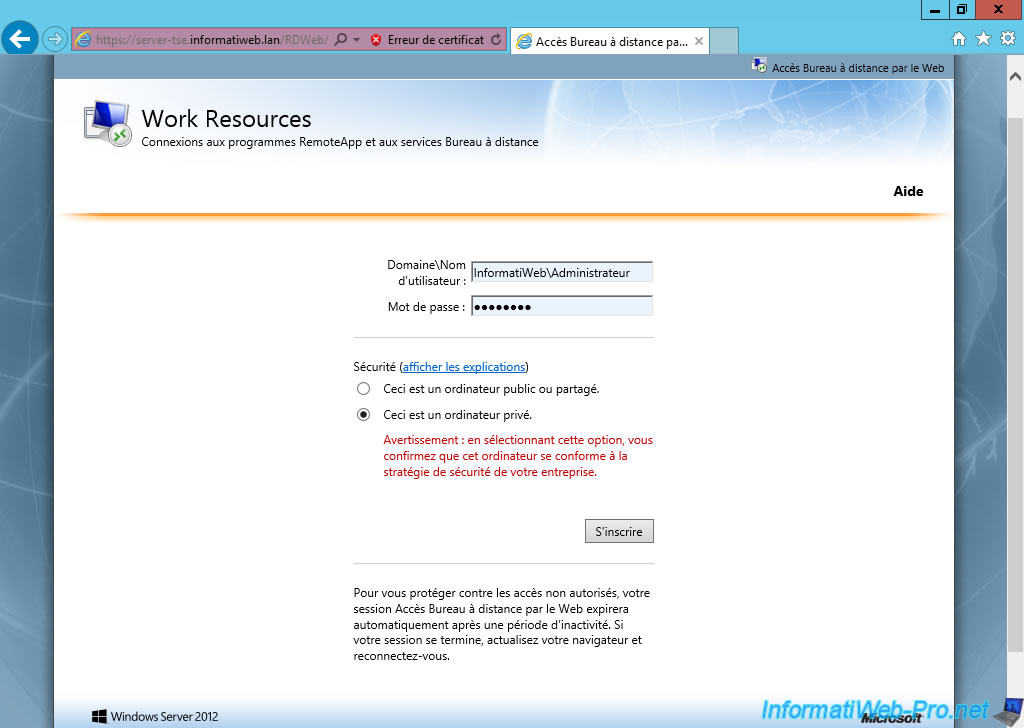
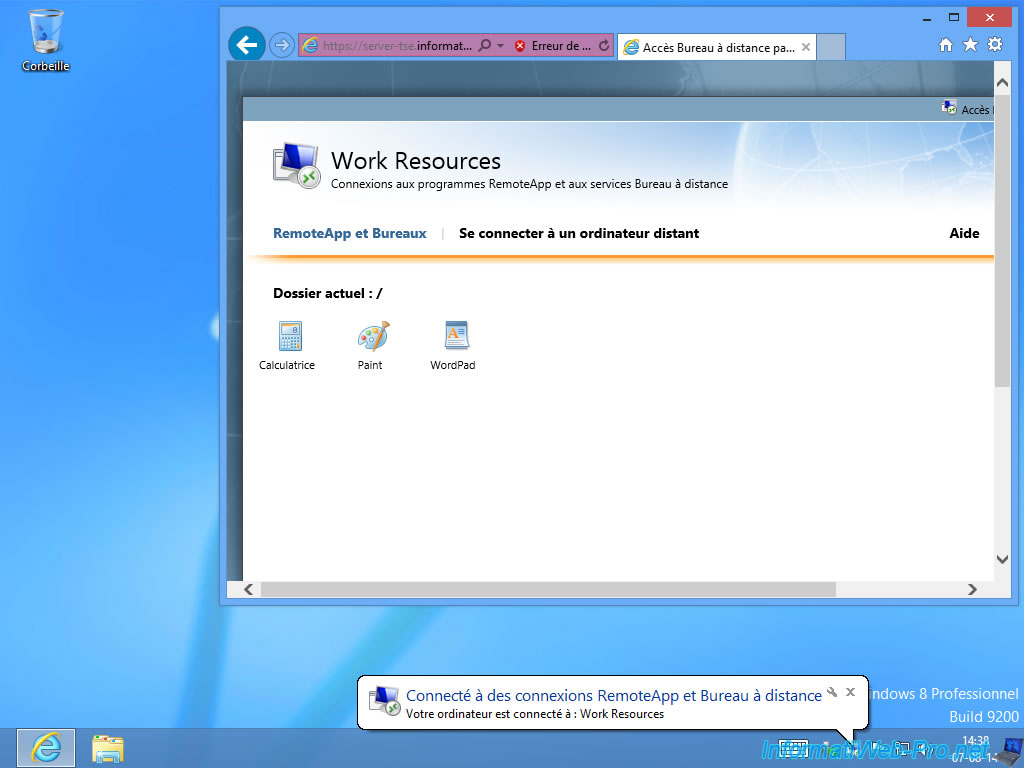
If all goes well, the published programs will be displayed.
To start a RemoteApp program, simply click it.
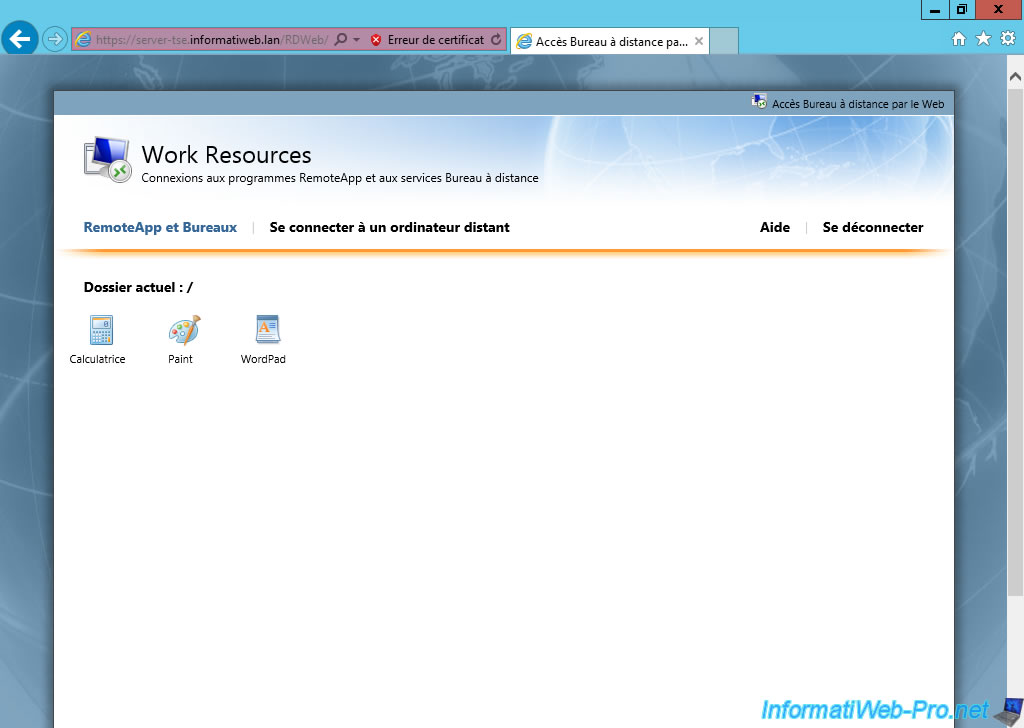
The headband is orange for the same reasons as earlier. But we will resolve this problem later.
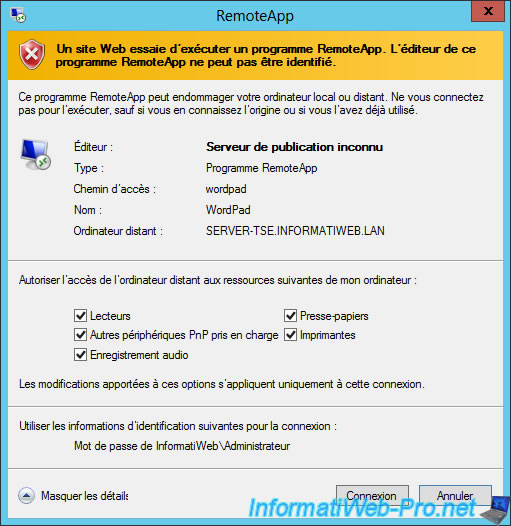
The selected program is displayed.
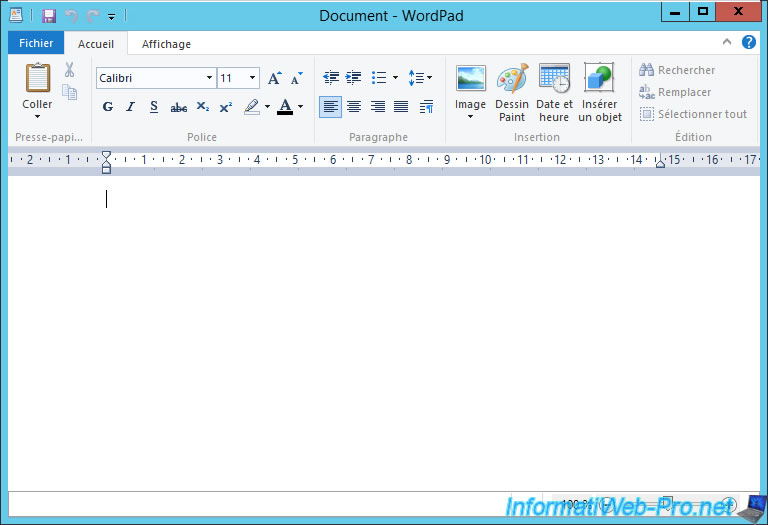
Now that it works, we'll connect a computer to the Active Directory and access the web interface via address "https://[server name].domain.extension/RDWeb".
Ignore the error about the certificate for now.
Note : As you can see, a notification is displayed on the bottom of the screen. This notification comes from the feature "Remote connections" of Windows, we will configure later (must be using a valid certificate).
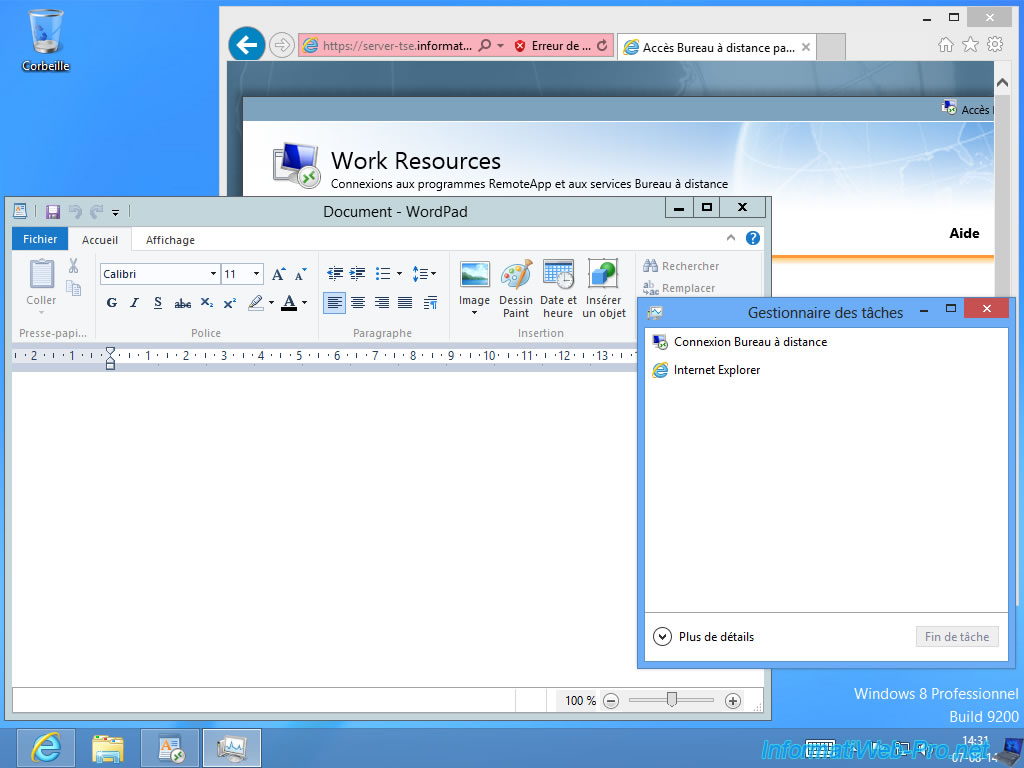
So that you understand how this solution works, here is a screenshot where we start WordPad from RemoteApps. As you can see through the task manager, WordPad run on the server and not on the client computer. On the computer, there is only the RDP (Remote Desktop Protocol) client that runs. The RDP client is called "Remote Desktop Connection" in the start menu.
As explained earlier in this tutorial, the program runs on the server and the client receives only the pixels (a display of the program). Indeed, the outline color is that of Windows Server 2012 and not Windows 8 that we put in blue.
6. Selection and Activation of the license server
To publish legally paid programs, you must activate a license server where you will insert the codes of licenses purchased.
For example, Microsoft volume licensing programs.
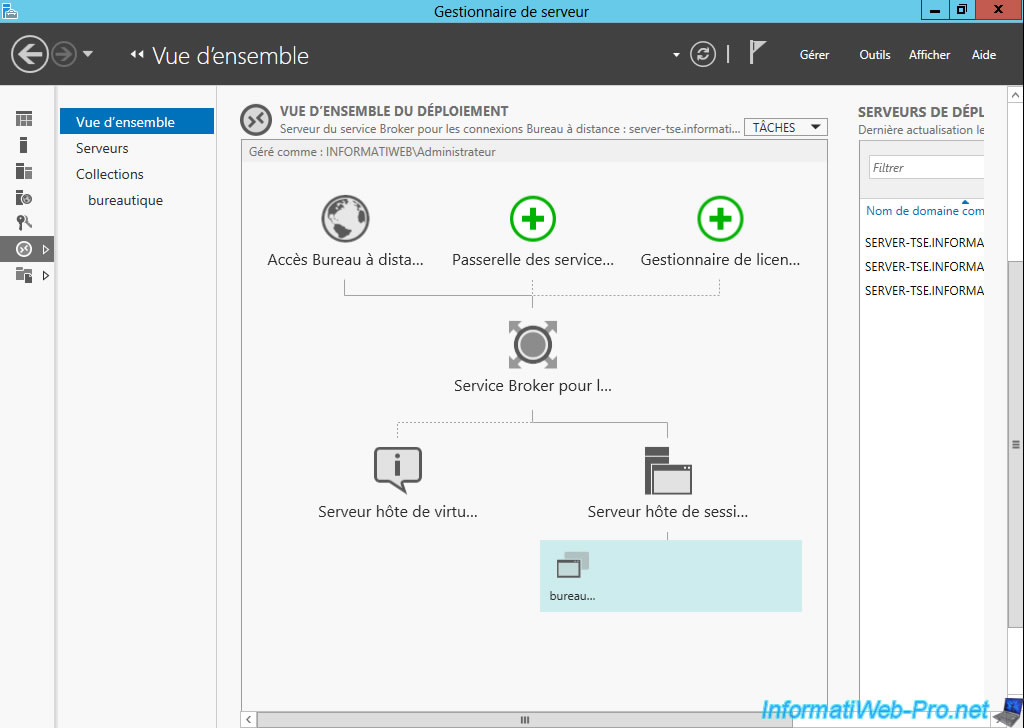
To select a server where you want to install the License Manager, click the + named "Licensing".
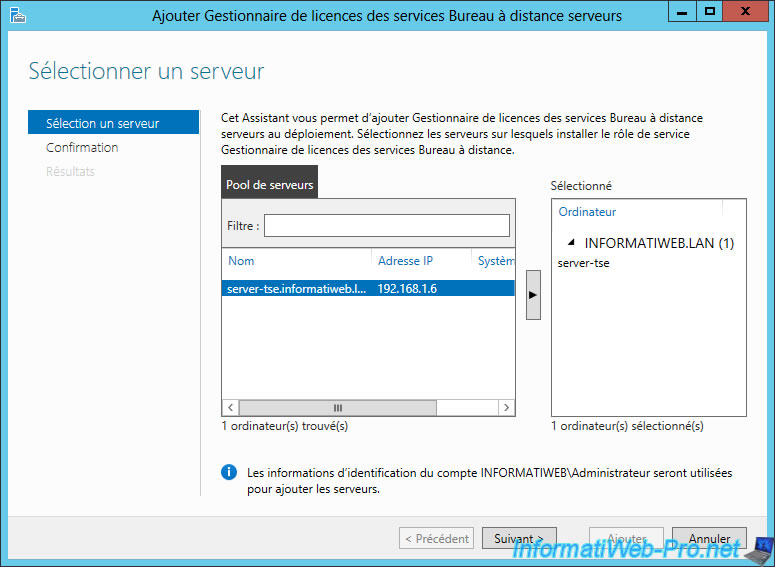
Select the desired server.
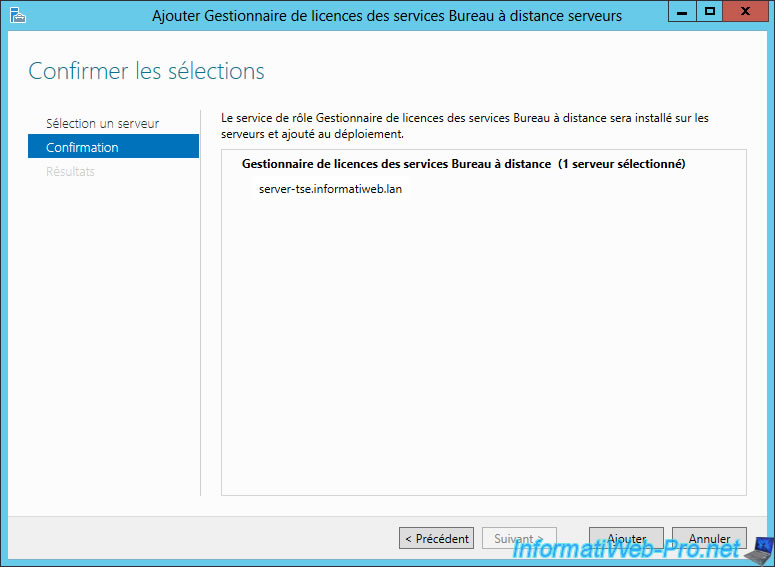
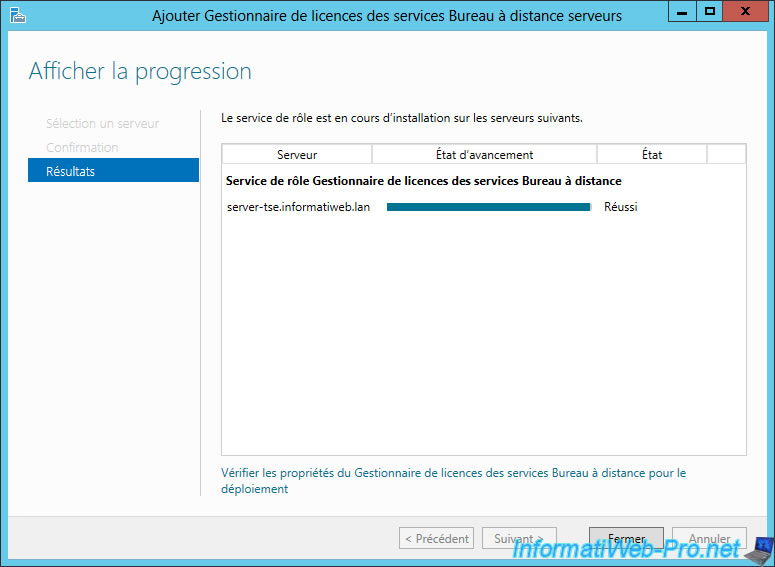
The license server was added to the deployment.
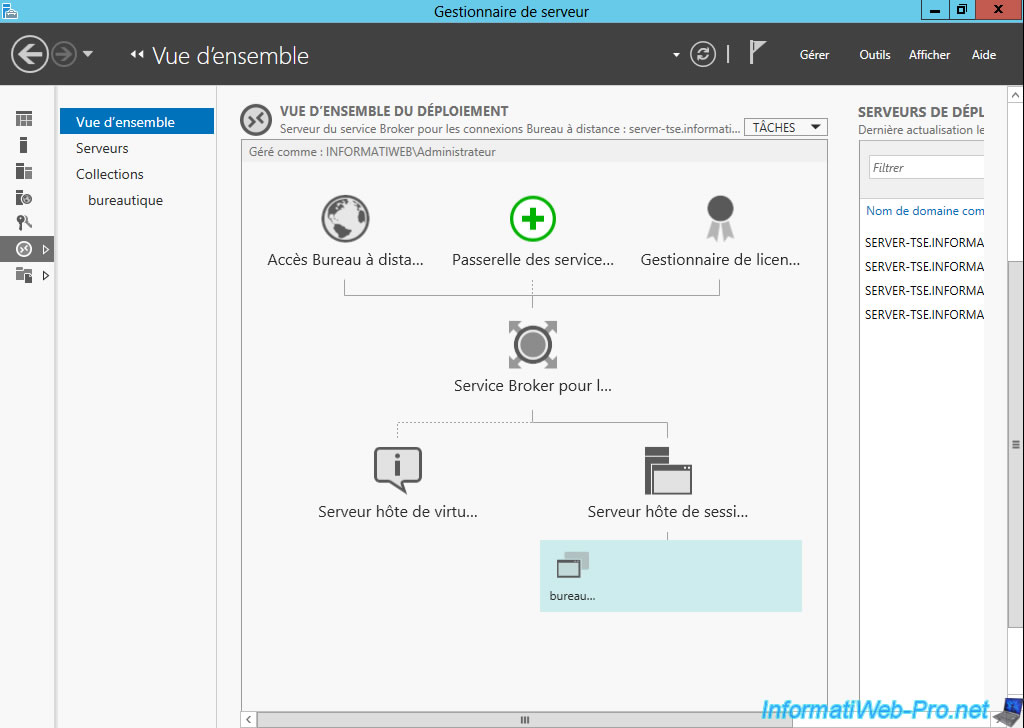
To open the License Manager, go to "Tools -> Terminal Services -> Remote Desktop Licensing Manager.
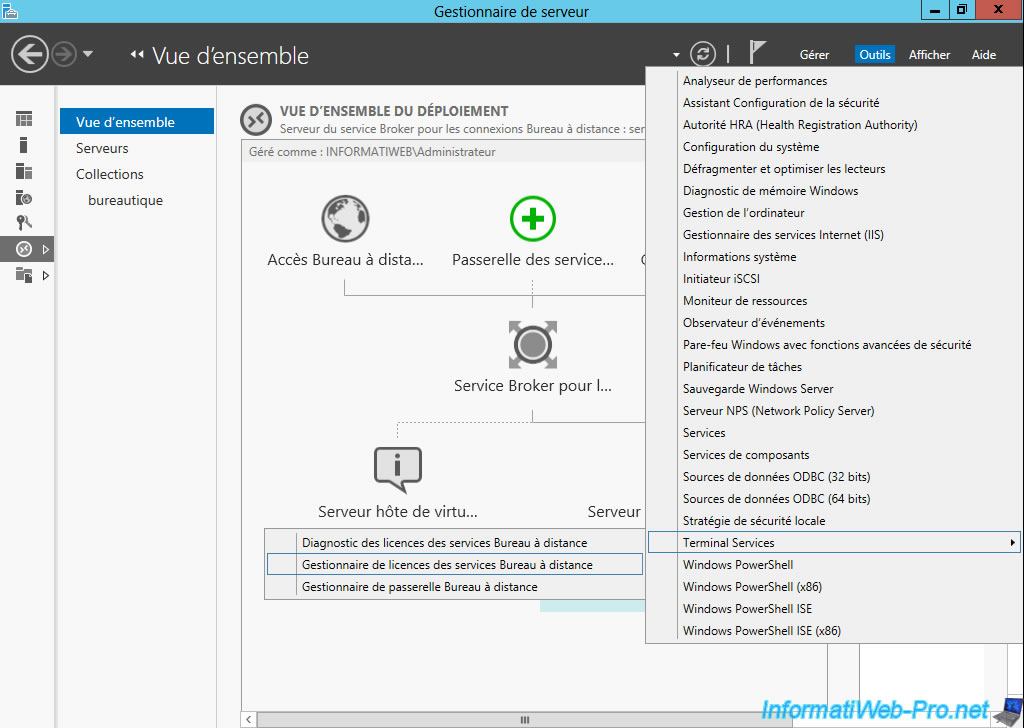
By default, the licenses server is not activated. You will need to activate it for free to insert the volume licensing you have purchased.
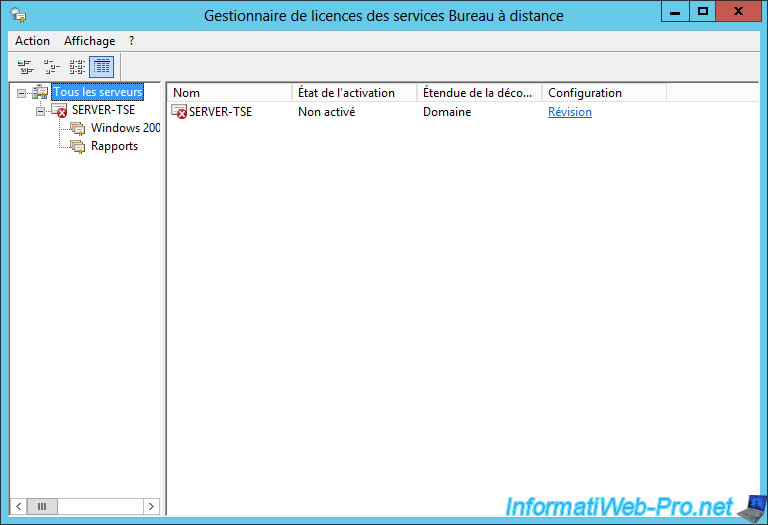
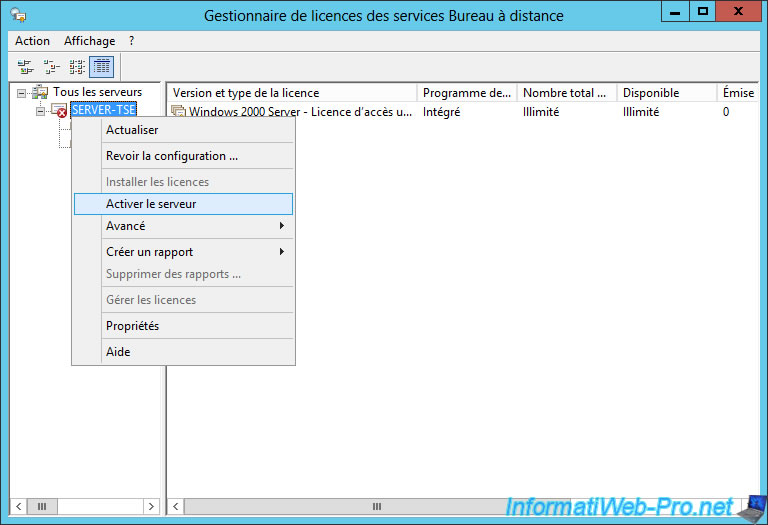
For this tutorial, we will activate our server (because it's free and it's an evaluation version of Windows Server 2012).
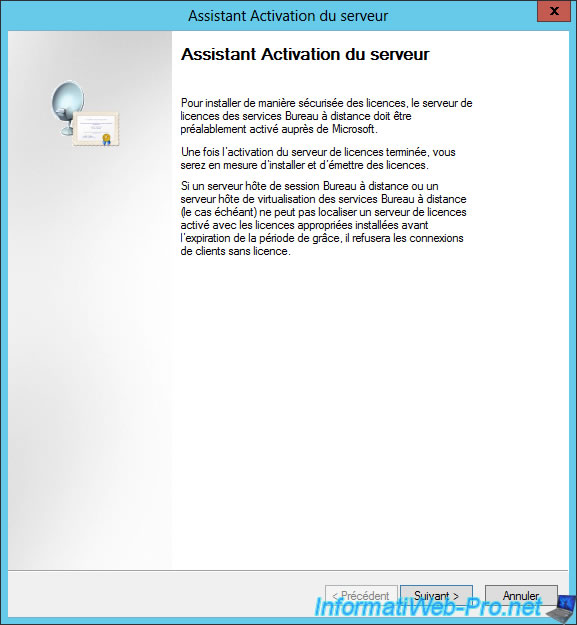
Server Activation Wizard appears.
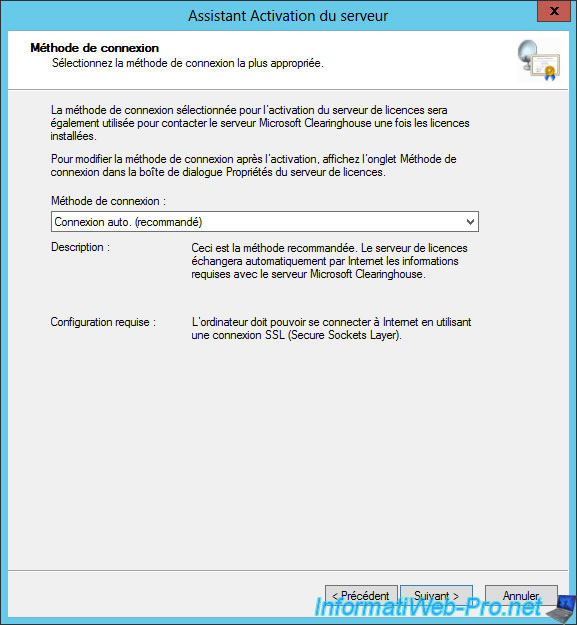
To activate your licenses server, either you go through the automatic method, or you go through the Microsoft website.
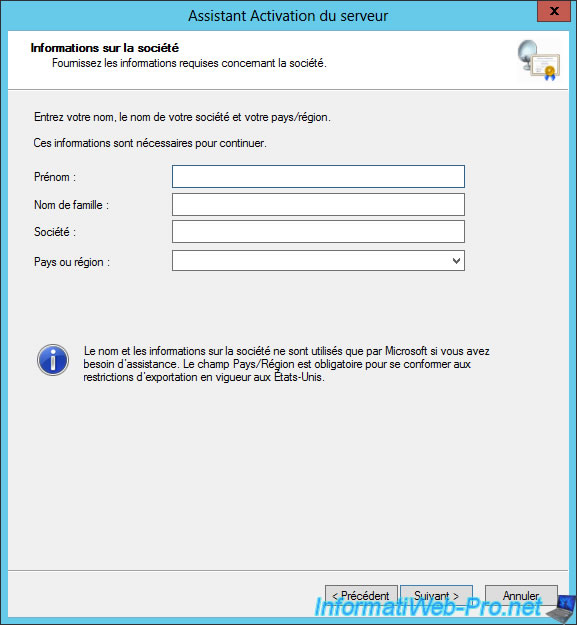
Enter the necessary information.
Then, you will have another page with other optional information to fulfill.
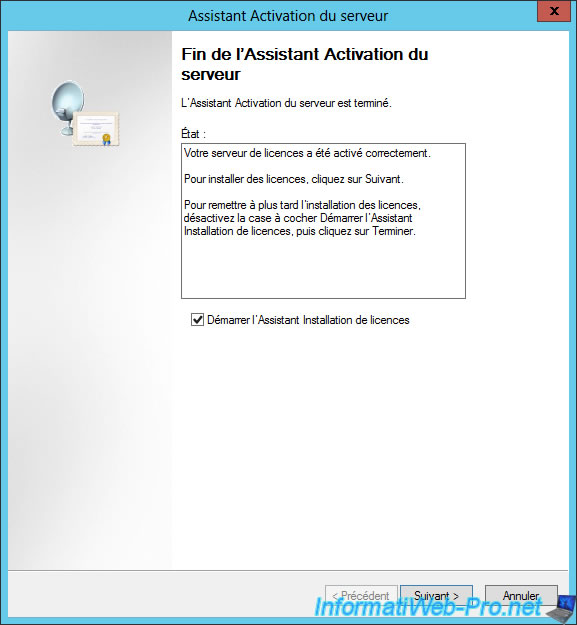
The licenses server is activated. To add licenses (also known as CAL), leave the box "Start Install Licenses Wizard" checked and click "Next."
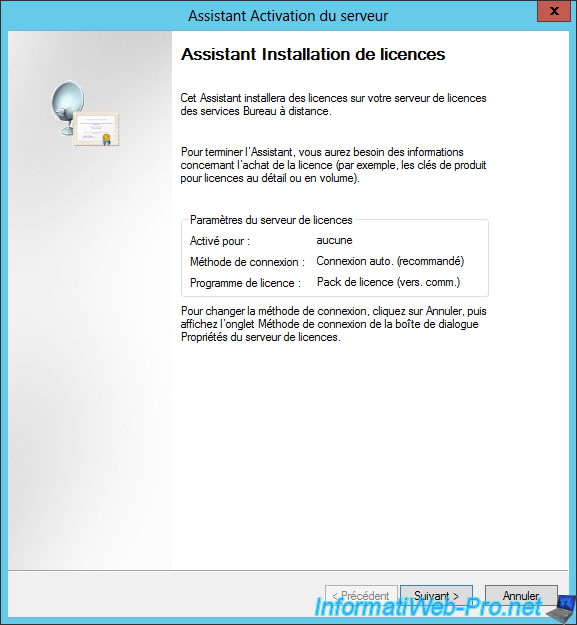
The license installation wizard appears.
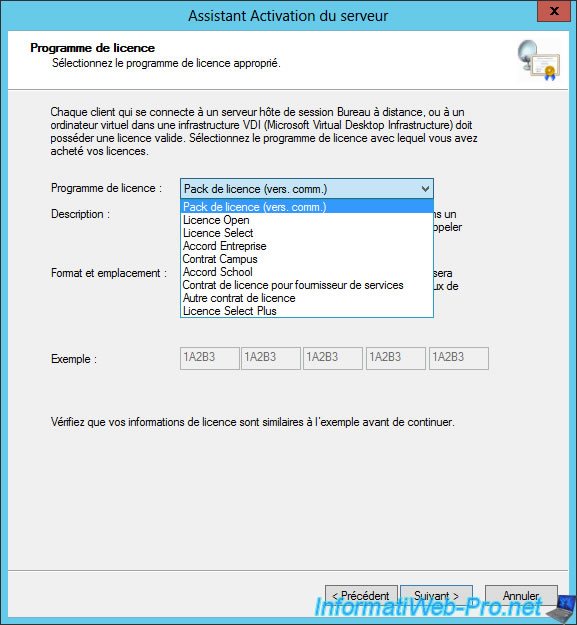
Select the appropriate license program.
Then, enter your licenses.
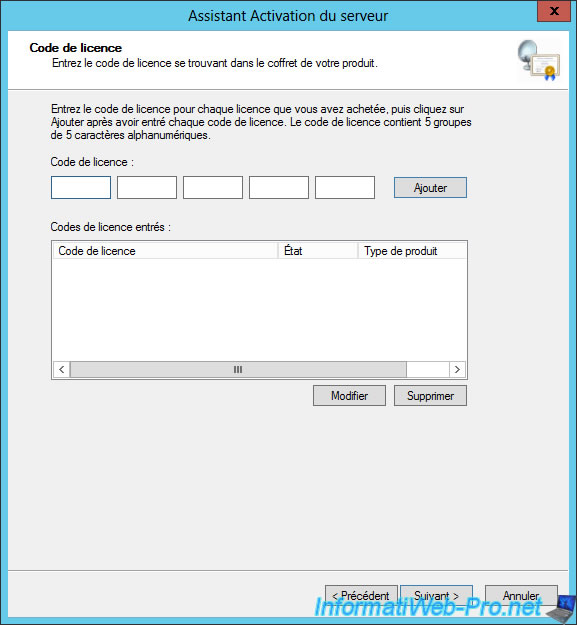
Because we did not buy licenses, we can not go further in this section.
However, we advise you to inquire about licenses to use for "Terminal Server" services (RemoteApp, Remote Desktop, remote desktops based on virtual desktops, remote desktop session-based, ...). For now, you can access the programs and remote desktops in unlimited so legally. But after the 120 days (the grace period) it will not be possible, unless you have purchased and added the necessary licenses in the license manager.
The grace period of 120 days, allows you to test this "Terminal Server" solution in a real way, as well as troubleshooting when the licenses server fails.
In speaking of breakdowns, we advise you to allocate your licenses on different licenses servers to avoid that all users are locked at the same time. A minimum of two licenses servers is recommended.
Finally, never duplicate licenses on these two servers. If you use multiple license servers, you must distribute the licenses and not duplicate them. If you duplicate them, you risk having problems with Microsoft and you may exceed the limit permitted by the number of licences stored on your licenses server.
Share this tutorial
To see also
-
Windows Server 9/3/2014
WS 2012 - TSE - RemoteApp (on multiple servers)
-
Windows Server 1/13/2019
WS 2012 / 2012 R2 / 2016 - RDS - Configure user profile disks (UPD)
-
Windows Server 12/29/2018
WS 2012 / 2012 R2 / 2016 - RDS - Deploy a RDS infrastructure (session-based desktops)
-
Windows Server 3/15/2019
WS 2012 / 2012 R2 / 2016 - RDS - RemoteApp distribution methods

No comment