- Windows Server
- 16 February 2019 at 12:56 UTC
-

In business, it happens that your client (the company where you are going to install this RDS solution) wants to customize a minimum the interface of the solution that you put in place for them to more or less match the colors of the company .
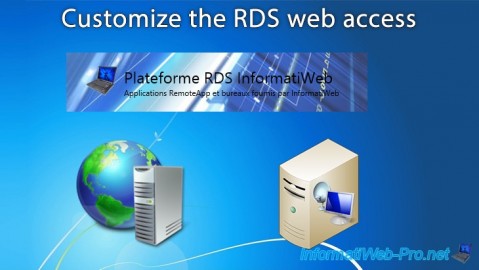
In this tutorial, we will show you how to change the images, as well as the title and description of this web access to customize this RDS web access.
We will also show you how to enable the option to change your password from this web access and how to access it.
- Change images of the web access
- Change the text of the web access
- Add an option to change the password
1. Change images of the web access
By default, the Remote Desktop web access looks like this.
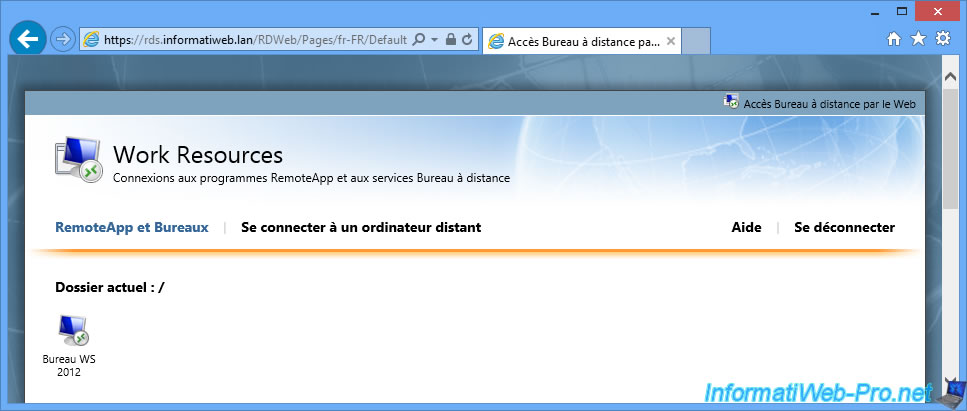
To customize this web access, you must first find the folder that contains the pages and other files of this web access.
Since this is a website, you will find this information through the Internet Information Services (IIS) Manager.
In Internet Information Services (IIS) Manager, go to : Sites -> Default Web Site -> RDWeb.
In the right column, click Explore.
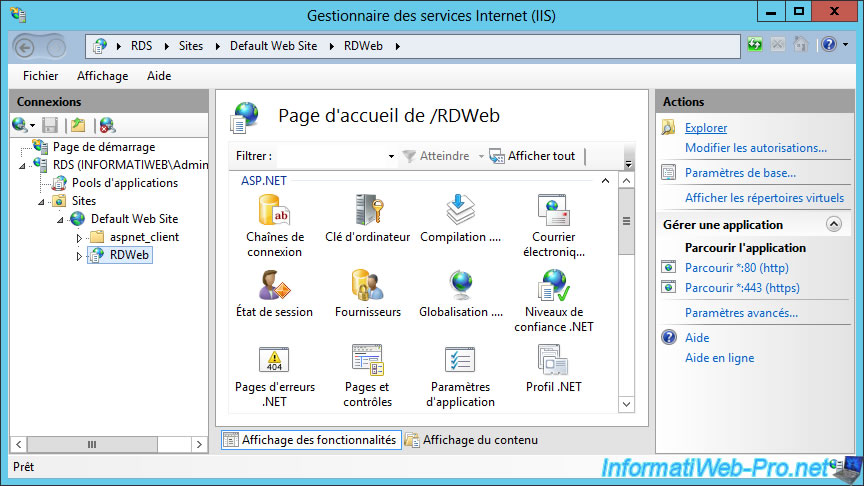
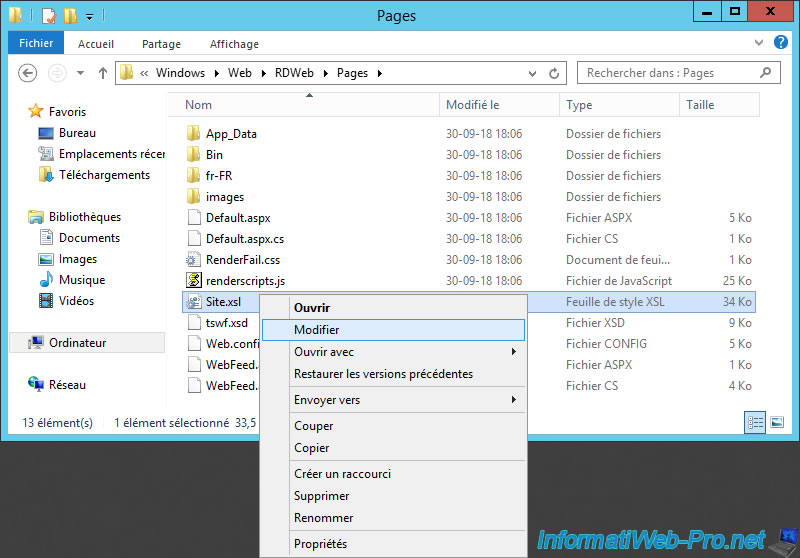
The "C:\Windows\Web\RDWeb" folder appears.
In the "Pages" folder, open the "Site.xsl" file by right-clicking "Edit" on it.
In this file, you will find the location of the banner (which corresponds to the light blue image displayed in the background and having a size of 900x90 pixels).
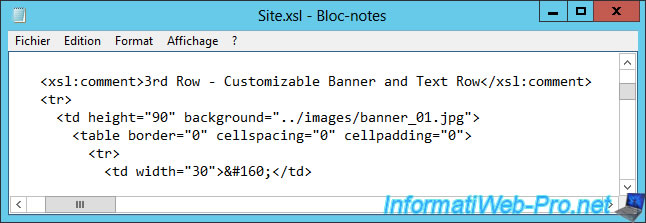
In this file, you will also find the location of the logo in 48x48 pixels format displayed on the left of the "Work Resources" title.
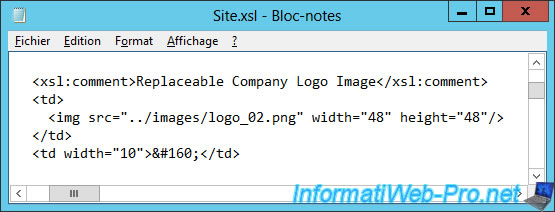
Finally, you can also find the small icon in 16x16 pixels format at the top right of the page (where is the "RD Web Access" link).
![]()
To change these images, you have 2 possibilities :
- rename the original files and replace them with yours : banner_01.jpg, logo_02.png and logo_01.png
- or add your images in the subfolder "images" and change the name of the files to load in the "Site.xsl" file
Note : if you try to edit the "Site.xsl" file with Notepad and Windows Server doesn't allow you to save the file with the same name, you will need to restart the notepad as an administrator.
Thus, you will have the right to edit this file.
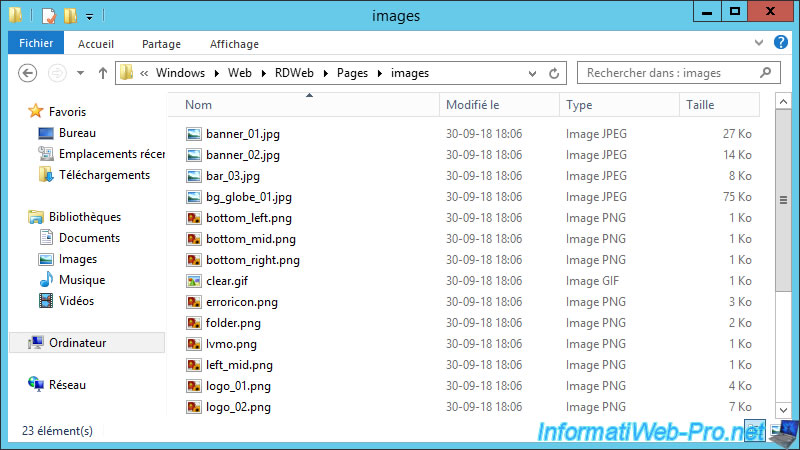
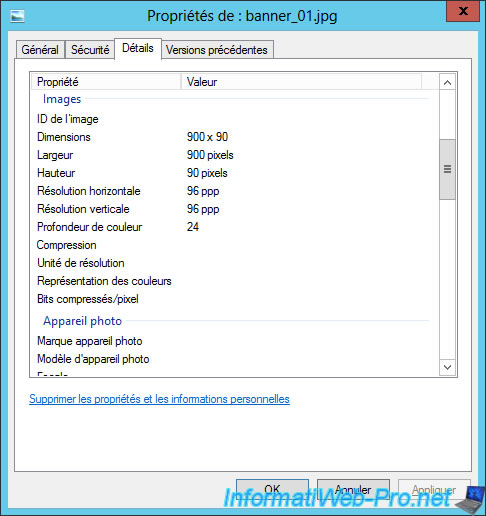
If you want to edit other images, right-click "Properties" on the file you want to edit and go to the "Details" tab.
In the information displayed in this tab, you will find the original dimensions of the desired image.
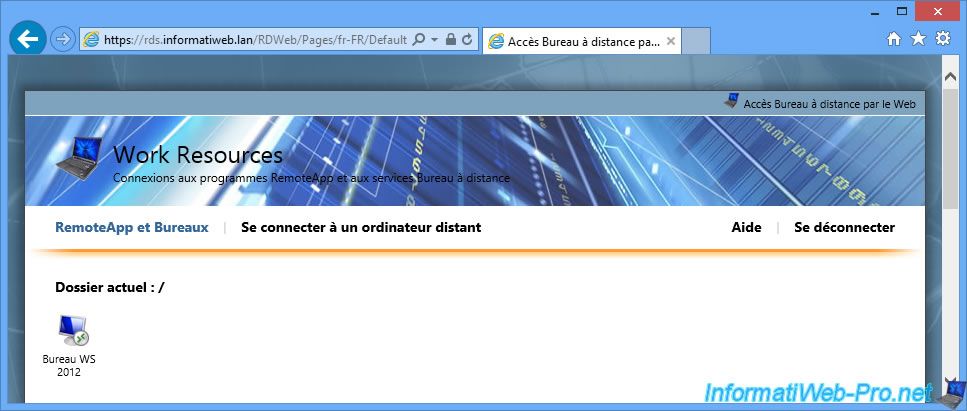
In our case, we created images in the colors of our InformatiWeb website and renamed them to use the same file names.
Thus, after an update (F5) of the page, here is what it gives.
2. Change the text of the web access
To change the text displayed in this web access, you will need to edit this file : C:\Windows\Web\RDWeb\Pages\fr-FR\RDWAStrings.xml
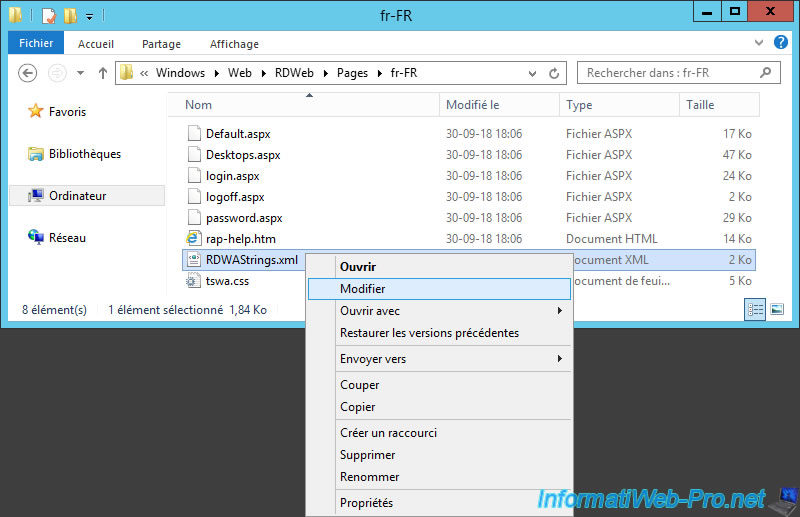
As you can see, this xml file contains the list of the sentences displayed in the RD Web Access.
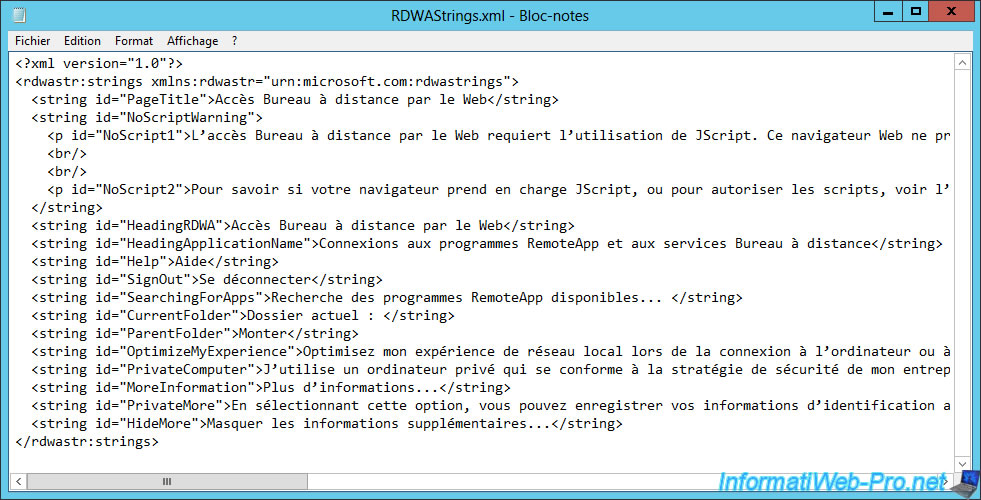
In our case, we have edited the sentences whose IDs are :
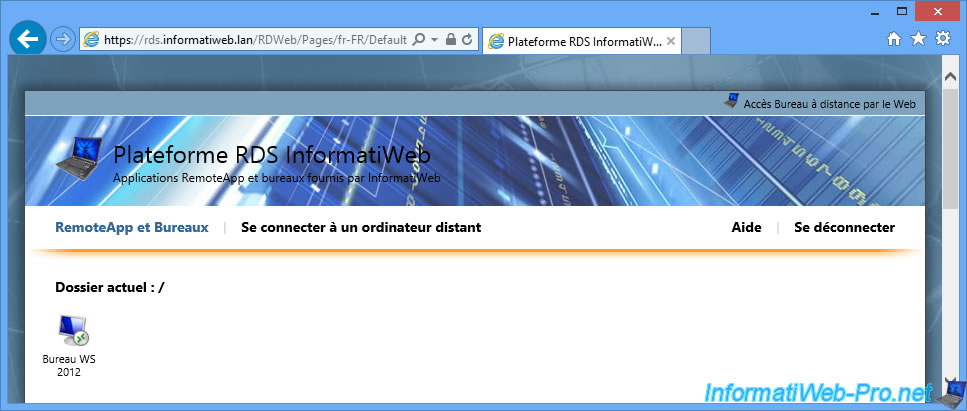
- PageTitle : InformatiWeb RDS platform
- HeadingApplicationName : RemoteApp applications and desktops provided by InformatiWeb
Note that the sentence whose ID is "PageTitle" is the name of the tab and not the "Work Resources" title of the page.
To change this title, you must run a PowerShell command prompt and import the "RemoteDesktop" module :
PowerShell
Import-Module RemoteDesktop
Then, use this command :
PowerShell
Set-RDWorkspace -Name "InformatiWeb RDS platform" -ConnectionBroker rds.informatiweb.lan

Which gives this.
3. Add an option to change the password
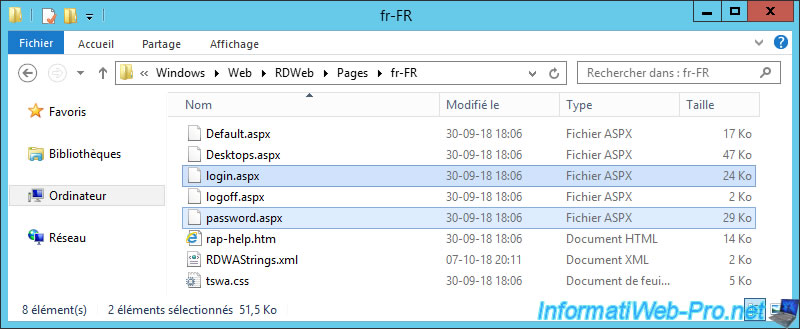
Finally, if you are a little observant, you may have noticed the presence of these files : login.aspx and password.aspx
In the Internet Information Services (IIS) Manager, go to : Sites -> Default Web Site -> RDWeb -> Pages -> Application settings.
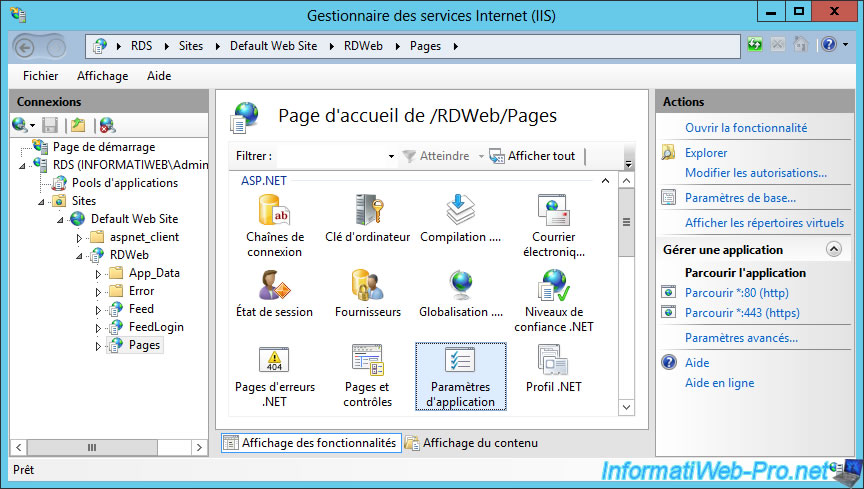
In the list of available application settings, you will find this one : PasswordChangeEnabled.
This parameter allows you to authorize or not the modification of your password via web access.
For more information about these application settings, refer to the Customizing RD WebAccess page of the Microsoft Technet's.
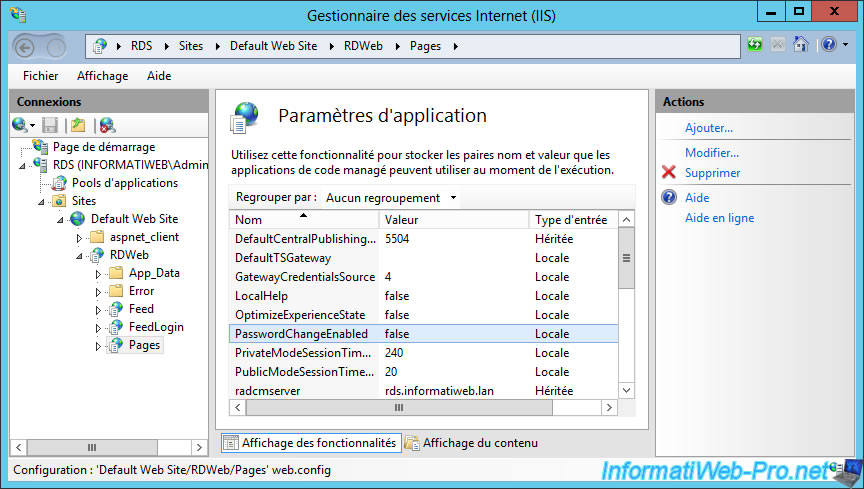
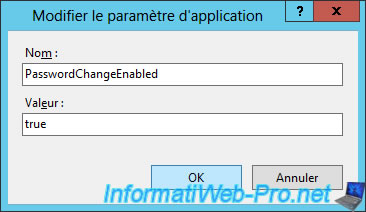
To allow the password change from the web access, specify "true" as the value instead of the default "false" value.
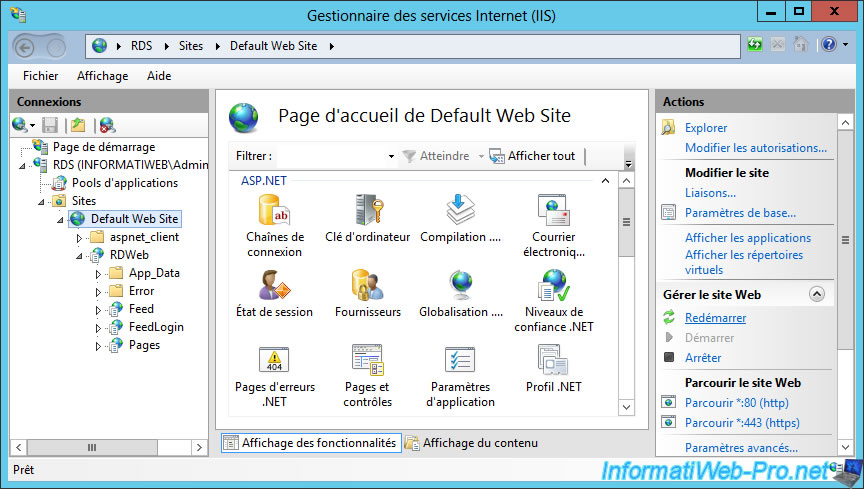
Then, restart the Default Web Site via the "Restart" option located in the right column to save this change.
Although this setting exists, no password change link will appear automatically.
You will have to add it manually by editing the appropriate file with the notepad.
Note that the notepad should be started as an administrator so that you can save the changes made in this file.
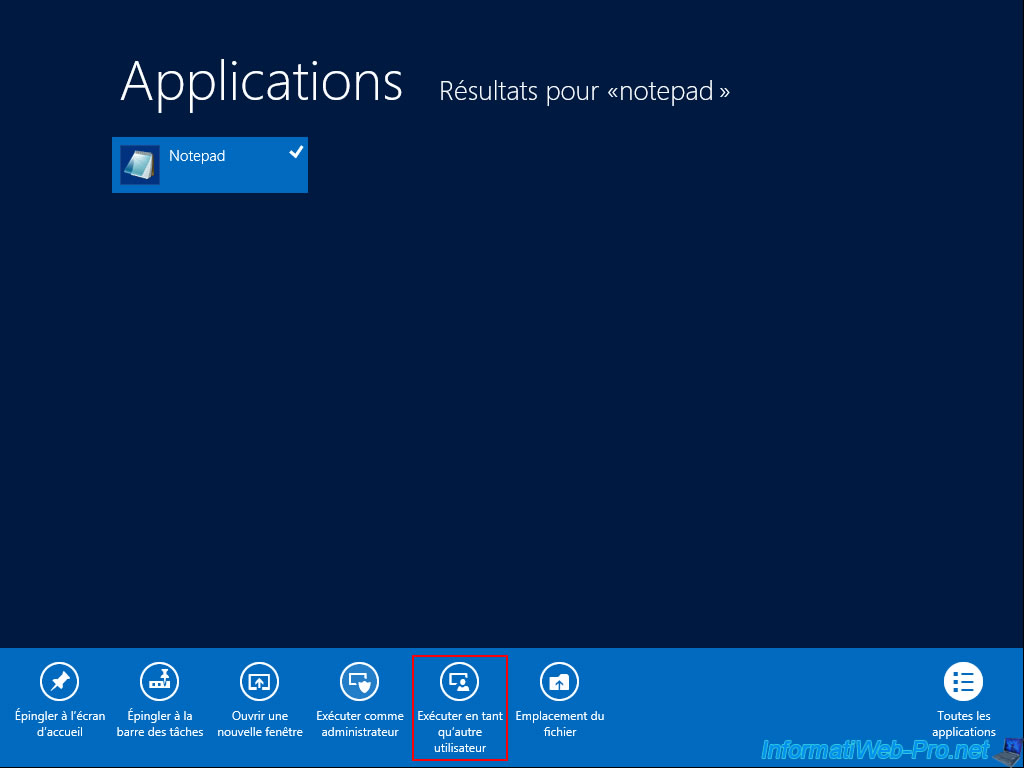
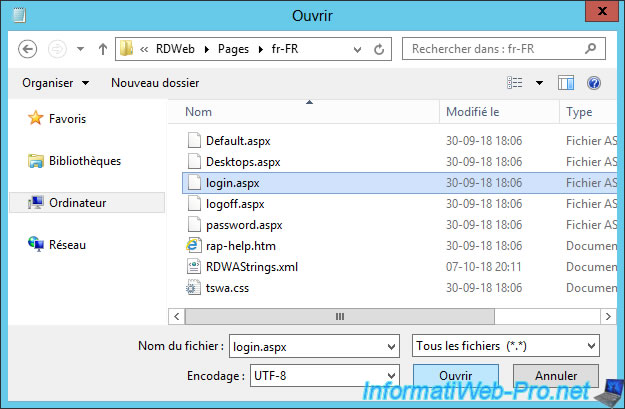
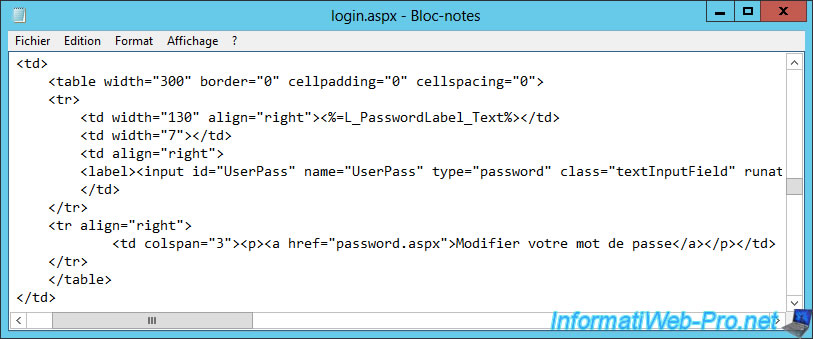
From the notepad launched as an administrator, open the "login.aspx" file.
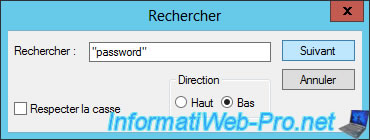
Open the search window via the "Edit -> Search" menu or via the "CTRL + F" keyboard shortcut, then look for the "password" (with the quotes) word.
Thus, you will arrive at the place where is defined the field where your user indicates his password when he connects on your RDS web access.
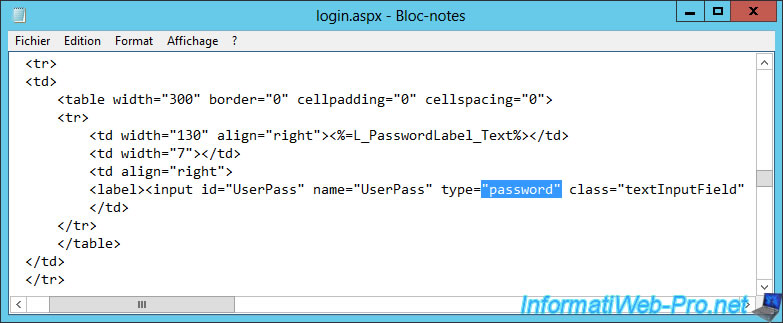
Edit this part of the file by adding that piece of HTML code to the right place, and save the changes.
Plain Text
<tr align="right">
  <td colspan="3"><p><a href="password.aspx">Change your password</a></p></td>
</tr>
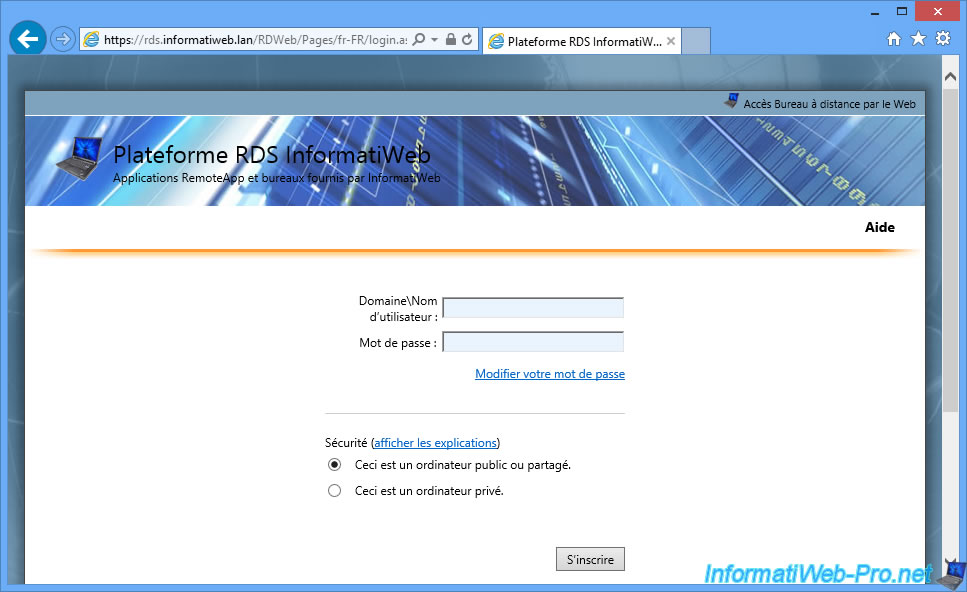
Refresh the login page of the web access and you will see a "Change your password" link below the "Password" box.
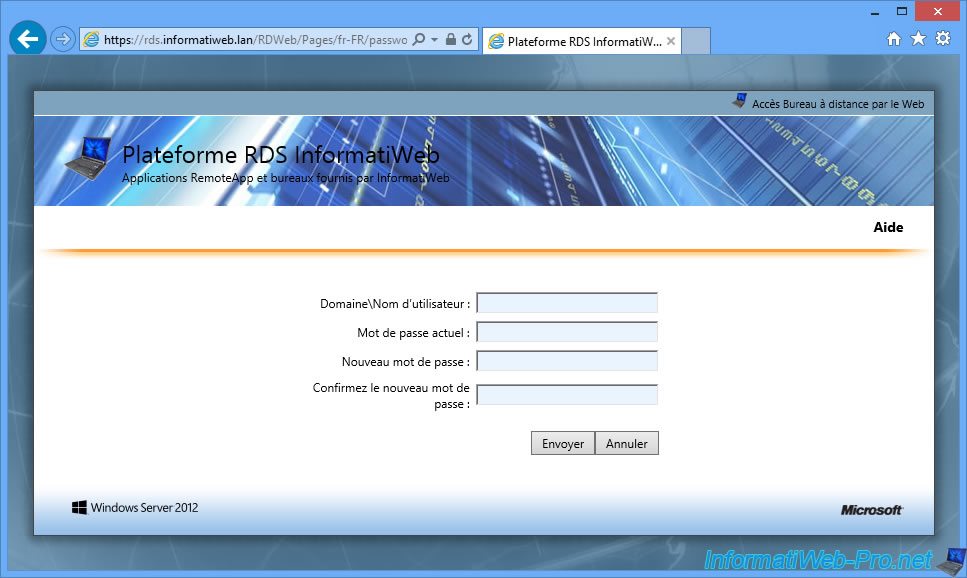
By clicking on it, you will be redirected to the "password.aspx" page which is accessible only because we have enabled the "PasswordChangeEnabled" application setting.
Share this tutorial
To see also
-
Windows Server 6/7/2019
WS 2012 / 2012 R2 - RDS - Set up HA on your RDS infrastructure
-
Windows Server 3/8/2019
WS 2012 / 2012 R2 / 2016 - RDS - Access RemoteApp via a modern application
-
Windows Server 4/28/2019
WS 2012 / 2012 R2 / 2016 - RDS - Attempt to unblock the session as a user
-

Windows Server 3/16/2019
WS 2012 / 2012 R2 / 2016 - RDS - Change the properties of RemoteApps

You must be logged in to post a comment