Install and configure DirectAccess on Windows Server 2012 / 2012 R2 with clients on Windows 7, 8 and 10
- Windows Server
- DirectAccess
- 12 September 2017 at 18:29 UTC
-

- 2/5

4. Installing and configuring the Active Directory
Since the installation and the configuration of an Active Directory server is quite simple.
Here are just a few important steps for configuring it for DirectAccess.
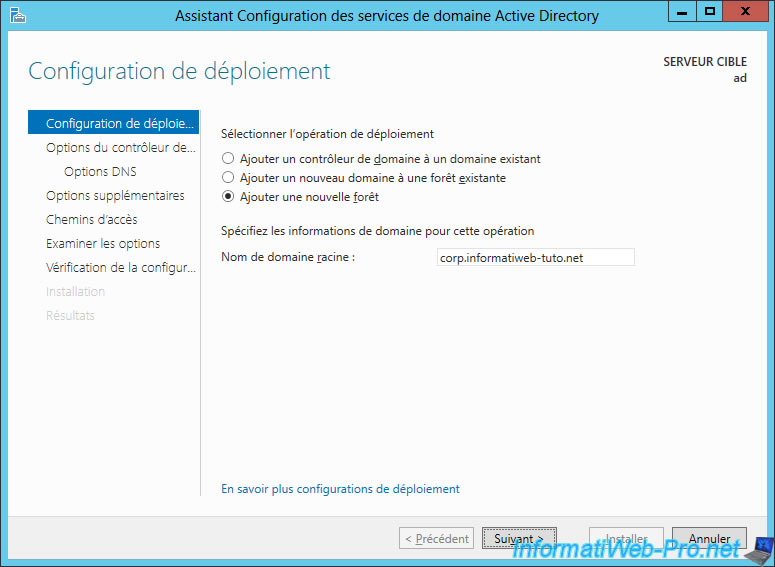
Since DirectAccess clients will connect from the outside, we will configure our Active Directory server to use a real domain that we own on the Internet.
To avoid conflicts between machine names on your local network and subdomains that you would like to add on the Internet via OVH or other, we will use a subdomain of our domain.
For example : corp.informatiweb-tuto.net
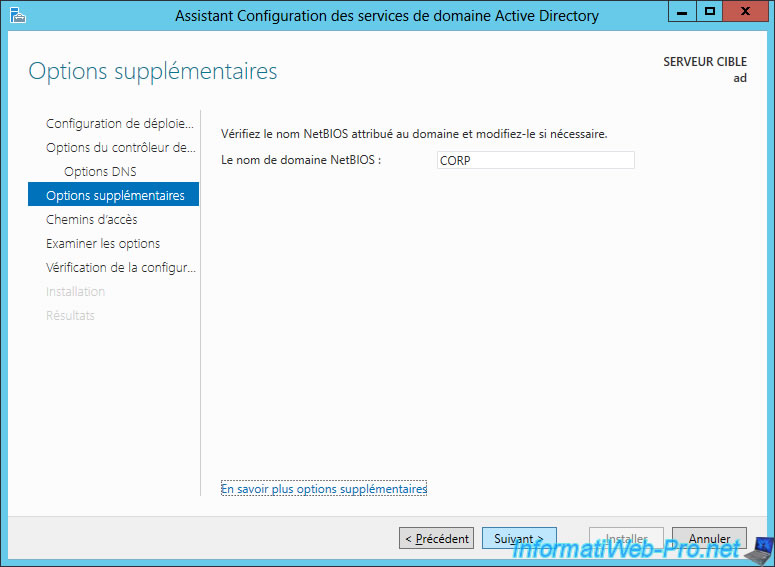
For the NETBIOS name, Windows Server will default use the name of your subdomain.
So, in our case : CORP.
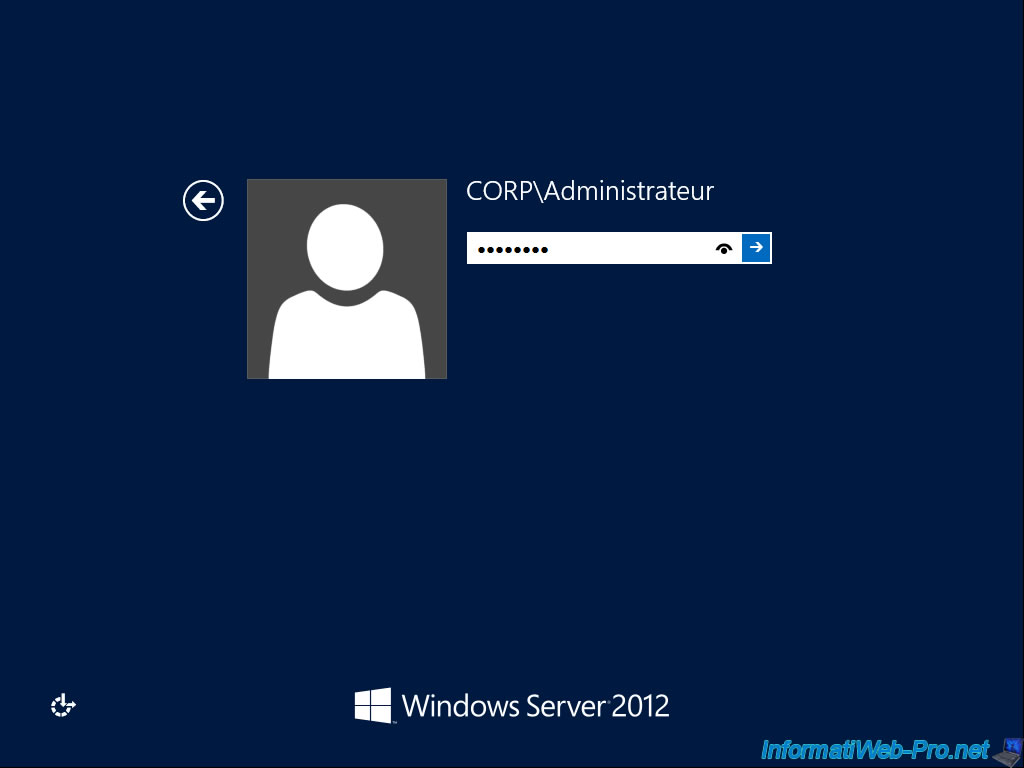
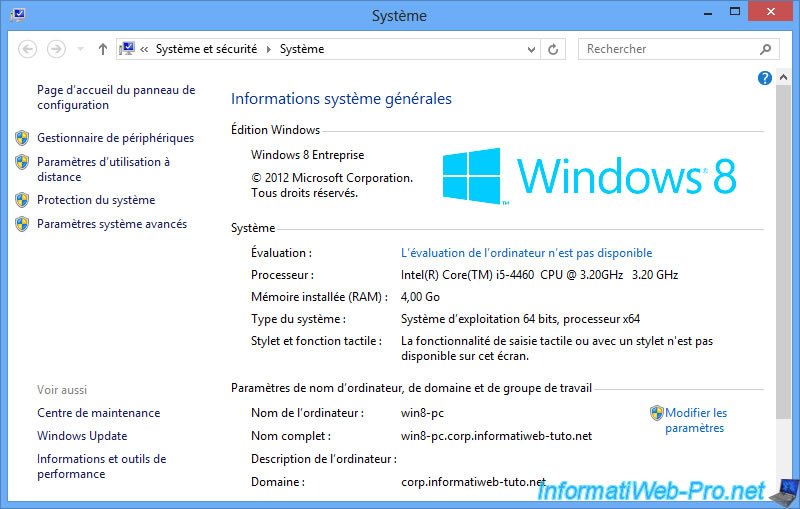
When the server restarts, log on with your domain administrator account.
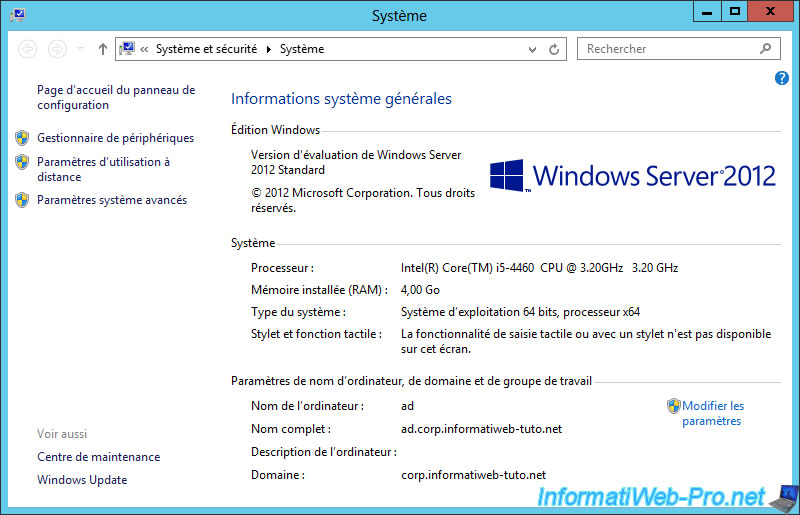
As you can see in the image below, our "ad" server is part of our domain "corp.informatiweb-tuto.net".
5. Joining machines to the Active Directory
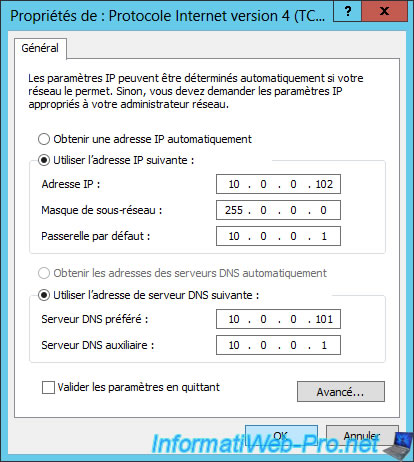
To join client machines and the 2nd server to your Active Directory server, be sure to specify the address of your Active Directory server as the preferred DNS server.
Then, for the 2nd server (which will be the DirectAccess server), we will set it a static IP address : 10.0.0.102
Then, we will join our DirectAccess server and our client machines to this domain : corp.informatiweb-tuto.net
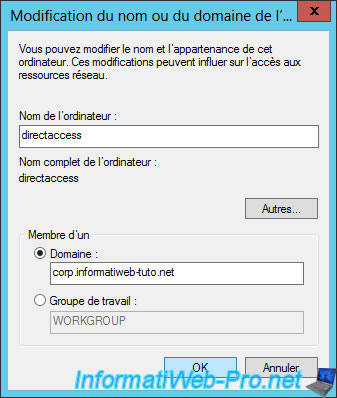
Once joined to the domain, our DirectAccess server will have as domain name : directaccess.corp.informatiweb-tuto.net

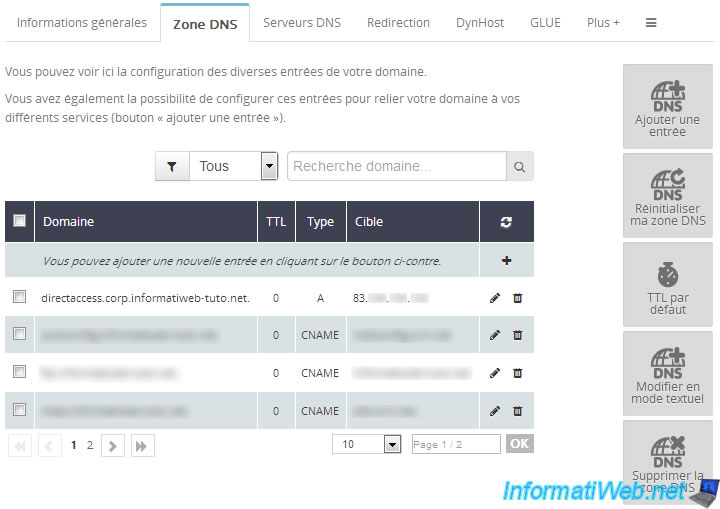
To enable clients to connect from the outside, you will need to create a "directaccess.corp" subdomain on your domain (in our case : informatiweb-tuto.net).
To do this, log into your account on the site of your web host (OVH, LWS, Gandi, ...) and go in the "DNS zone" section.
Then, create a "A" record pointing to your company's external IP address.
Note : if you also have an external IPv6 address, you can also create an AAAA record and specify the external IPv6 address of your company.
For the moment, we have joined 2 client machines:
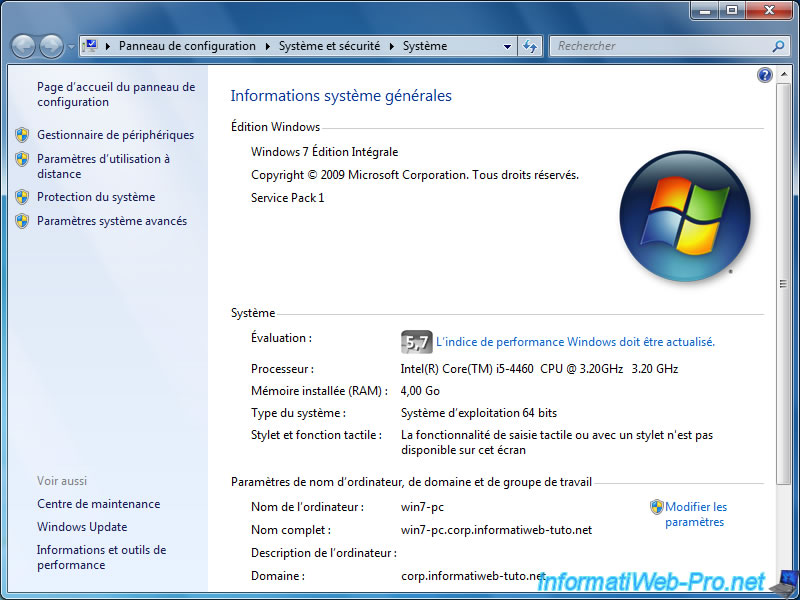
- a Windows 7 Ultimate Edition machine
- a Windows 8 Enterprise machine
6. Configuring client-server authentication
To enable clients to automatically connect to the DirectAccess server in a secure way, fully transparent manner, we will configure a client-server authentication using digital certificates. (Hence the use of a Windows Server certification authority.)
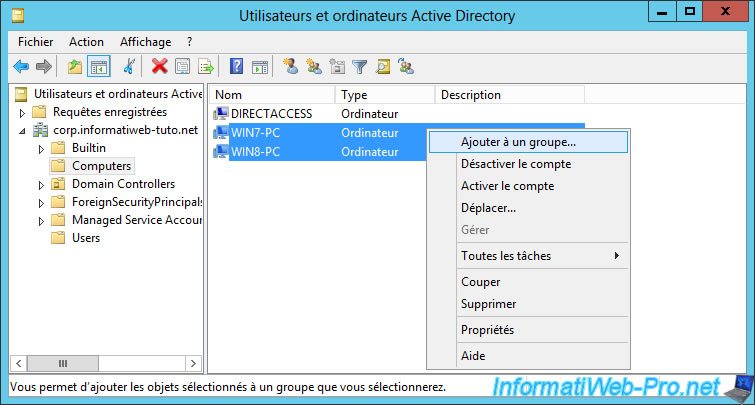
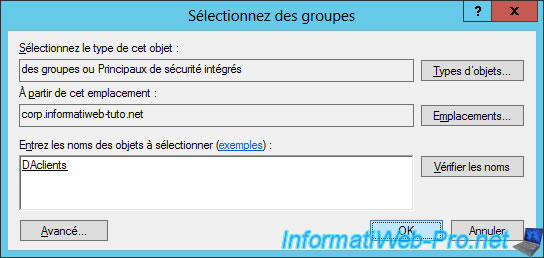
To begin, we will create a security group in which we will add the client PCs authorized to connect to the company network via DirectAccess.
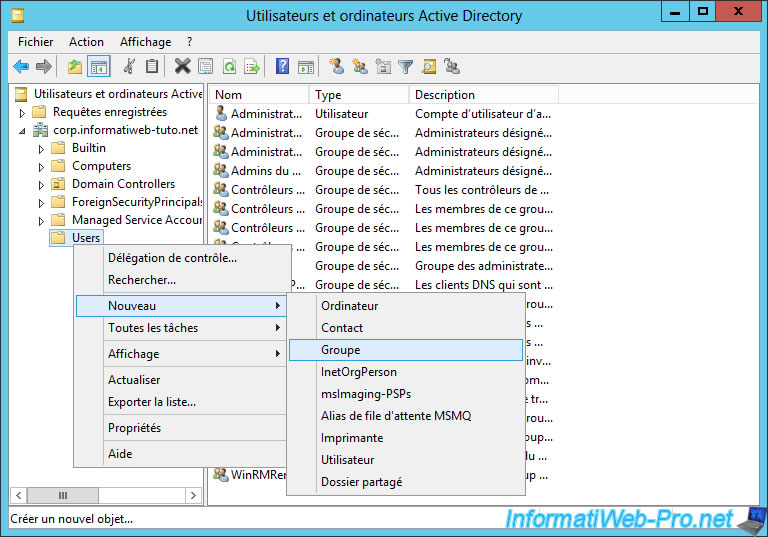
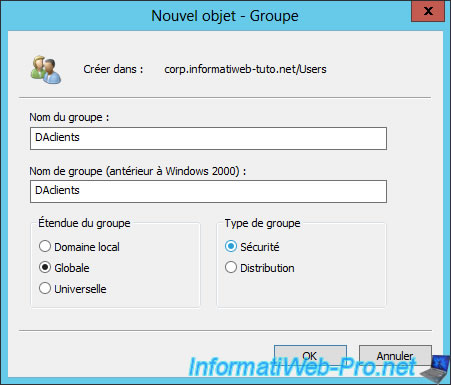
Then, add the client machines to this group.

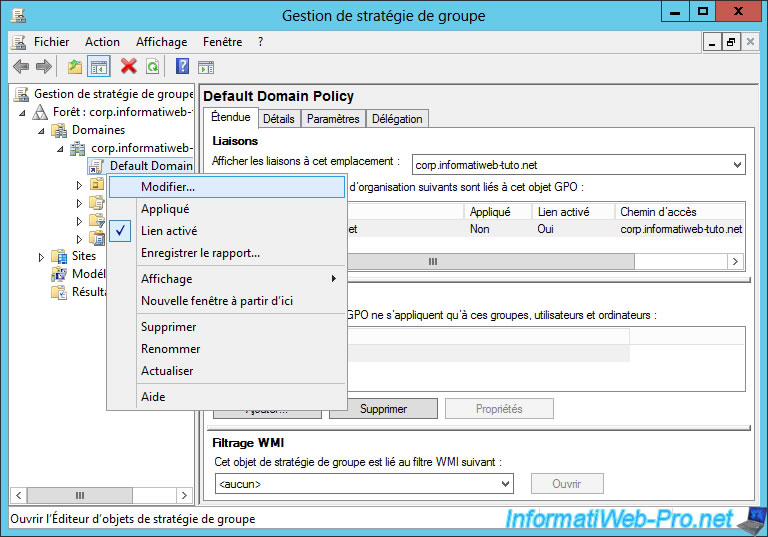
To automatically create computer certificates, we will activate a dedicated Group Policy for this purpose.
To do this, run the "Group Policy Management" program and right-click "Edit" on the "Default Domain Policy" item.
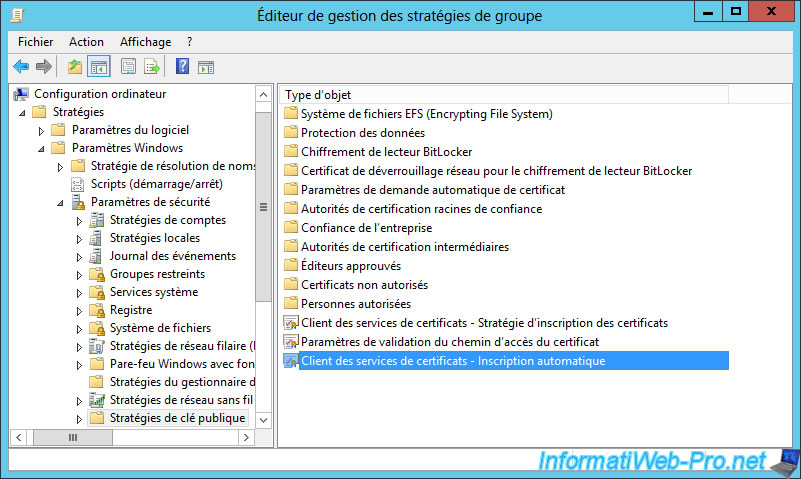
In the "Group Policy Management Editor" window that appears, go to : Computer Configuration -> Policies -> Windows Settings -> Security Settings -> Public Key Policies.
Then, double-click on "Certificate Services Client - Auto-Enrollment".
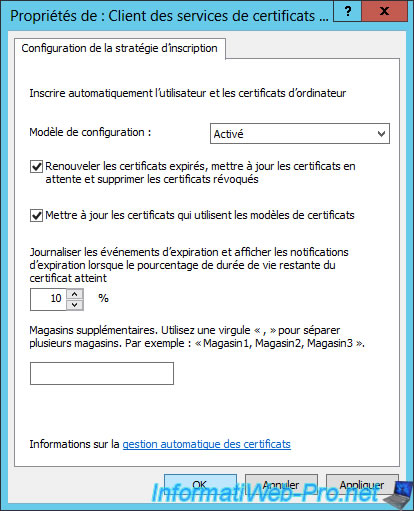
Enable this policy by selecting the "Configuration Model: Enabled" option and check the 2 boxes :
- Renew expired certificates, ...
- Update certificates ...
Click OK.
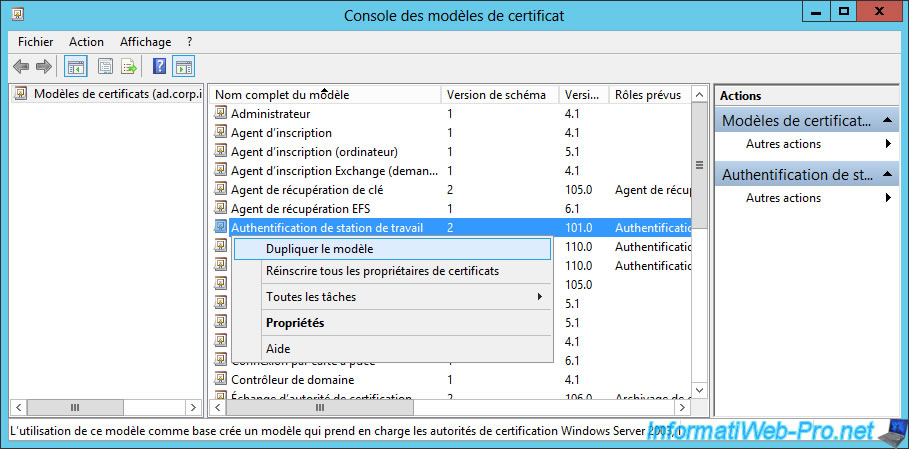
Now that the policy is enabled, run the "Certification Authority" program (or certsrv) and right-click "Manage" on the "Certificate Templates" option.
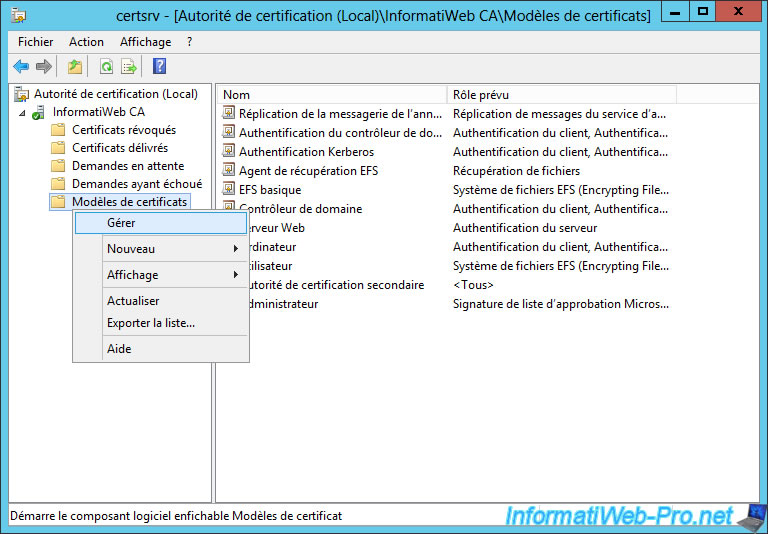
Duplicate the "Workstation Authentication" template.
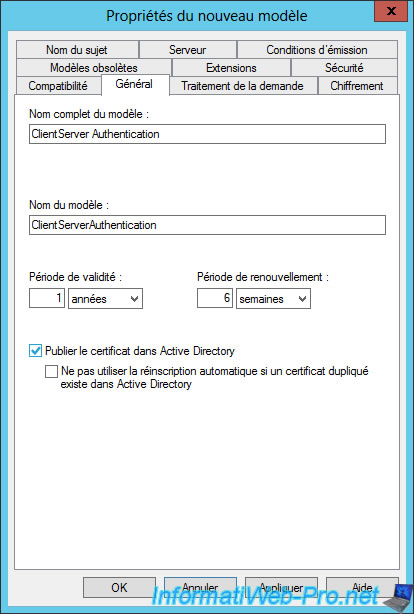
Specify "Client Server Authentication" as the model name and check the "Publish certificate in Active Directory" check box.
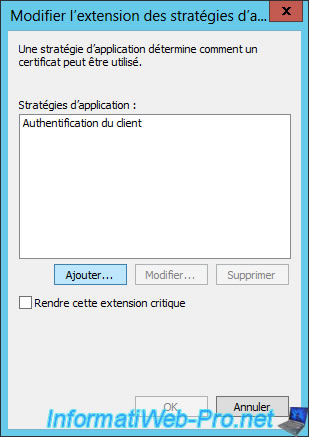
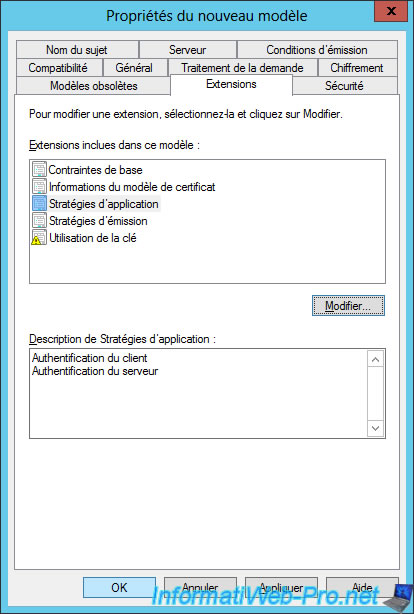
In the "Extensions" tab, choose the "Application Policies" option and click "Edit".
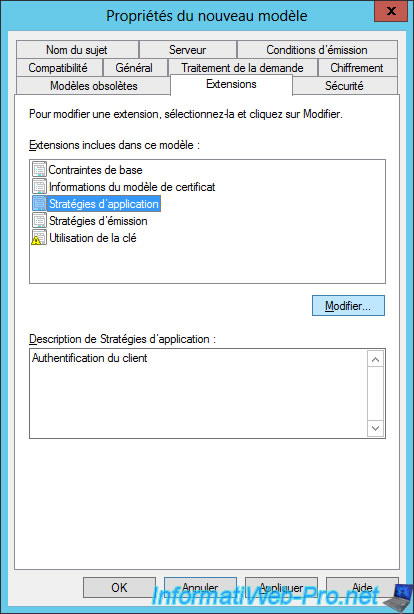
The list of application policies for this certificate template is displayed.
Click Add.
Select the "Server Authentication" policy and click OK.
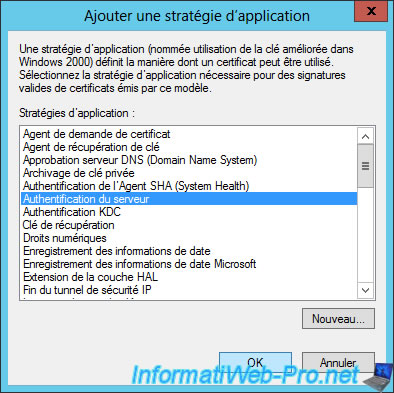
Click OK.
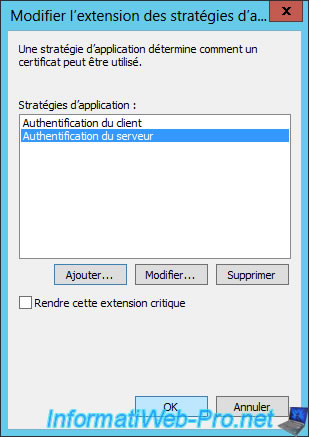
Now, this certificate template will create certificates to authenticate the client and the server.
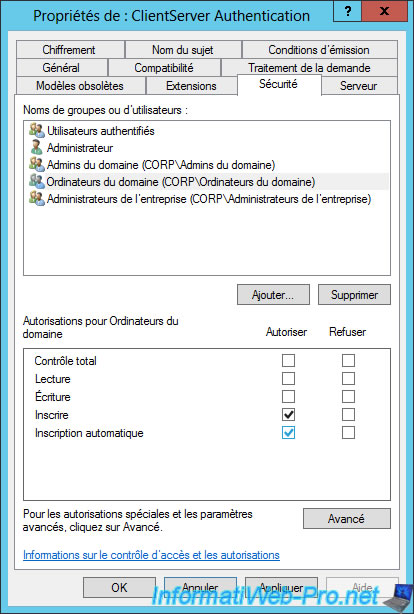
To allow client machines to create their computer certificates, you must give them the "Autoenroll" right.
To do this, go to the "Security" tab, select the "Domain Computers" group and check the "Autoenroll" box.
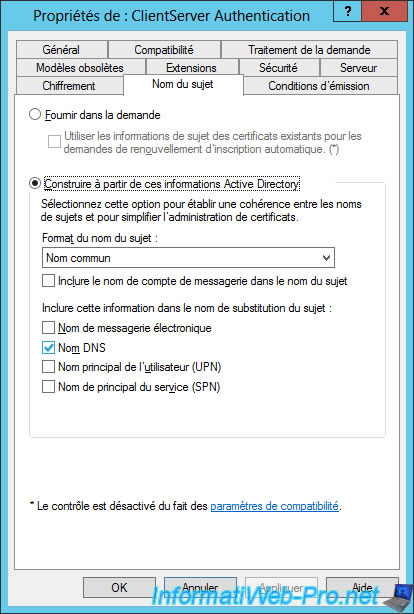
To finish, go to the "Subject Name" tab and select "Common Name" as the subject name format.
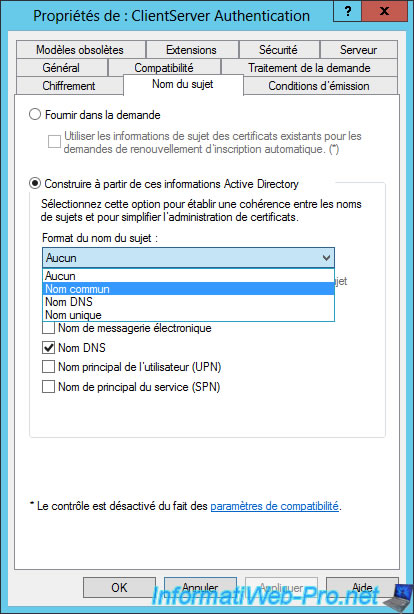
And check if the "DNS name" checkbox is checked.
To use this new certificate template, you will need to right-click on "Certificate Templates" and click "New -> Certificate Template to Issue".
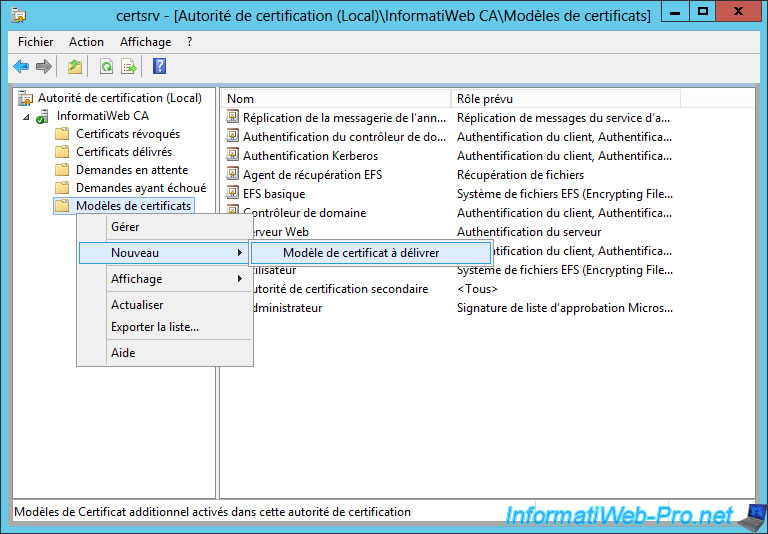
Select our new "ClientServer Authentication" certificate template and click OK.
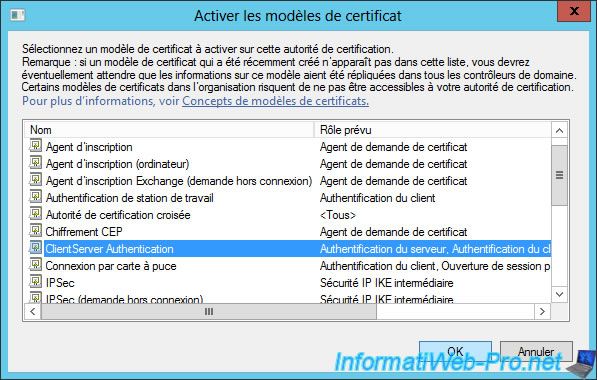
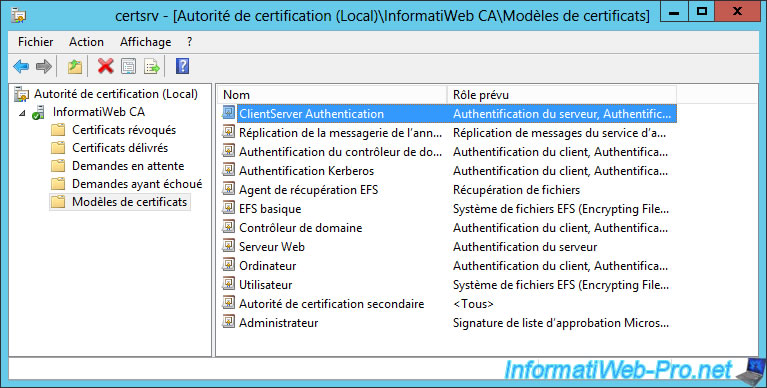
Now, it's displayed in the "Certificate Templates" list.
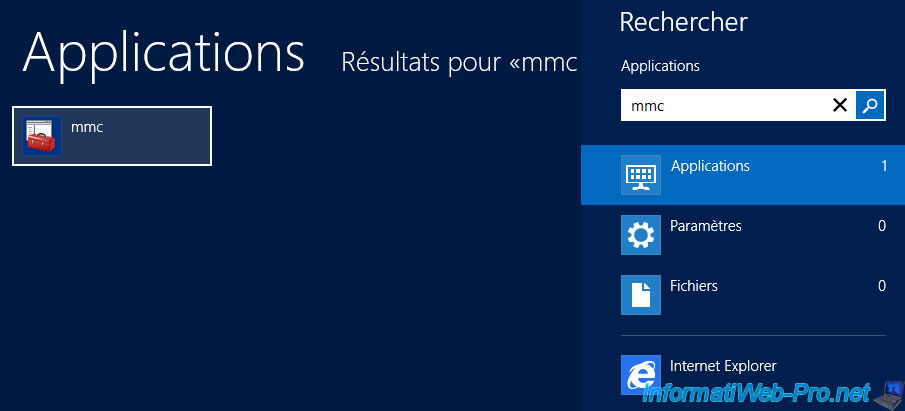
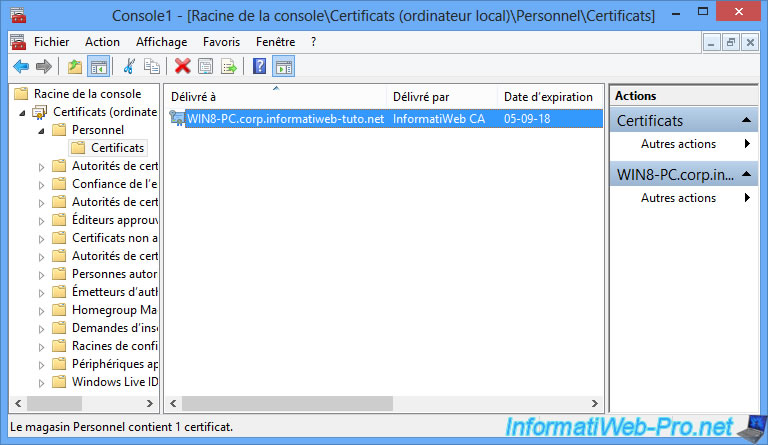
Now, restart all the PC's of the network, as well as your servers so that they each receive their computer certificate.
To verify that the network PCs have received their computer certificate, you can use the "mmc" program.
Go to "File" and click "Add/Remove Snap-in".
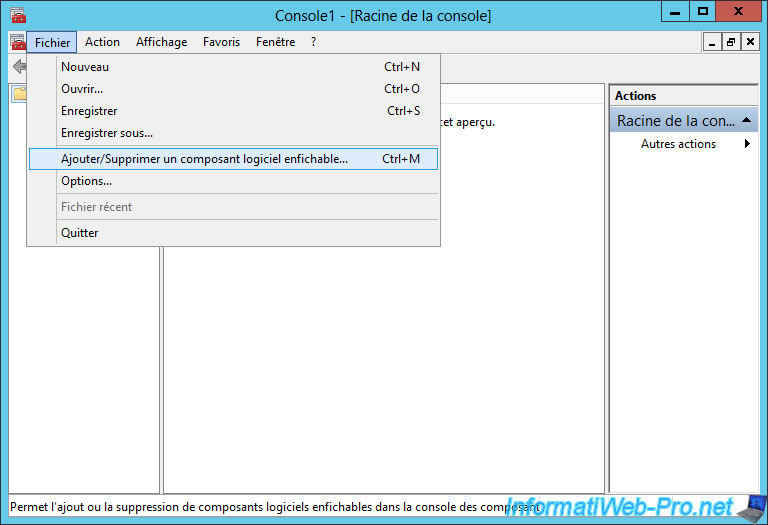
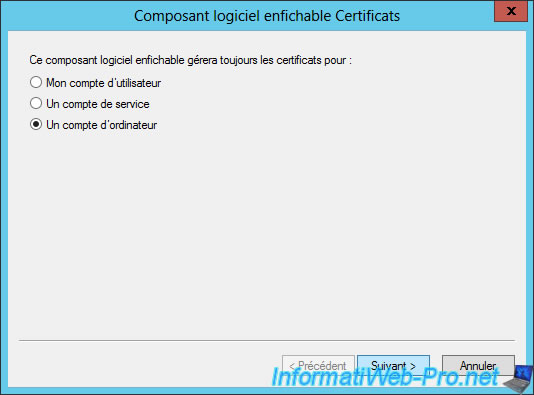
Add the "Certificates" component.

Select "Computer account".
Select "Local computer ..." and click Finish.
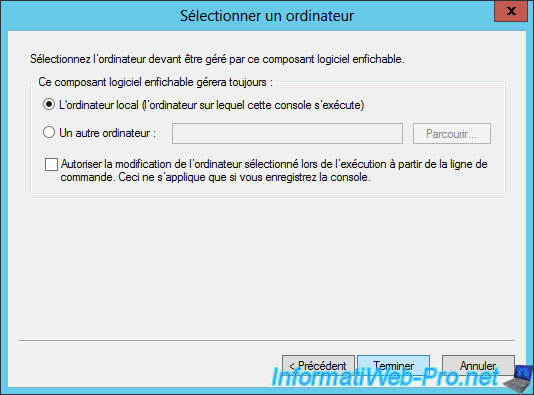
Click OK.

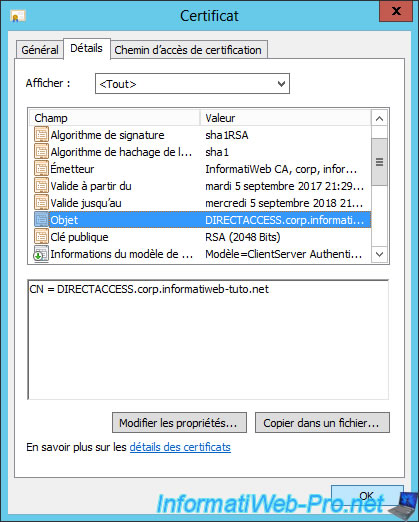
As you can see, our server has received a certificate with its "DIRECTACCESS.corp.informatiweb-tuto.net" name from our "InformatiWeb CA" certification authority.
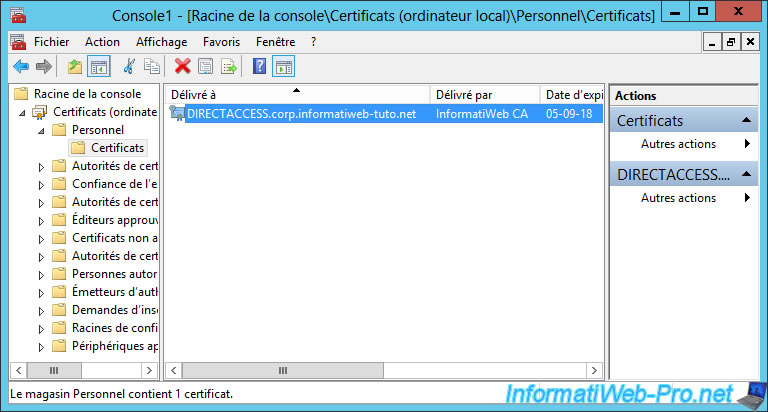
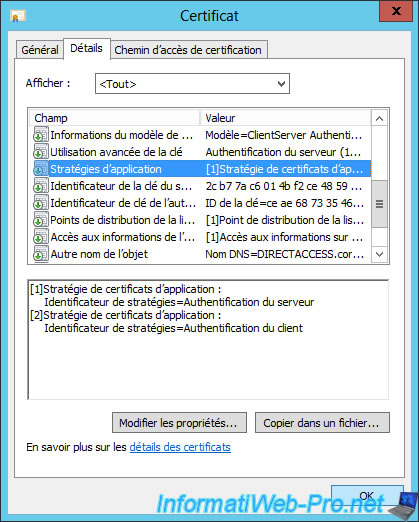
If you double-click on the certificate, you will see that it's designed for these roles :
- ensures the identity of a remote computer (server authentication)
- proves your identity to a remote computer (client authentication)

In the "Details" tab, you will find the Subject with the common name indicated in the certificate.
This common name is the FQDN of your machine.
You will also see that the application policies for certificates are :
- the server authentication
- the client authentication
For client versions of Windows, the procedure is identical.
Share this tutorial
To see also
-
Windows Server 10/15/2017
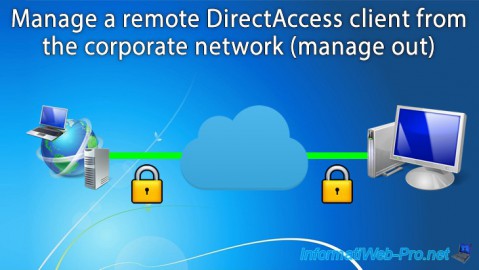
WS 2012 / 2012 R2 - DirectAccess - Manage a remote client (manage out)
-
Windows Server 10/3/2017
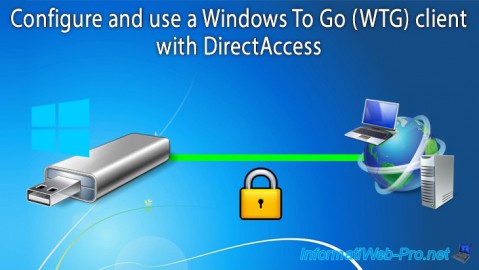
WS 2012/2012 R2 - DirectAccess - Configure a Windows To Go client
No comment