Network access modes presentation and create custom virtual networks with VMware Workstation 16 or 15
- VMware
- 03 July 2020 at 18:06 UTC
-

- 4/4
5. LAN segments (VLANs)
VMware Workstation also supports the creation and use of VLANs through the "LAN segment" option found in the settings of your VMware virtual machines.
The use of LAN segments (or VLANs) allows you to connect some virtual machines to each other, but the disadvantage is that they will not have access to the Internet.
To create a new VLAN (or LAN segment at VMware), click on the "LAN Segments" button.
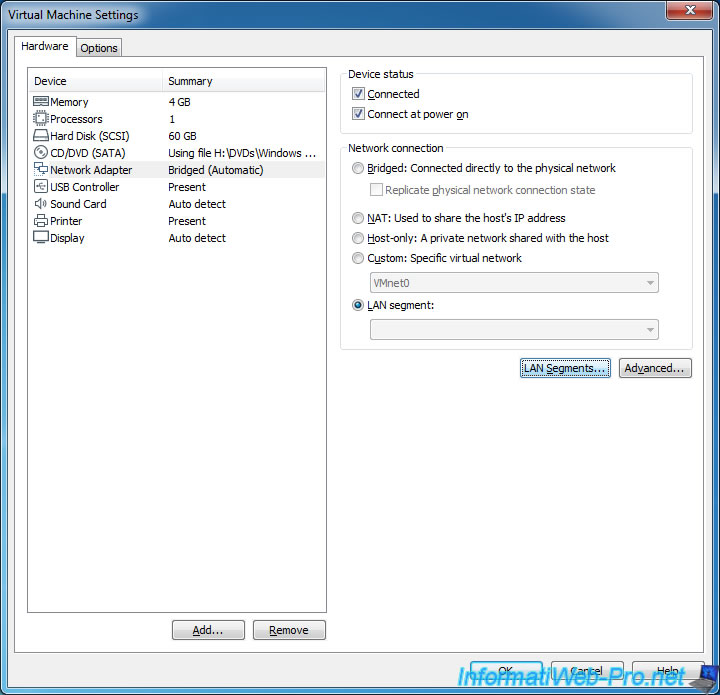
In the "Global LAN Segments" window that appears, click : Add.
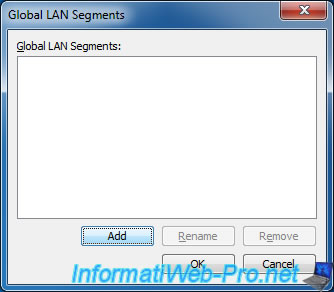
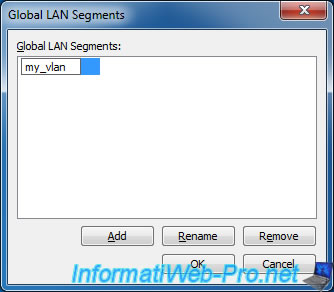
Enter a name for this new segment.
For example : my_vlan.
Then, in the "Hardware" section of your virtual machine's settings, select the desired virtual Network Adapter and select "LAN segment".
Then, in the proposed list, select the previously created LAN segment.
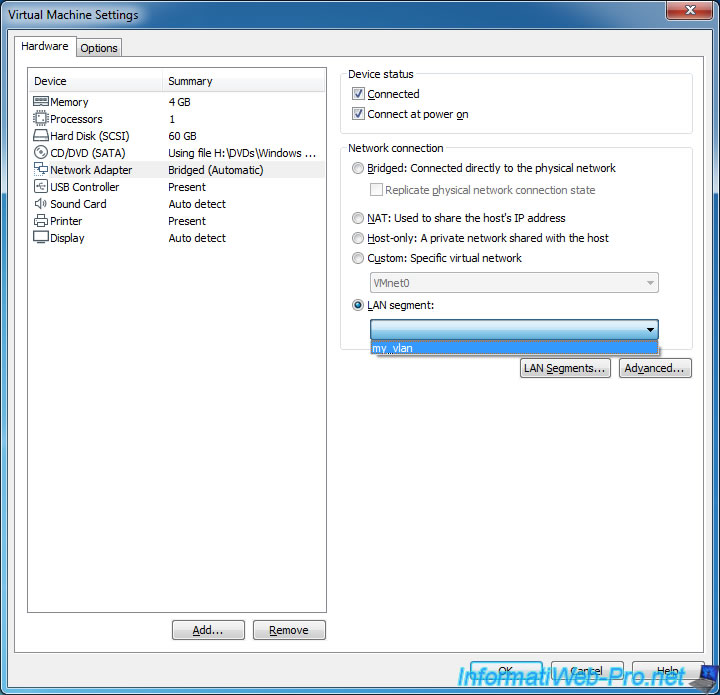
On the second virtual machine to connect with the 1st VM, select the same LAN segment.
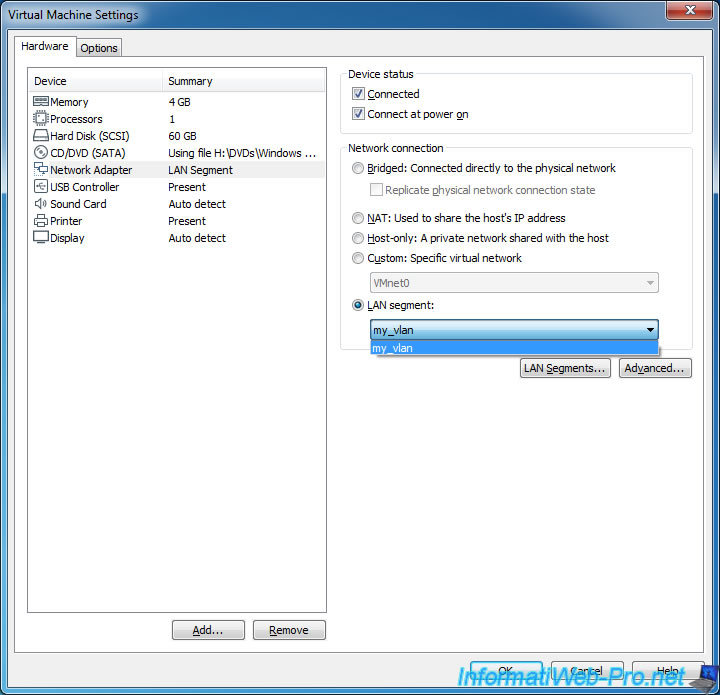
Once the desired virtual machines are connected to the same LAN segment, you will need to set static IP addresses from the guest OS to communicate with each other.
Indeed, when using the LAN segment, there is neither gateway nor DHCP server (to distribute the IP addresses).
So, you have to set a static IP address on each of them before they can communicate with each other.
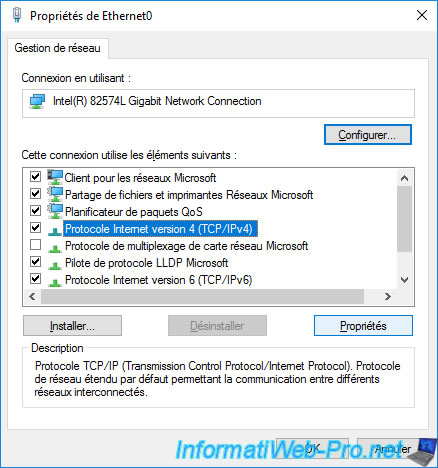
For this, from the guest OS, right-click "Properties", select the Internet Protocol Version 4 (TCP/IPv4) and click on : Properties.
Assign an IP address and a subnet mask (which will be populated automatically based on the IP address specified above) and click OK.
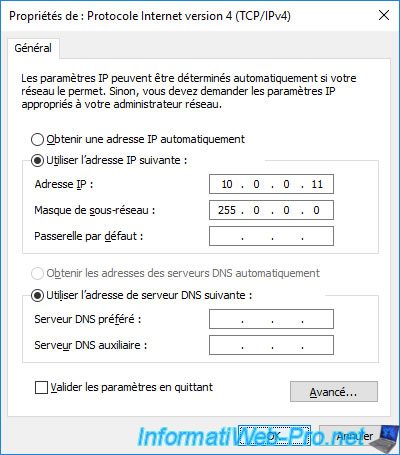
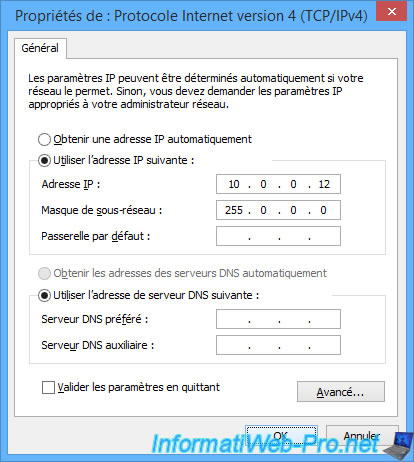
Now, since the Windows 8 virtual machine has the IP address 10.0.0.12, we will be able to access the web server of the 10.0.0.11 machine on Windows 10.
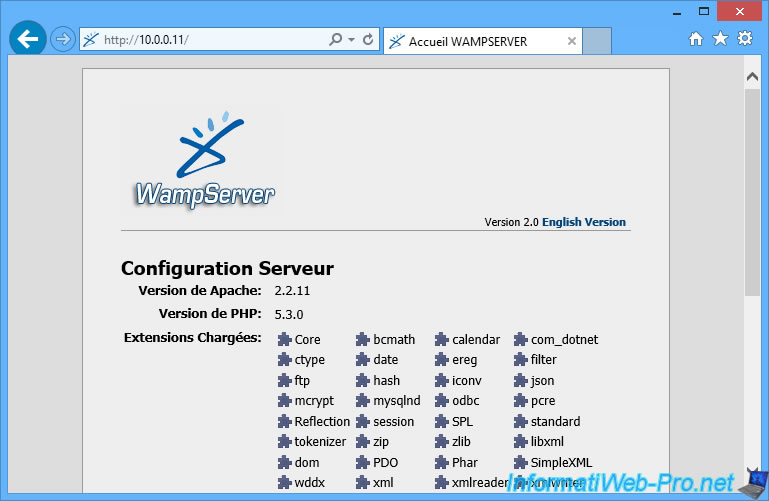
However, since there is no default gateway, you will not be able to access the Internet from these virtual machines.

6. Restore default network settings
VMware allows you to change all the necessary network settings (including those of the default networks) with Virtual Network Editor.
However, if you change many network settings through this program, you may end up crashing the virtual network of VMware Workstation by mishandling (creating a conflict, disabling an important setting, ...) .
In short, if you have a problem with the virtual network of VMware Workstation, you can easily restore the default configuration with Virtual Network Editor.
Launch it, click on "Change Settings" for this program to get administrator rights, then click : Restore Defaults.
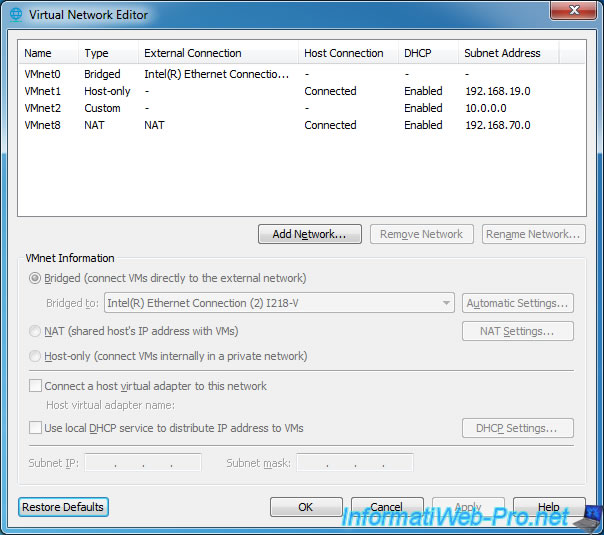
However, note that restoring the VMware Workstation default virtual network settings is only possible when all virtual machines are stopped.
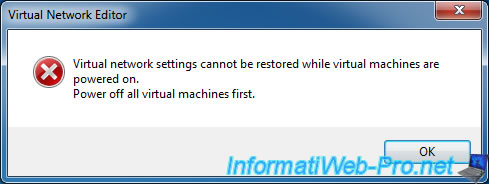
Otherwise, the following error will appear :
Plain Text
Virtual network settings cannot be restored while virtual machines are powered on.
Power off all virtual machines first.
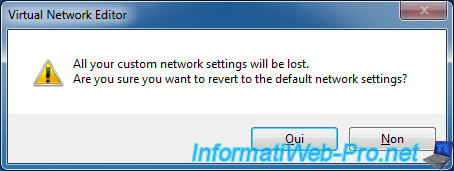
If all virtual machines are currently stopped, this warning will be displayed :
Plain Text
All your custom network settings will be lost.
Are you sure you want to revert to the default network settings?
Click Yes.
To restore the default network settings, Virtual Network Editor will uninstall the virtual network components.

Then, reinstall them cleanly.

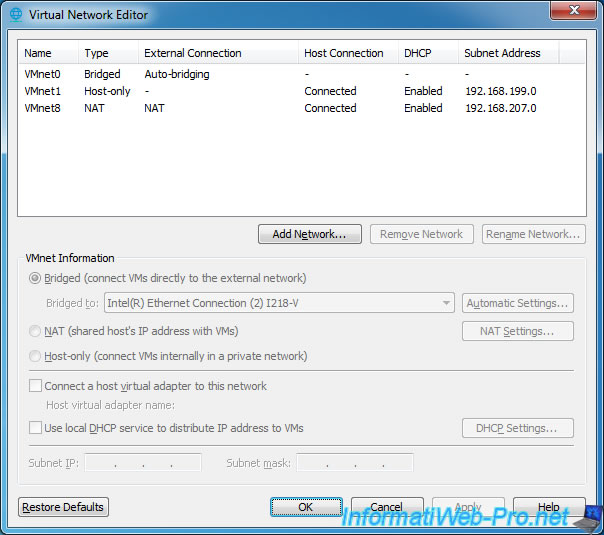
Once the network settings are restored, you will only find the original virtual networks :
- VMnet0 : Bridged
- VMnet1 : Host-only
- VMnet8 : NAT
7. Preserve, export, and import network settings (since version 15.5)
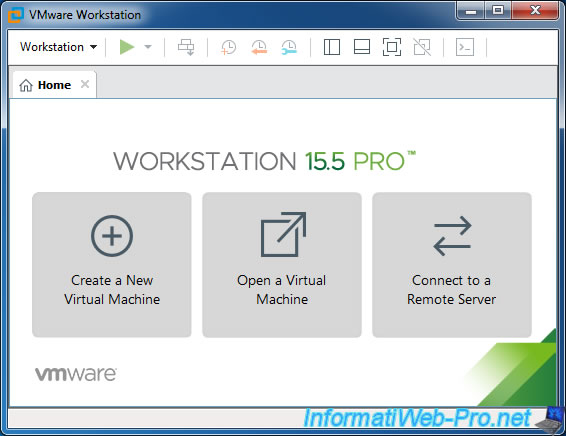
Since VMware Workstation Pro v15.5, your custom network settings will be preserved during VMware Workstation Pro updates.
You will also be able to export and import your network settings (on the same computer only), makes some tests, and then easily restore previous custom network settings in case of problems (for example).
Official sources :
- VMworld 2019: Fusion and Workstation Announcements
- Importing and Exporting Network Settings on Windows Host
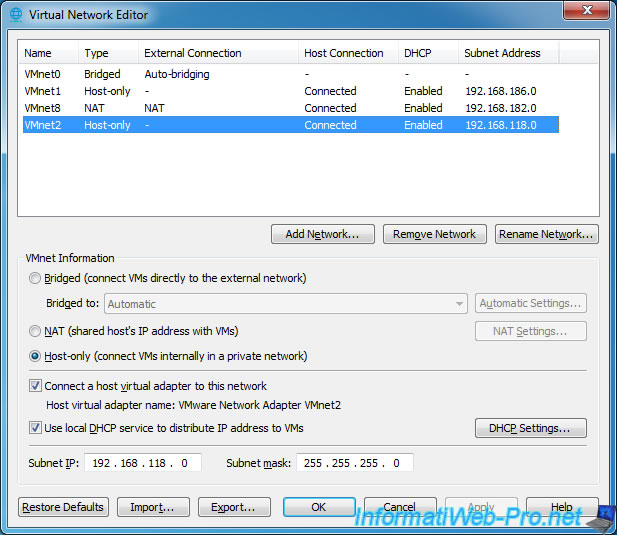
As expected, 2 buttons "Import" and "Export" appeared in the Virtual Network Editor.
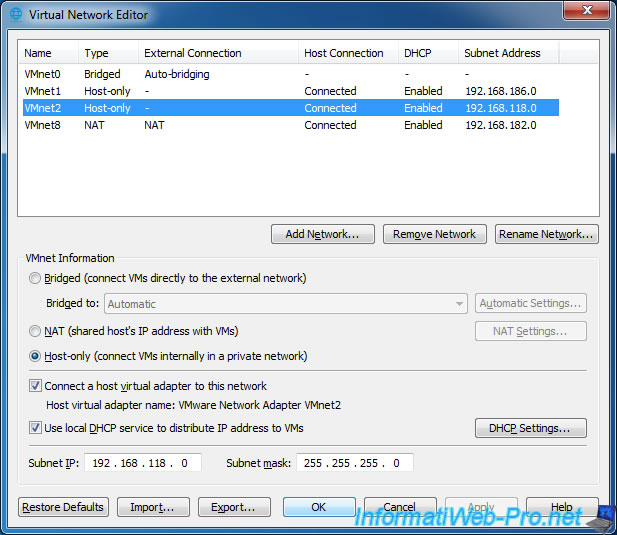
For this tutorial, we created a new VMnet2 virtual network in Host-only and applied the changes.
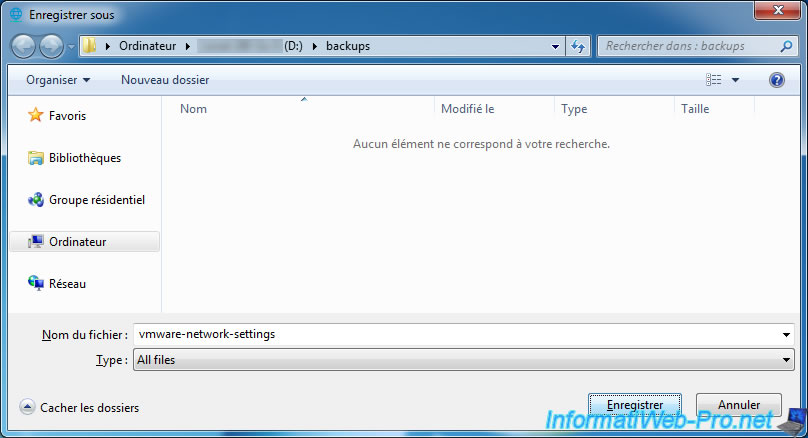
Now, click Export to export the custom configuration of your VMware virtual networks.
Note : you don't need to specify an extension for this file, because the format of this file is unknown. For example, you can't read it correctly with the notepad.
We delete the previously created VMnet2 virtual network and save the changes.
Then, we restore the previous network settings by clicking Import.
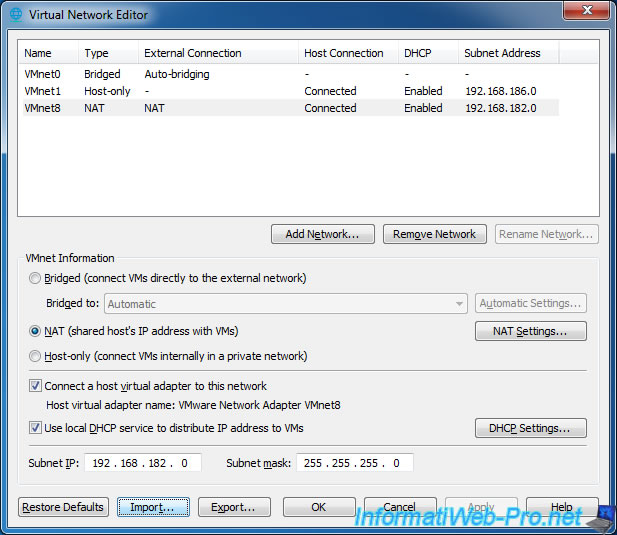
Select the file created previously.
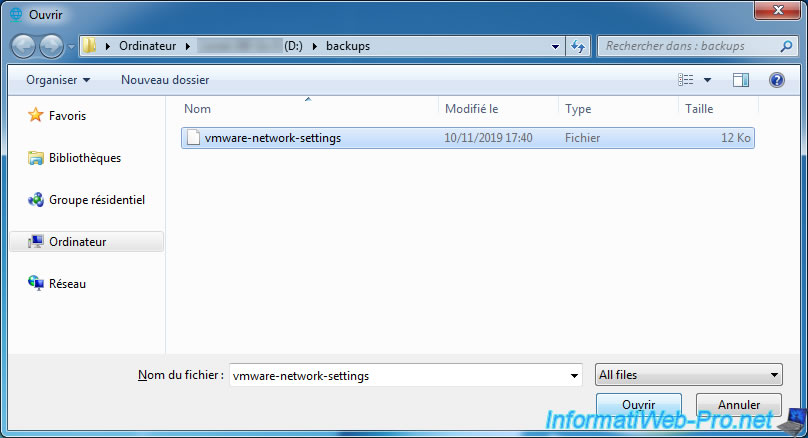
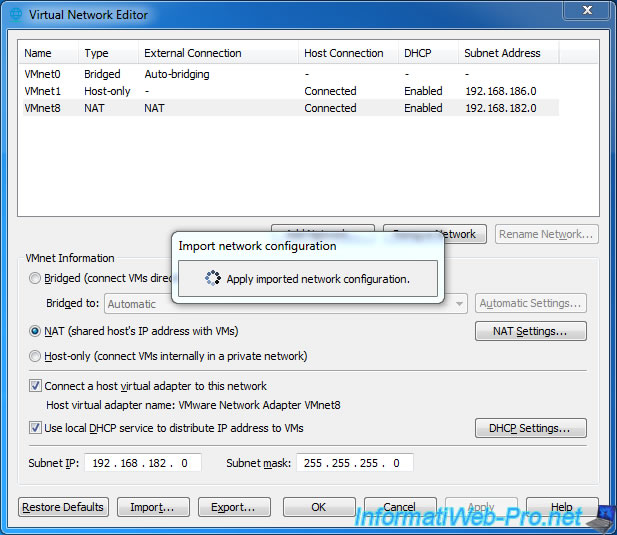
Wait while importing the configuration, automatically uninstalling virtual network adapters created by VMware, and reinstalling and configuring them.
Once the import is complete, you will retrieve your custom network configuration.
Share this tutorial
To see also
-
VMware 3/16/2013
VMware Workstation - Boot a VM on the BIOS / EFI firmware
-
VMware 2/7/2020
VMware Workstation 15 - Installation on Linux
-

VMware 12/24/2021
VMware Workstation 15 - Slice the virtual hard disk of a VM
-
VMware 12/10/2021
VMware Workstation 15.5 - Convert a Virtual PC virtual machine to a VMware VM

No comment